ddrum originaly by Clavia Stockholm


ddrum old stock list

SOUNDCARTRIDGES

2023.03.06


Charlie Benante Anthrax Tama triggered by ddrum

tour de suisse
JoJo Mayer - Frauenfeld on monday, 11.11.1991
- a fabulous 45 minute drum solo - awesome ... !!!

tour de suisse
JoJo Mayer - Altishofen on Tuesday, 12.11.1991
- a fabulous 45 minute drum solo - awesome ... !!!

tour de suisse
JoJo Mayer - Zürich, 13.11.1991
- a fabulous 45 minute drum solo - awesome ... !!!

Video 1 Enzo Todesco Live-Show Messe Luzern

ddrum Triggering ddrumAT

Video 2 Enzo Todesco Live-Show Messe Luzern

ddrum Triggering ddrumAT

Video 1 Noband Willi Strehler & Enzo Lopardo

Live-Show Messe Luzern

ddrum Triggering ddrumAT

Video 2 Noband Willi Strehler & Enzo Lopardo

Live-Show Messe Luzern

ddrum Triggering ddrumAT


Video 1 Jojo Mayer

Live-Show Messe Luzern

ddrum Triggering ddrum2 & ddrumAT

Video 1 Jojo Mayer

Live-Shows Messe Luzern

ddrum Triggering ddrum2 & ddrumAT

Einladung Musikmesse Luzern - 22. - 25. September 1995

 Das Sample-Trigger System von ddrum ist hervorragend. Ich bin von diesen Geräten wirklich sehr überzeugt. Dave Weckl hat einen Endorsement-Deal mit ddrum.

Wir möchten uns die Gelegenheit nicht entgehen lassen, Ihnen an der Musikmesse Luzern 22. - 25. September 1995 Halle l , ddrum Stand 152 zu demonstrieren, womit Pop- und Rockgrössen wie Michael Jackson und Yellow ihren Beat takten.

Was wir periphär in Sachen Lautsprecher, Verstärker und Mischpulte auf Lager haben, können Sie jetzt auch im neuen ddrum-Katalog nachschlagen.

Wir freuen uns auf Ihren Besuch.

Diagramme und Infos über Beyma sind auch als CD-ROM-Einzelblattauszug erhältlich.


DDRUM-SCHWEIZ - POSTFACH 816 - 8953 DIETIKON 1

TEL 01 742 26 00                                           01 742 26 01

EINLADUNG ZUM FACHSIMPELN

Thanks to Michael Jackson und Yellow für die bisher beste

Musikdemonstration mit Clavia's Nord Lead Synthesizern.

Allen anderen Talenten, Tüftlern, Triggern und Taktern schaffen wir

an der Musikmesse Luzern:

22. - 25. September 1995 Halle 1, ddrum Stand 152

auf über 70 m2 Zugang zu neuen Klangvisionen.

Wir freuen uns auf Ihren Besuch.

Mai 1994

Jahrgang 4

Ausgabe 14

ddrum-schweiz presents

 Schlagzeuge aus Schweden

ddrums und ihre Faszination 1994

darum probieren Sie - ddrum einfach aus -

 Das erste ddrum wurde gemäss Augenzeugen anno 1982 in die Schweiz gebracht. Die emsigen Schweden haben ihren  Pioniergeist ununterbrochen mit gewaltigen Fortschritten unter Beweis gestellt. Nach dem ddrumRack, ddrumplus und ddrum2 - welches aufgrund seiner Updates von 1985 bis 1992 sehr beliebt war, folgte das ddrumAT. Heute präsentieren wir Ihnen mit  dem Sampler, der dem Schlagzeuger mit Precisionpads & zukunftsorientierter Bauweise die Möglichkeit gewährleistet, sein Instrument während Jahren via Updates auf den neusten Stand der Dinge zu verbessern. Was wir Ihnen jetzt mit beiliegenden Prospekten vorstellen dürfen, ist äusserst schwierig in Worte zu fassen, ohne Superlative zu verwenden. Ihnen empfehlen wir darum, schauen Sie bei Ihrem Händler rein und fragen nach Testmöglichkeiten.

Viel Vergnügen!

Warnung des Bundesamtes für Gesundheitswesen - Der Gebrauch von ddrum Produkten kann zur Abhängigkeit führen!

mit Fotos von Charlie Benante, Sly Dunbar, Jim Keltner, Ian Haughland Europe, Frank Beard ZZ-Top, Jim Chapin, Kenny Aronoff, Enzo Todesco, Gino Vanelli, Randy Crawford, James Allen, Stevie Wonder, Will Calhoun, Living Colour, Peter Erskine, Gary Wallis, Pink Floyd, Marko Soccoli, Jonathan Moffet, Madonna, Rhino, Manowar, Larrie Londin, Nick Menza, Megadeth
mit Fotos von Charlie Benante, Sly Dunbar, Jim Keltner, Ian Haughland Europe, Frank Beard ZZ-Top, Jim Chapin, Kenny Aronoff, Enzo Todesco, Gino Vanelli, Randy Crawford, ames Allen, Stevie Wonder, Will Calhoun, Living Colour, Peter Erskine, Gary Wallis, Pink Floyd, Marko Soccoli, Jonathan Moffet, Madonna, Rhino, Manowar, Larrie Londin, Nick Menza, Megadeth
mit Fotos von Charlie Benante, Sly Dunbar, Jim Keltner, Ian Haughland Europe, Frank Beard ZZ-Top, Jim Chapin, Kenny Aronoff, Enzo Todesco, Gino Vanelli, Randy Crawford, James Allen, Stevie Wonder, Will Calhoun, Living Colour, Peter Erskine, Gary Wallis, Pink Floyd, Marko Soccoli, Jonathan Moffet, Madonna, Rhino, Manowar, Larrie Londin, Nick Menza, Megadeth

HÄNDLER-INFORMATION

&

EINLADUNG


ZUR FERA 1994

Halle 6.1 - Stand 6.111

Der Besuch bei uns am Stand lohnt sich nicht nur wegen des guten Kaffees, oder der hübschen Frauen, die den Wein servieren, sondern auch der ganz speziellen Konditionen wegen. 

Wir haben auch dieses Jahr einige Ueberraschungen, die nachfolgend aufgelistet sind: 

Spezielle Besuchszeiten für Fachhändler MI-FR + MO von 09.00-12.00. Einige zusätzliche Details zu unserem Paradepferd ddrum3. Ganz neu aus Amerika die Visu-Lite Cymbal- und Hi-Hat Triggers. 

Unsere neuen und für Händler sehr lukrativen Stützpunkthändlerkonditionen. 

Hoffentlich auch nähere Details über den virtual analog Synthesizer von Clavia, der Ende September lieferbar sein wird.


Mit herzlichen und ddrummenden Grüssen

ddrum-schweiz

INVITATION FERA 1994 et INFORMATION DE REVENDEURS

Halle 6.1 - Stand 6.111

Cher Client

Venez nous rendre visite a notre stand, pas uniquement pour notre bon cafe et les belles femmes qui vous servent le vin, mais egalement pour nos conditions tres speciales. 

Nous avons cette annee aussi quelques belles surprises:

Ouvertures speciales pour revendeurs Mercredi-Vendredi + Lundi: 9.00 - 12.00. Quelques details supplementaires au sujet de notre produit de reference ddrum3. Tout nouveau d'Amerique les Visu-Lite Cymbal- et Hi-Hat Triggers. Nos nouvelles conditions tres lucratives pour revendeurs regionaux. 

Nous esperons avoir plus de details sur le Synthesizer virtuel analogique de Clavia, qui devrait etre livrable a partir de fin septembre 1994. 

Avec nos sinceres et ddrumentes salutations

ddrum-suisse

Welcome to the music Show at the Allmend Luzern 4.-7. Nov. 1994

The third dimension of digital drums & cymbal triggers are showed by following famous drummers in hall 2 - stand 2:

Ioannidis Geo - Dead End Cowboys - Talk about us -    4.11.1994

Leonardo - Eurodrums -                 6.11.1994

Barbera Giorgio - Bo Katzmann - Rally Music - S.B.B. - 7.11.1994

Bene Janos - Dr.Prof.Dr.Dr.MIDI -            4.-7.11.94

Strehler Willy - Hans N'Moses - Noband                              4.-7.11.94 

Bergman Tal                        5.-7.11.94

- Billy Idol

- Simple Minds

- Chaka Khan-Terence Trent D'arby

- Blood, Sweat & Tears

- Memphis Slim etc.      


SPONSORED BY:

DDRUM AND VISU-LITE SWITZERLAND


Mesdames et Messieurs,

Dans le cadre du 2ieme salon international de la musique electronique et acoustique, nous avons l'honeur de vous invitez a notre exposition d'instruments et accessoires pour batterie electronique. Nous vous y présenterons des grandes marques comme: Bedrock - Excalibur - ddrum et notre dernier produit de haute technologie VISU-LITE cymbale électronique.
Afin de pouvoir vous présentez nos produits dans leurs meilleurs performances, nous mettons a votre disposition à notre stand technicien et musicien. Leonardo que vous connaissez a travers son livre d'enseignement Euro Drums et le batteur de Billy Idol et Simple Minds seront présent afin de vous faire les démonstrations les plus représentatives de notre gamme haute technologie, dont certains produits ne sont pas encore développés en France.
Dans un premier temps nous vous proposons de prendre connaissance de la gamme VTSU-LITE dont vous trouverez une documentation ci-jointe ainsi qu'une tarifications très avantageuse.
Dans l'esprit de notre collaboration nous vous proposerons une remise supplémentaire sur vos commandes realisees pendant le salon. Nous prendrons contact avec vous afin de fixer un rendez-vous sur notre stand et repondre à vos besoins.

En vous souhaitant une bonne reception, recevez Mesdames et Messieurs nos salutations distinguees.

ddrum-suisse


Invito al Salone della Musica elettronica ed acustica di CH-Lucerna

dal 04.11.1994 al 07.11.1994 - Halle 2 - Stand 2


Signore e Signori

Nel quadro del salone internazionale della musica di Lucerna abbiamo l'onore di invitarvi alla nostra esposizione, di strumenti ed accesori per la batteria elettronica. Noi vi prensenteremo delle grandi marche come Bedrock - Excalibur - ddrum ed il nostro ultimo prodotto di alta tecnologia VISU-LITE (piatti elettronici compatibili con qualsiasi tipo di batteria elettronica.

Naturalmente nel nostro stand trovete dei tecnici e dei batteristi altamente qualificati in grado di dimonstrare e spiegare per qualsiasi e sigenza. Tanto per fare un nome Bergman Tal - gia batterista di:

Billy Idol
Simple Minds
Chaka Khan
Terence Trent D'arby Blood
Sweat & Tears
Memphis Slim etc.

Poniamo la vostra attenzione su VISU-LITE (il mercato in Italia per queste articolo e ancora tutto da sviluppare). Seque documentazione con vantaggi e tariffe ed in uno spirito di collaborazione vi proponiamo ancora uno sconto supplementare sulle comande realizzate durante la fiera.

Prenderemo contatto con voi al fine di fissare un appuntamento per meglio rispondere ai vostri bisogni.

Distinti saluti

ddrum-svizzera


Einladung - Messe Luzern

Musik-Messe Luzern 23.9. bis 27.9.93

Wir freuen uns, Ihnen an unserem Stand in Halle 2 Einmaliges bieten zu können!


Live - Shows mit:

- Enzo Todesco
- JoJo Mayer
- Noband

Plus zwei Weltneuheiten:

- ddrum 3
- ddrum Danielson

Enzo Todesco

Enzo Todesco wurde 1964 in Uster geboren. Mit 5 Jahren erhielt er sein erstes Schlagzeug und ein Jahr später spielte er bereits im Trio Todesco, der Band seines Vaters, mit. Vom 13. bis zum 16. Lebensjahr nahm er bei Leonardo Unterricht, der ihn ermutigte, in die Staaten zu wechseln, um Schlagzeuger zu werden. So ging Enzo 1984 ans PIT (Percussion Institute of Technology) nach Los Angeles, wo er das Ausbildungsjahr sehr erfolgreich mit zwei Auszeichnungen abschloss. Er gewann den Young Drummer Contest 1985 mit Gregg Bissonette und Peter Donald in der Jury und wurde zum Outstanding Drummer of the Year 19B5 erkoren - mit Joe Porcaro, Ralph Humphrey und Steve Houghton als Juroren. Im gleichen Jahr bot ihm das PIT einen Lehrstuhl an, den er auch heute noch inne hat. Dank seiner einwandfreien Technik, dem perfekten Feeling und seiner Professionalität hat Enzo seinen Ruf als Weltklasse-Schlagzeuger und vielseitiger Musiker seit dieser Zeit kontinuierlich gefestigt und ist heute gesuchter Drummer verschiedener weltbekannter Musiker - im Studio und auf Tour.


Tourneen/Konzerte:

Gino Vannelli, Randy Crawford, Thom Rotella Band, Warren Hi ll, Claire Fischer & Salsa Picante, L.A. Samba, Jeff Berlin & Vox Humana.


Recordings:
Gino Vannelli, James lngram, Stephanie Spruill, Warren Hill, Heinz Affolter.


TV und Videos:
China Beach (Warner Brothers), Gino Vannell in The Time of the Day, Gino Vannelli/Live in Montreal 1990.

Enzo Todesco

live triggering by ddrum

Enzo Todesco

live triggering by ddrum

JoJo Mayer

The Intergalactic Maiden Ballet, James Blood Ulmer's Blues Experience, mit George Adams und Jamaldeen Tacuma, Klaus Doldingers Passport, Depart mit Harry Sokal, Peter Gigers Family of Percussion, Harry Pepl und Chico Freemann

JOJO MAYER


Geboren 1963 in Zürich, hat er seine frühe Kindheit im fernen Osten verbracht. Schon mit drei Jahren bekam er sein erstes Drum Set. JoJo ist im Grunde Autodidakt, wurde aber von seinem Vater, einem professionellen Bassisten, in die Musik eingeführt. Sein erster öffentlicher Auftritt fand statt, als er gerade 2 l/2 Jahre a1t war. Mit 18 Jahren wurde er von Monty Alexander für eine grosse Europa-Tournee engagiert, wo er Gelegenheit bekam, an grossen internationalen Festivals wie North-Sea Den Haag, Antibes und Montreux, Stars wie Dizzy Gillespie und Ernestine Anderson zu begleiten.
In den folgenden Jahren gab es viele ganz unterschiedliche Projekte, Tourneen, Konzerte, Studio-Sessionen mit Tony Scott, John Zorn, Glenn Ferris, Jonas Hellborg, Ray Anderson, Sonny Fortune, Emily Remler (Jazz In) und vielen anderen. JoJo Mayer machte sich auch einen Namen als kreativer und gewitzter Solo-Performer, so trat er an vielen wichtigen Drummer-Meetings neben Billy Cobham, Vinny Colaiuta und Jack de Johnette auf.
Einige seiner europäischen Aktivitäten: The Intergalactic Maiden Ballet, James Blood Ulmer's Blues Experience, mit George Adams und Jamaldeen Tacuma, Klaus Doldingers Passport, Depart mit Harry Sokal, Peter Gigers Family of Percussion, Harry Pepl und Chico Freemann. JoJo lebt heute in New York, wo er als Freelancer mit Hike und Leni Stern, Hiram Bullock, Gerald Veasley, Hinou Cinelu, der Black Rock Coalition N.Y. und den Screaming Headless Torsos spielt und dabei an einem Solo-Project arbeitet, sowie eigene Musik komponiert.


JoJo Mayer

live triggering by ddrum

JoJo Mayer

live triggering by ddrum

NOBAND

Noband ist eine aussergewöhnliche Formation, da sie mit Hilfe von Samplern ihre Songs komponiert und gestaltet. Dabei wird von der TV-Werbung über den Strassenlärm und den Umweltgeräuschen bis hin zu Humphrey Bogart alles verwertet, was die Fantasie der Musiker anzuregen vermag. Die englischen Texte sind der Verständlichkeit wegen kurz und einfach gehalten. Dies ist sicher auch der Grund, dass die Kritiken stets mehr als positiv ausfielen, die ihnen die Konzerte zusammen mit PRIMUS aus den USA und den Leningrad Cowboys aus Finnland einbrachten.

Für die diesjährige Musikmesse in Luzern hat sich Noband auf die beiden Initianten Enzo Lopardo (ddrum, Sampler) und Willy Strehler (Guitars, Vox) reduziert, die neben alten überarbeiteten Kompositionen, Einblick in einige neue Arrangements ihres zukünftigen Live-Programms gewähren werden. Da sich Noband im Verlaufe ihres vierjährigen Bestehens nie auf eine blosse konzertante Darbietung beschränkt hat, wird sie auch visuell für einige Ueberraschungen sorgen.

Willy Strehler


machte mit 14 Jahren die ersten Gehversuche auf der Gitarre und bildete sich in der Folge als Autodidakt selbst weiter. Schon früh entdeckte er sei ne Vorlieben für technische Geräte aller Art und produzierte im Zeitalter des aufkommenden Techno-Genres aussergewöhnliche Rhythmus- und Klangkompositionen. Mit seinem Loopdelay und Gespühr für Experimental-Musik erreichte er in der Endausscheidung des Musik-Wettbewerbes der Migros mit einem Gitarren-Xylophon-Duo das Finale. Als Schlagzeuger sorgte er nebenbei in lokalen Bands für Furore, wofür er zur Zeit auch in der schillernden Formation Hans'n'Moses engagiert ist. Weiter ist er als Gitarrist/Bassist bei Ralph Beauvert aktiv, wo er 1992 zusammen mit Graham Clark ein Album produzierte. Er ist des weiteren an der Musikschule Geddop in Winterthur als Gitarren- und Bandunterrichts-Lehrer tätig.


Enzo Lopardo


Seines Zeichens Autodidakt auf Schlagzeug und Percussionen wurde er bekannt durch die Thomas Diethelm Band, mit der er neben Tours und TV-Auftritten zwei Alben eingespielt hat. Weiter spielte er mit Max Lässer's Ark, Split, Jenas Hellborg, Cafe Türk, The Unersättlichen & Dr. Turbo. Als Percussionist machte er sich in der London-Jamaikanischen Reggae-Szene einen Namen. Er spielte Festivals mit Bob Andy, Earl Sixteen, Prince Lincoln Thompson, Berris Bassa, Glenn Brown und Milton Hutchinson. Ueber ein Dutzend Tonträger zeugen von seiner musikalischen Tätigkeit und neben seiner eigenen Formation Noband ist er weiter in den Formationen Head to Toe, Gentle Rebels, Mick Russel & the Blues Express und Livin History als treibende Kraft hinter der Schiessbude aktiv. Dazu komponiert und arrangiert er für das Tanztheater Rakassa aus Winterthur und ist als Mitglied der Theatergruppe Fatal Dö aus Basel musikalischer Verantwortlicher. Weiter unterrichtet er seit einem Jahr an seiner eigenen Schule Geddop in Winterthur.


Enzo Lopardo

live triggering by ddrum

Enzo Lopardo

live triggering by ddrum

Enzo Todesco & Jojo Mayer

Sehr geehrte KundIn

Die Frankfurter Musik-Messe 1992 hat uns einmal mehr gezeigt, ddrum ist einsame Spitze! Die Leser der deutschen Zeitschrift Fachblatt haben ddrum als bestes E-Drum gewählt, wofür uns an der Messe der Poll 1991 überreicht wurde. Danke. 

Zudem haben die Schweden viel Lob mit dem neuen ddrumAT erhalten (Accoustic­Triggering). Dieses neue ddrum mit speziellem Trigger-Interface und einmaligen Triggern eröffnet nun endlich dem eingefleischten Akustiker die perfekte Welt des digitalen Schlagzeuges im Pad- oder Trigger-Mode. 

Will Calhoun von Living Colour hat sich gleich nach dem Test des ddrumAT an der Messe eines geordert, damit er einer der ersten sein kann, der seinen Setup perfekt über die Bühne bringt. Noch kleverer hat es Tony Smith - drummer bei Nina Hagen - gemacht. Er überzeugte die Schweden so gekonnt von seiner Ungeduld, dass sie ihm noch am gleichen Abend in Darmstadt innerhalb einer knappen Stunde sein akkustisches Set mit dem ddrumAT auf Vordermann brachten, sodass er für diesen Gig 64 massgeschneiderte Set-Ups zur Verfügung hatte.

Neben dem 72jährigen Jim Chapin haben sich die drummer von Bonfire, Mezzoforte, Scorpions und viele andere selbst davon überzeugt, dass sich das wie ein Lauffeuer durch die heiligen Messe-Hallen verbreitete - Highlight - ddrumAT - auch im Test durch knallharte Profisbewährt. 

Wer sich mit dem Gedanken befasst, mit ddrum-Triggern andere Geräte anzusteuern, sollte sich zuerst die Zeit nehmen, das complete ddrum-System zu testen, da nur damit die optimale Dynamik gewährleistet ist, und sich niemand mehr mit Maschinengewehr-Wirbel und Drummaschinen-Toms zufrieden geben muss.

Mit freundlichem Gruss


ddrum - schweiz


Cher client 

La derniere edition de la faire d'instruments de musique de Francfort nous l'a une fois de plus confirme; ddrum, c'est vraiment genial! Les lecteurs du magazine allemand Fachblatt ont elu ddrum meilleure batterie electronique. Le prix Poll 1991 nous a donc ete remis à la faire. Mille mercis. 

Les Suedois ont en outre été complimentes pour le nouveau ddrumAT (Accoustic-Triggering). Muni d'une interface trigger speciale et de triggers uniques en leur genre, ce nouveau ddrum seduira les amateurs de batteries acoustiques le plus endurcis et les fera penetrer dans le monde parfait de la batterie digitale en modes pad et trigger. 

Will Calhoun des Living Colour a commande un ddrumAT aussitot apres l'avoir teste à la faire. Il voulait etre un des premiers à apparaitre avec un equipement aussi performant sur scene. Tony Smith, batteur de Nina Hagen, a été encore plus malin: apres avoir reussi a convaincre les Suedois de son impatience, ceux-ci vinrent - equiper sa batterie acoustique d'un ddrumAT en l'espace d'une heure. Le soir meme, il disposait pour son concert ä Darmstadt de 64 reglages differents. 

En-dehors de Jim Chapin qui a atteind l'age venerable de 72 ans, les batteurs de Bonfire, de Mezzoforte et de Scorpions ont tous pu se rendre campte que ddrumAT etait un produit propre à satisfaire les professionnels les plus exigeants - nouvelle qui se repandit comme de la poudre dans taute la faire. 

Celui qui entend commander d'autres appareils à partir des triggers ddrum ferait mieux de prendre du temps pour tester le systeme ddrum complet avant. Seulement ainsi il jouira de la dynamique optimale et renoncera à se satisfaire de l'effet tir en rafale et batterie mecanique qui ne contribuent guere au plaisir de l'ecoute.


Avec nos cordiales salutations

ddrum - suisse


Gentile cliente

la fiera degli strumenti musicali di Francoforte ce l'ha confermato ancora un volta: ddrum e veramente il massimo! I lettori della rivista tedesca Fachblatt hanno scelto ddrum come la migliore batteria elettronica; per questo abbiamo ricevuto alla fiera il premio Poll 1991. Mille grazie. 

Inoltre, gli svedesi hanno ottenuto ampi consensi per il nuovo ddrumAT (Acoustic-Triggering). Questo nuovo ddrum, dotato di un'interfaccia trigger speciale e di trigger unici nel loro genere, conquistera certamente i piu entusiasti sostenitori di batterie acustiche e aprira loro le porte del mondo perfetto della batteria digitale nei modi pad e trigger. 

Will Calhoun dei Living Colour ha ordinato un ddrumAT subito dopo averlo provato alla fiera. Voleva infatti essere uno dei primi a  comparire sulla scena con un equipaggiamento cosi perfetto. Tony Smith, batterista di Nina Hagen, e stato ancora piu furbo: con la sua incredibile impazienza, ha convinto gli svedesi ad aggiungere al suo equipaggiamento acustico un ddrumAT nel giro di un'ora appena. Lasera stessa ha potuto quindi disporre di 64 set-up diversi per il concerto ehe ha avuto luogo a Darmstadt. 

Oltre al 72enne Jim Chapin, anche i batteristi di Bonfire, Mezzoforte e Scorpions e molti altri si sono resi conto ehe ddrumAT e un prodotto in grado di soddifare i professionisti piu esigenti - una notizia ehe si e propagata nei padiglioni della fiera in men ehe non si dica. 

Chi ha intenzione di ordinare altri apparecchi da aggiungere ai trigger ddrum dovrebbe prima prendersi un po'di tempo per provare il sistema ddrum completo. Solo cosi e assicurata la sua dinamica ottimale e nessuno deve piu accontentarsi degli effeti a raffica di mitra e batteria meccanica.  


Cordiali saluti  

ddrum - svizzera

ddrum-schweiz

G E N E R A L I M P O R T E U R  F Ü R  D A S  P R O F E S S I O N E L L E  S C HL A G Z E U G

ddrum AT

Ram Sound und & Flashpac's


30 ddrumAT drumkit complet mit Pads in schwarz 8 Kanal, 64 Samples, 3 Toms, 1 Snare & Rim,

1 Kick und 6 Kabel.
8320.0


30 ddrumAT drumkit complet mit Pads in weiss 8320.0  
 
  8 Kanal, 64 Samples, 3 toms, 1 Kick,  


  1 Snare & Rim und 6 Kabel.  


30 ddrumAT Steuerteil ohne Pads/Trigger 5865.0


  8 Kanal 64 Samples  


37 ddrumAT drumkit complet mit Triggerset 6785.0


  8 Kanal, 64 Samples, Triggerset 3/1/1  


22 ddrum Performer, Program--Change & Metronome 895.00


ddrum Trigger


70 ddrum Triggerset complet 985.00


70
3 Toms, 1 Snare & Rim mit Kabel, 1 Kick ddrum Tom-Trigger  

185.00


70 ddrum Kick-Trigger 198.00


70 ddrum Snare & Rim-Trigger mit Kabel 298.00


2200  

2304
ddrum Kitpac RAM Cartridge Sicherungs-Cartridge Effect Snare 7 Snare Samples182.0  

182.0

2305 Metal 1 182.0
  6 Metal Samples  
2306 Ethnic 1 182.0
  9 Ethnic Samples  
2307 Drummachine 1 182.0
  11 Drummachine Samples  
2308 Cymbal 1 182.0
  2 Hi-Hat-, 2 Ride-, 1 Crash Sample  
2309 Effect Toms 1 182.0
  3 Echo-, 3 Ambience-, 3 Simmons Tom Samples  
2310 Cymbal 2 182.0
 

2312
2 Crash-, 3 Splash-, 1 Opera Gong Sample Snares & Kicks 1  

182.0
  6 Snare- and 3 Kick Samples  
2313 Drumkit 1 182.0
  1 Complete drumkit, 6 Samples  

ddrum Pads

45 ddrum Padset complet mit 6 Kabel, schwarz 2920.0


45 ddrum Padset complet mit 6 Kabel, weiss 2920.0


80 ddrum Padstation mit 1920.0


  Midi-Controller-Box und Multikabel  


40 Tom Pad 10" schwarz mit Kabel 552.00


40 Tom Pad 10" weiss mit Kabel 552.00


42 Tube Pad mit Kabel 262.00


50 Snare Pad 12" schwarz mit 2 Kabel 735.00


50 Snare pad 12" weiss mit 2 Kabel 735.00


60 Kick pad schwarz mit Kabel 785.00


60 Kick pad weiss mit Kabel 785.00


61 Kickhead 132.00


850 Kickhead Double Header       398.00

2315 Orchestral 282.0
  10 Lang Orchestral Samples  
2316 Churchbell & Gong 182.0
  2 Very lang sounding Samples  
2320 Drumkit 2 182.0
  1 Complete Heavy Rock'n Roll Kit, 6 Samples  
2321 Tom 2 282.0
  3 Rota-, 3 Ambience-, 4 Octoban Samples  
2322 Drumkit 3 282.0
  With lang sounding Toms, 11 Samples  
2323 Snares & Kicks 2 282.0
  20 Samples from here and there  

27 ddrum2 2.2 update kit 1.7 to 2.2 980.00


21 ddrum2 Software update 2.2 to 3.3 380.00


11 ddrum plus Erweiterungsmodul 480.00


11 ddrum plus Transformer 220 V 112.00


45 ddrum Compact-Stand 1080.00


45 ddrum Empire-Rack Stand 1820.00


43 1O" ddrum tom head 26.00


50 12" ddrum snare head 29.00


41 10" Foam for tom pad 12.00


51 12" Foam for Snare pad 12.00


41 Sensorplate for 10" tom pad 58.00      
50 Sensorplate 12" Snare pad 78.00      
50 Sensorplate Rim pad 55.00      
 
403   Multicable                  422.00


2325      Peter Erskine Signature Spac    325.00
               10 Peter Erskine Samples         

2326 Larrie Londin Signature Soundpac 325.00
  11 Larrie Londin Samples  
2327 Babe Pace Signature Soundpac 325.00
  20 Babe Pace Samples  
2328 Snares & Kicks 3 282.00
  9 Snare- & 10 Kick Samples  
2329 Snares & Kicks 4 282.00
  8 Snare- & 9 Kick Samples  
2400 ddrum Flash-Pac, Sample-Speicher 525.00
  2 Mbit Sample-Kopier-Speicher  

Separatdruck aus Workshop Nr. 9/ 1992   -    © by Aargauer Tagblatt AG, Aarau

Emanzipiert  -  ddrumAT  -  Enzo Lopardo

Alle finden sie es geil, absolut wahnsinnig - das ddrum, mit den studiomässigen Spitzen-Sounds, der verblüffenden Dynamik und den Fell- und Spannring-bestückten Pads mit dem echten Spielgefühl. Doch auf die Bühne damit - kommt gar nicht in die Tüte. Zumindest für den eingefleischten Akustik-Drummer nicht, der sich kaum vorstellen kann, nur mit einigen elektronischen Dingern um sich herum ein Konzert durchzustehen. Für all jene Drummer gibt es aber ab sofort keine Entschuldigungen mehr.

Der schwedische Hersteller ist dem Trend der Zeit gefolgt und hat an der diesjährigen Messe ein ausgeklügeltes Trigger-Set zusammen mit einem komplett überarbeiteten Steuerteil vorgestellt: das ddrum AT, was soviel heisst wie Acoustic Triggering.

Schon lange vor der diesjährigen Frankfurter Musikmesse munkelte man über eine weitere Neuigkeit aus dem Lager von ddrum. Eine Low-Cost­Version des bewährten ddrum2 wäre den meisten Drummern wohl am liebsten gewesen. Doch damit, dass ausgerechnet ddrum auf den Trend des Triggerings einsteigen würde, angesichts der Tatsache, dass sie die ausgereiftesten, auf dem Markt erhältlichen E-Drum­Pads bauen, hat wohl kaum jemand gerechnet. Und noch weniger mit der Tatsache, dass sie dazu ein überarbeitetes Steuerteil mit integriertem Trigger-Interface anbieten, das sogar den Bedienungskomfort des ddrum2 überbietet.

Die Trigger­Mikrofone

Das Trigger-Set umfasst drei verschiedene Modelle: einen für die Bass-, eine Stereo-Ausführung für die Snaredrum und einen für alle möglichen Arten von Tom-Toms. Auch hier setzen die Schweden auf ihre bisher bewährte stabile und strapazierfähige Bauweise. Die rot lackierte und 90 Grad abgewinkelte Halterung ist aus geflanschtem Stahlblech gefertigt, die man seitlich mit einer schlagzeugüblichen Vierkantschraube am Spannreifen der jeweiligen Trommel befestigen kann. Am oberen Ende befindet sich das eigentliche Herzstück: das Trigger­Mikrofon. Hierbei handelt es sich um ein Piezo-Mikrofon, das an einem Schaumstoffwürfelchen befestigt, gut geschützt innerhalb der Stahlhalterung angeleimt ist. Am unteren Ende des Stahlwinkels ist eine XLR-Buchse montiert, die den Anschluss zum Steuergerät gewährleistet. Äusserlich lassen sich Tom- und Snare-Trigger nicht unterscheiden. Schaut man aber in die Innenseite des Snare-Triggers, stellt man fest, dass unmittelbar oberhalb des XLR-Anschlusses ein weiteres, rundes Piezo-Mikrofon befestigt ist. Damit werden die Impulse des Spannreifens getrennt von denen des Schlagfells verarbeitet, wie man es bereits von den ddrum-Snare­Pad her kennt. Der  Bassdrum­Trigger ist etwas länglicher ausgefallen und ist so konzipiert, dass das Schaumstoffwürfelchen mit dem Piezo­Mikrofon an einem beweglichen Metallplättchen mittels der Vierkantschraube an den Bassdrum-Spannreifen montiert werden kann.

Die Montage

Bereits hier zeigt sich, dass sich die Hersteller punkto Anwenderfreundlichkeit viel überlegt haben. Ein Vierkantschlüssel genügt, um die Metallwinkel in der vorgegebenen Aussparung am Spannreifen der jeweiligen Trommel einzuhängen und festzuschrauben. Ein rundes Plastikteilchen am Ende der Schraube verhindert, dass der Spannreifen dabei zerkratzt wird. Beim Bassdrum-Trigger sind dies zwei breite Gummistücke, zwischen denen der Spannreifen eingeklemmt wird. Bei der Montage wird nun das oben beschriebene Schaumstoffwürfelchen mit dem Piezo-Mikrofon automatisch gegen das Fell gedrückt. Da die aufwendige und teils mühselige Prozedur des Anklebens und des richtigen Plazierens der Trigger entfällt, ist die Montage selbst für den technisch weniger begabten Drummer ein Kinderspiel. In wenigen Minuten lassen sich die ddrum-Trigger an ein Drumset anbringen. Und, man höre und staune, das Abkleben oder Dämpfen der Trommeln ist laut Hersteller auch nicht mehr nötig. Spätestens hier kann man es kaum noch erwarten die kleinen roten Dinger anzuschliessen und in Betrieb zu nehmen.

Aber schauen wir uns vorerst das überarbeitete Steuerteil an!

Erweitert und neu angeordnet

Die ddrum AT Elektronik

Das Soundmodul

Auf den ersten Blick wirkt das neue ddrum AT kleiner als das Vorgängermodell ddrum2. Doch der Schein trügt. Das mag wohl in erster Linie daran liegen, dass die auffallend rote Gehäusefarbe einem dezenten Grau gewichen ist und dass die Frontplatte etwas flacher ausfällt. Erst bei genauerem Hinsehen wird man sich bewusst, das die Bedienungselemente in ihrer Konzeption neu durchdacht und angeordnet sind. Das Bedienungsfeld ist in drei Sektionen unterteilt, in eine Sound-Pac-Expansion, in eine Programming- und in eine Pad- und Trigger-Input-Section.

Die Sound-Pac-Expansion wurde von fünf auf vier Slots reduziert, wobei das ddrum AT im internen Speicher über eine fünfte Sound-Bank verfügt und insgesamt gesehen gegenüber dem ddrum2 von 50 auf 64 Samples erweitert wurde. In der Programming­Section wurden das Kit Select und die eigentliche Sound­Programmierung zusammengefasst, in der, wie wir später sehen werden, auf drei Ebenen gearbeitet werden kann. Aus diesem Grund verfügt das Steuerteil nur noch über ein Display. Unmittelbar anschliessend auf gleicher Höhe sind die Sensitivity-Regler für Pad- und Trigger-Inputs angeordnet. Vernünftigerweise wurde ihnen die Channel-Select-Knöpfe zugeordnet, mit denen man den zu programmierenden Kanal anwählen kann. Wie beim dddrum2 stehen rechts unten ein Kopfhöreranschlus mit Lautstärke-Regler und der Master-Volume-Regler zur Verfügung.

Auf der Rückseite können acht Trigger oder Pads via Jack­Buchsen angeschlossen werden, und jeder Kanal verfügt über einen separaten Ausgang. Daneben befindet sich ein Mix-Out-STereo-Ausgang und ein regelbarer Line-Eingang, der ausschliesslich über den Kopfhörer-Ausgang abgehört werden kann. Dies eignet sich vorzüglich, um zu Tapes und CDs zu üben. Da die Padstation (Multipad) nicht mehr produziert wird, hat man logischerweise beim AT auf den Multistecker (Direktanschluss) verzichtet. Etwas verblüfft stellte ich allerdings fest, dass das Gerät nur über ein MIDI-IN und ein MIDI-OUT verfügt. Warum der Hersteller auf ein MIDI-THRU verzichtet hat, ist mir ein Rätsel. Für den Remote-Controller, der speziell für das AT entwicket wurde und nächstens auf den Markt kommt, ist eine ddrum­Minibuchse im Format eines Telefon-Anschlusssteckers vorgesehen. Leider kann hier der Performer nicht wie beim ddrum2 angeschlossen werden, weil dies die schwedische Gerätprüfanstalt nicht akzeptieren konnte. Der Performer kann aber nach wie vor via MIDI angeschlossen werden.

Play-Modus und Trigger-Interface

Beim Einschalten des Steuerteils befindet man sich automatisch im Play-Modus, und das dreistellige Leuchtzahlen­Display zeigt P0, d.h. Programm- oder Kit-Nummer null an. Mit Hilfe des grossen Drehknopfes, der beim ddrum2 ausschliesslich im Edit­Modus gebraucht  wurde, kann man die von 0 bis 63 durchlaufend numerierten Factory-Kits durchscrollen. Dies erweist sich vor allem beim Durchhören, aber auch bei der Anwahl verschiedener Kits am Gerät selbst, als wesentliche Erleichterung, wenn man bedenkt, dass beim ddrum2 jedes Kit auf dem Nummernpad einzeln eingegeben werden musste. Will man vom Drumset aus die Kits anwählen, kann über MIDI der Performer angeschlossen werden. Da dieser auf das ddrum2 zugeschnitten wurde, d.h. sich auf eine numerische Eingabe von 1 bis 8 beschränkt, können im AT die Kits mit der Endzahl 0 oder 9 nicht abgerufen werden. Doch für das AT wird innert Kürze ein spezieller Remote-Controller auf den Markt kommen. Sind die einzelnen Trigger einmal angeschlossen, empfiehlt es sich, vorerst in der Programming-Section die Triggeranpassungen vorzunehmen. Ein Knopfdruck genügt, um vom Play- direkt in den Edit-Modus zu gelangen. Im Input Setting befindet sich das Triggerinterface, das auf vier Ebenen arbeitet:

1) Im AT Mode stehen vier Einstellungen zur Verfügung. Eine für den ausschliesslichen Betrieb mit Pad- und achtzehn für die Anwendung von Triggern. AI-A6 ist für Snares und hoch gestimmte Tom-Toms, B1-B6 für mittel bis tief gestimmte Tom­Toms und Cl-C6 für tief gestimmte Floortom und Bassdrums vorgesehen. Auf diese Weise kann man für die erste Inbetriebnahme eine Grobeinstellung vornehmen.

2) Drückt man nun auf die Shift-Taste gelangt man vom AT-Mode in die Parameter der Dynamic Curve. Dabei beginnt das grün leuchtende Lämpchen zu blinken. Dies ist ebenfalls neu und signalisiert dem Anwender auf welcher Programming-Ebene er sich gerade befindet. Drei sinnvolle Dynamikkurven werden für jeden einzelnen Kanal angeboten.

3) Mit der Threshold-Taste kann man mit Werten O bis 99 die Dynamik-Schwelle d.h. ab welcher Schlagintensität ein Sound ertönen soll, festlegen. Dieser Parameter arbeitet im wesentlichen wie ein Gate und sollte nicht mit der Funktion der Sensivity-Regler verwechselt werden. Denn beim Threshold bleibt die Dynamik-Spitze erhalten, wobei bei abnehmenden Sensivity­Werten Lautstärke verloren geht.

4) Die Parameter des Crosstalks stellen eine artverwandte Funktion des Threshold dar. Der Unterschied liegt allerdings darin, dass sich das Crosstalk in erster Linie auf akustische Störeinflüsse, die ein sauberes Triggern verhindern, einwirkt. So ist es beispielsweise durchaus möglich, dass laute Monitor-Boxen die Triggermikrofone beeinflussen können, oder eine hart gespielte Snare gleichzeitig ein Tom-Tom- oder Bassdrum­Trigger leicht auslösen. Mit dem Crosstalk lassen sich solche unnerwünschte Nebeneffekte eliminieren, ohne dass man mit hohen Thresholdwerten Dynamikeinbussen in Kauf nehmen muss. 

All die oben beschriebenen Funktionen lassen sich für jeden Kanal einzeln editieren, gelten für alle Kits und werden automatisch abgespeichert. Eine weitere lobenswerte Verbesserung stellt die Anwahl der einzelnen zu editierenden Kanäle dar, die nicht mehr ausschliesslich von den Channel-Select-Knöpfen am Steuergerät, sondern durch simples Anspielen des betreffenden Triggers bzw. Pads aus erfolgen kann und blitzschnelle Editieren ermöglicht.

Ob wegen des knappen Platzes auf einen MIDl-Thru und XLR-Buchsen für die Audio-Ausgänge verzichtet wurde?

Auf los geht's los!

Ich persönlich bin ein Liebhaber sauber gestimmter, offen klingender Schlagzeuge mit gutem Sustain. Selbst bei kleinen Tom-Toms gehe ich an die Grenze des Low-End-Bereichs, um das grösstmögliche Klangvolumen aus einer Trommel herauszuholen. Ausserdem haben es mir sehr hoch gestimmte, ungedämpfte Snares à la James Brown angetan. Ein Drumset also, bei dem jeder Mischer mal feuchte Hände kriegt und nervös nach dem Gaffatape zu suchen beginnt. Wer sich schon mit dem ganzen Triggering ein wenig auskennt oder damit etwas herumexperimentiert hat, kann von Doppeltriggern und den skurrilsten Mulltisound-Effekten ein Liedchen singen. Da ist in vielen Fällen das Gaffatape der einzige Ausweg, um über die Runden zu kommen. Aus diesem Grunde war ich eher skeptisch gegenüber den euphorischen Aussagen des schwedischen Herstellers, dass bei den ddrum-Triggern das Drumset überhaupt nicht abgedämpft werden müsse. Doch schon bei meinen ersten Tests an der Musikmesse Frankfurt blieb mir schlicht die Spucke weg. Dies wiederholte sich bei meinen Tests am eigenen Set, wo ich mit den im Manual angegebenen Grobeinstellungen ein ausgezeichnetes Resultat erzielte und kaum aufhören konnte zu spielen. Mit einigen Feineinstellungen optimierte ich nachträglich ohne grosse Mühe das Triggerverhalten der Tom-Toms und der Bassdrum. Von flattrig bis hart gestimmt, reagierte diese bis hin zu den feinsten Schlägen sensibel und ohne jegliche Doppeltrigger. Der Stereo-Trigger für die Snare nahm dafür etwas mehr Zeit in Anspruch, da es mir wichtig erschien, eine saubere Kanaltrennung zwischen dem Rim- und dem Schlagfell-Signal zu erzielen. Eine Tatsache, der ich anfänglich nicht viel Chancen einräumte. Doch von der Praxis ausgehend weiss man, dass der Rim vor allem bei lauterem und härterem Spiel im Snareschlag einbezogen wird. Aus diesem Grunde empfehle ich allen Anwendern, den Threshold-Wert zu erhöhen und allenfalls mit dem Crosstalk eventuelle Schlagfell-Vibrationen zu eliminieren. Wichtig ist aber, dass feine Übersprecher nicht um jeden Preis eliminiert werden müssen, denn sie können den Snare-Sound durchaus sehr lebendig gestalten. Ich testete den Stereo-Trigger an einer 14-Zoll-Snare mit Gussspannreifen und an einer 12-Zoll-Soprano-Snare mit geflanschten Spannreifen. Mit der 14-Zoll-Snare konnte ich in bezug auf die Kanaltrennung leicht bessere Resultate erzielen als mit der 12-Zoll-Snare. Dies lässt sich in erster Linie auf den Grössenunterschied zurückführen, wobei die Spannreifen sicher auch noch eine Rolle spielen. Das Triggerverhalten würde ich als hervorragend bezeichnen, zumal der Trigger, unabhängig, wo das Fell angespielt wird, mit der gleichen Sensibilität reagiert. MIDI-Dynamik gewohnte Drummer (127 Schritte = 40d B) werden am phänomenalen Dynamikumfang und an der Sensibilität (1000 Schritte = 60 dB) ihre helle Freude haben.

Sounds und Programming

Wie schon erwähnt, ist das AT um 14 Sampleplätze auf insgesamt 64 Samples erweitert worden, wobei 29 davon brandneu und die restlichen 35 Samples vom ddrum2 übernommen wurden. Diese Zahlen mögen in der heutigen Zeit der Drumexpander mit bis zu tausend Sounds etwas mikrig aussehen, doch handelt es sich hier wohlverstanden um Rohsamples, die in 13 Edit-Para­metern bearbeitet und miteinander kombiniert werden können. Genau hier zeigen sich die wahren Stärken des AT, das in der Handhabung des Programmierens um einiges vereinfacht wurde. Nehmen wir einmal an, dass der Bassdrum-Sound ausgewechselt werden soll. Ein einfacher Knopfdruck auf Sound genügt, um alle 64 Sounds durchzuscrollen. Ist die gewünschte Bassdrum gefunden, aber man noch nicht ganz sicher ist, gelangt man mit erneutem Knopfdruck auf Sound in den Play-Modus zurück, wo die vorhergehende Bassdrum immer noch gespeichert ist. Der Hersteller hat hier wohl völlig unbeabsichtigt eine sehr hilfreiche Compare-Funktion (im Manual nicht erwähnt!) geschaffen, die in Studiosituationen und im Zusammenstellen verschiedener Kits zeitsparend eingesetzt werden kann. Sie lässt sich ausser auf die Trigger-Parameter auf alle Edit-Funktionen anwenden.

Im allgemeinen stellte ich fest, dass die neuen Sounds im AT brillanter klingen und mit etwas mehr Biss daherkommen. Erfreulich ist auch die Tatsache, dass einige Sounds, wie Bassdrums, Toms, Snares und sogar ein Sidestick mit Effekts gesampelt wurden, die neben den manchmal spartanisch trockenen ddrum-Sounds sehr erfrischend wirken und interessante Sound-Links (was das ist, werden wir später sehen) zulassen. Die bewährten Percussions-Samples vom ddrum2 wurden übernommen.

Link

Neben den herkömmlichen Editiermöglichkeiten wie Pitch, Decay, Bass, Treble, Pan, Level und Pitch-Bend, ist der Link-Modus das powervollste Feature des ddrum. Damit kann man dem Hauptsample bis zu zwei weiteren Sounds mit sieben verschiedenen Dynamik-Parametern beimischen. Drückt man auf Link 1/2, wählt man die Slave-Kanäle an, von denen aus man die Sounds dem Master-Kanal beimischen möchte. In einem zweiten Schritt geht man auf Link Mode I oder Link Mode 2, wo dem entsprechenden Slave eine Dynamikkurve zugeordnet wird. Nach diesem Schema lassen sich auf einfachste Weise interessante und persönliche Sounds zusammenstellen. Besonders attraktiv wirken Drumkits, deren Sound-Links in einem Stereo-Panorama verteilt werden. Einige Beispiele hierfür findet man in den Factory-Presets 40/41/44/45/46 und 47.

MIDI

Das AT ist in dieser Beziehung nicht ganz standardmässig ausgerüstet, da neben MIDI-In und -Out das MIDI­Thru kurzerhand weggelassen wurde. Damit eignet es sich nicht mehr als Durchgangsgerät, was aber im Lager nicht allzu MIDI-gewandter Anwender nicht zu schwer ins Gewicht fallen wird. Jedem Kanal kann im Local-Modus ein separater MIDI-Channel und eine Note-Number zugeordnet werden, die wiederum von Kit zu Kit variieren und abgespeichert werden können. Mit der Gate Time lassen sich Sounds, die via MIDI von Sound-Modulen abgerufen werden, von 0 bis 31 (3 ms bis 30 Sek.) in der Länge begrenzen. Für Programm-Change­Befehle stehen zwei Möglichkeiten zur Verfügung. Im Global-Mode wird ein einzelner Befehl gesendet, und zwar auf dem MIDI-Kanal, der für Ausgang 8 festgelegt wurde. Im Local-Mode ist es möglich, von jedem Sound-Kanal aus auf achtt verschiedenen MIDI-Kanälen Program­Change-Befehle auszuführen.  Wird das AT via MIDI an Sound-Expander angeschlossen, ist unbedingt darauf zu achten, dass jeder Sound­Kanal im Triggerinterface die Dynamikkurve auf Cu3 gestellt wird. Diese ist speziell für die MIDI-Anwendung vorgesehen und erwies sich auch im Test als die geeignetste. Will man dagegen einen Konstanten Lautärkepegel ohne Dynamik, z.B. für die Bassdrum, sollte man Cu2 anwählen.

MIDI-Delays gibt es leider immer, was vor allem im Bereich der E-Drums ein spürbares Handicap darstellt. Das AT würde ich MIDI-mässig als schnell und extrem sauber arbeitend bezeichnen, besonders auch in der Anwendung mit Multipad.

Anwendungsbereich

Das ddrumAT ist kein spezielles Gerät, dass in ganz speziellen Situationen unter speziellen Bedingungen seine Anwendung findet. Sein Einsatzbiet erstreckt sich vom Uebungskeller über den akkustisch miesen Club bis hin zur hypertechnisierten Mega­Bühne, kurz, überall dort, wo ein guter Drum-Sound gefragt ist. Plötzlich lassen sich bequem einfache Demotapes im eigenen Uebungsraum realisieren. Soundchecks auf grossen Bühnen dauern allenfalls einige Minuten, und in kleinen Clubs kann dezent etwas Drum-Sound auf die Gesanganlage zugemischt werden. Im besonderen möchte ich das AT allen Studiobesitzern empfehlen, die es satt haben, schlecht gestimmte Drums mit Gaffatape zu überkleben, um nachträglich mit viel Effekten stundenlang einen Drumsound zu basteln. Die Trigger sind schnell montiert und schränken den Drummer weder spieltechnisch noch soundmässig ein. Ausserdem sollte man nicht vergessen, dass das AT weiterhin als E-Drum mit Pads, wie bisher das ddrum2 eingesetzt werden kann. 

Fazit

Mit dem ddrumAT hat der schwedische Hersteller ein Trigger­System auf den Markt gebracht, das in jeder Hinsicht neue Massstäbe in der Trigger­Technik setzt. Sie sind ihrer Philosophie treu gebliben, für Drummer verlässliche und einfach zu handhabende Instrumente zu bauen. In bezug auf Stabilität (sprich Road-Tauglichkeit) und hohe Lebenserwartung sind die neuen Trigger-Mikrofone fast schon revolutionierend. Es ist doch eine erfreuliche Tatsache, dass ab sofort Kleben und Basteln bei der problemlosen und schnellen Montage nicht mehr nötig ist. Ein weiterer positiver Punkt stelle die überaus logische und bequeme Handhabung des Steuerteils dar. Selbst die jenigen Drummer, die bis anhin nicht viel für Elecktronik übrig hatten, finden sich mit dem übersichtlich und verständlich gestalteten Manual schnell zurecht. Wer schon mit dem ddrum 2 zu tun hatte, wird feststellen, dass sich dessen ohnehin schon einfache Bedienung im AT um einiges vereinfacht hat und dass es um moderne Samples erster Güte erweitert worden ist.

Einziger Minuspunkt stellt das Fehlen der MIDI-THRU­Buchse dar, was vor allem für den MIDI-gewohnten Anwender etwas schmerzlich ausfallen wird. Ausserdem sollten sich die Hersteller mal Gedanken zum direkten Kanal und zum Stereo-Out machen: XLR-Buchsen würden die Arbeit im Studio- und vor allem im Live-Betrieb wesentlich erleichtern. Zur obenerwähnten Produkte­Philosophie von ddrum passen auch die Preise. Aber eben, ein Ferrari ist kein Trabbi! Und das AT ist halt ein absolut professionelles Instrument, das seinen Preis hat: jammern ist da ziemlich zwecklos. Angesichts des gebotenen Bedienungskomforts und der bis anhin unübertroffenen Qualiät von Hard- und Software, finde ich Fr. 6785.- absolut angemessen.

Das ddrum hat sich mit dem AT zugunsten der akkustischen Drummer aus dem Status des E-Drum Daseins emanzipiert. Gratuliere!

GENERALIMPORTEUR FUR DAS PROFESSIONELLE SCHLAGZEUG

TEL. 01/4510008                                                       POSTFACH 2116

FAX 01/451 1491                                                     CH-8040 ZURICH

Marko Soccoli

and his

28 pices ddrum kit

Gary Wallis Pink Floyd

Ian Haughland Europe

James Allen Stevie Wonder

Dennis Davies Stevie Wonder

Rick Allen Def Leppard

Sly Dunbar


DDRUM USER


ALEX VAN HALEN

AMY GRANT, GREG MORROW

ANDY KÖNIG

ARSENIO HALL - CHUCK MORRIS
BARBARA MANDRELL
BIG BREAK - GEOFF FARR
BILLY WARD
BOB SEGER, DON BREWER
BOSTON, DOUG HUFFMANN
BREATHE, SPIKE
BROKEN HEART MINISTRIES, BEN HUWITT
BROS
BRUCE SPRINGSTEEN - MAX WEINBERG
BURNING SPEAR, NELSON MILLER
BYRON ALLEN SHOW - KEVIN CLOUD
CLIFF RICHARD
COZY POWEL
DAN ATHERTON
DAN REED NETWORK, DAN PRED
DAVID LETTERMAN - ANTON FIG
DERRICK OREGON
DIE PALDAUER, FRANZ GRIESBACHER
DOKKEN, MICK BROWN
DUBEEL, THOMAS MARK
DURAN DURAN ROGER TAYLOR
EARTH, WIND AND FIRE
ED THIGPEN
EDDIE BAYERS
ELVIS COSTELLO TOM WAITS
ENGELBERT HUMPERDINK, ST.SAMUEL
ENZO TODESCO
ERSTE ALLGEMEINE VERUNSICHERUNG
EUROPE, IAN HAUGLAND
FABULOUS THUNDERBIRDS, FRAN CHRISTINA
FASTER PUSSYCAT
GARY WALLIS, PINK FLOYD
GIANCO FUCITO
GRAHAM BROAD
GREAT WHITE, AUDIE DESBROW
HANK WILLIAMS JR., BILL MARSHALL
HARALD SCHMIDT SHOW, ANTOINE FILLON
HARRY MORGAN
HAZY OSTERWALD
HOWARD JONES, HARRY MORGAN
HUEY LEWIS AND THE NEWS, BILL GIBSON
INNER CIRCLE, LANCELOT HALL
JAMES STROUDS
JANET JACKSON
JERRY CARRIGAN
JERRY KROOM
JETHRO TULL
JIM CHAPIN
JIM KELTNER
JOE FRANCO
JOHN COUGAR MELLENCAMP
JOHN DENVER, JERRY CARRIGAN

JOJO MAYER
JON ANDERSON, MASON TREAT
KATRINA AND THE WAWES, ALEX COOPER
KENNY ARONOFF
KIM WILDE, SIMON HILL
KIZZ
LARRIE LONDIN
LEVEL 42, PHIL GOULD
LOUISE MANDRELL, SUSANNE ELMER KING
LYNARD SKYNARD, ARTIMUS PYLE
MADONNA, JONATHAN MOFFET
MARIE OSMOND, MARTIN PARKER
MARK STEVENS
MEAT LOAF
MEL GAYNOR
MICHAEL BLAIR
MICHAEL CLARKE
MICHAEL JACKSON, JONATHAN MOFFET
MITCH FARMER
MÖTLEY CREW
MOTÖRHEAD, PHILTY TAYLOR
NILS LOFGREN BAND
NINA HAGEN BAND, TONY SMITH
OAK RIDGE BOYS, FRED SATTERFIELD
OMAR HAKIM
ORIGINAL ALPENECHO
P.B. BEGA
PALDAUER, FRANZ GRIESBACHER
PAUL MC CARTNEY - PRESTON HEYMAN
PETER ERSKINE
PINK FLOYD, NICK MASON & GARY WALLIS
POCO, GEORGE GRANTHAM
POISON, RICKY ROKETTE
RESPECT, RICHARD HARTLEY
ROBERT SWEET
ROGER HAWKINS
RONNIE MILSAP, ALLEN KERR
ROXETTE
ROXX, MARCO SOCCOLI
SHEILA E.
SIMON HILL
SIMPLE MINDS - MEL GAYNOR
SLAUGHTER, BLAS ELIAS
SLY DUNBAR
SNAP! TURBO
STEVE WHITE
STEVIE WONDER
STONEFUNKERS
STRYPER, ROB'N RAZ
SWISS-BOYS, EUGEN STADLER
TESLA, TROY LUCCETTA
THE ELVIS ROCK SHOW, WESLEY PRYOR
THIRD WORLD, WILLIE STEWART
TOMMY LEE    
TOMMY WELLS
TURN IT UP - CLINT DEGANNON (MTV)
VAN HALEN, ALEX VAN HALEN
VICTORY, FRITZ RANDOW
VIKINGARNA
WILLIE WILCOX
WINSTON GRENNAN
ZEBRA, GUY GELSO
ZZ-TOP, FRANK BEARD

and so on

Jojo Mayer

live on ddrum demo tour

ddrum2 model 4 - update 4.2

Sehr geehrte Damen und Herren

Endlich ist auch das allerneuste von ddrum bei uns in der Schweiz ab Lager lieferbar. Nachstehend die Neuerungen und Verbesserungen:

1.           Multipad Eingang für die Padstation.

2.           MIDI Thru Anschluss.

3.           ddrum-mini-Anschluss als Direktverbindung zum Performer mit Speisung.

4.           Metronom-Regler für ddrum Performer auf Bedienungsseite.

5.           Stummschaltung von Kanal 1 -4, entfernt die Sounds aus den Mix-Ausgängen.

6.           UD - Die neue MDE-Funktion zur Herabsetzung der Dynamik und MIDI-Dynamik.

7.           FlashPac Sockel, um eigene SoundPacs zu programmieren.

8.           Ein verbessertes und gleichmässigeres Ansprechverhalten der Pads.

Und wie Sie es von ddrum erwarten, sind diese Neuerungen - mit Ausnahme der zusätzlichen Eingänge und Anschlüsse - mit dem update  auch für alle ddrum­user zum Preis von Fr. 220,-- erhältlich. 

Sie haben also die Möglichkeit! - Ihr bis heute gekauftes Gerät auf den neusten Stand der Dinge zu bringen, und können die verbesserte Dynamik und das bessere Ansprechverhalten ebenso wie die neuen Funktionen mit der Verwendungsmöglichkeit der Flashpac auch in Ihr ddrum2 nachträglich einbauen lassen. 


Mit freundlichem Gruss

ddrum - schweiz

PS:

Die mit den Seriennummern 102'192 und 102'193 versehenen ddrum2-Geräte wurden gestohlen. Informieren Sie uns bitte, wenn Ihnen eines dieser Geräte angeboten würde. Danke.


ddrum2 modèle 4 - update 4.2


Cher Client 

Les dernieres nouveautes ddrum sont enfin disponibles de stock chez nous en Suisse. Voici la liste des nouveautes et ameliorations: 

1.           Entree Multipad pour station Pad.

2.           Connexion MIDI Thru.

3.           Mini-connexion ddrum pour raccordement direct au Performer avec alimentation.

4.           Regulateur metronome pour Performer ddrum cote commande.

5.           Commutations silencieuse canal 1 -4, ecarte les sounds des sorties du mix.

6.           UD-La nouvelle fonction MDE pour diminution de la dynamique et de la dynamique MIDI.

7.           Socle FlashPac, pour programmation de SoundPacs personnels.

8.           Des caracteristiques de reponse ameliorees et plus regulieres des Pads.

Bien sur, ces nouveautes ddrum, a l'exception des entrees et connexions supple­mentaires, sont accessibles a tous les utilisateurs ddrum2 avec le update au prix de 220,-- FS. 

Vous avez donc la possibilite de remettre votre installation a jour et de procurer a votre ddrum2 les avantages d'une dynamique amelioree et d'un meilleur mode reponse ainsi que d'y integrer les nouvelles fonctions comprenant la possibilite d'utilisation du FlashPac.


Avec nos meilleures salutations

ddrum - suisse

PS

Les appareils ddrum2 portant les numeros de serie 102'192 et 102'193 ont ete voles. Veuillez nous informer si l'un de ces appareils vous a ete propose. Mercie.


ddrum2 modello 4 - update 4.2

Cari Clienti

E' ora disponibile anche presso il nostro magazzino svizzero l'ultima novita ddrum. Le novita e i miglioramenti apportati sono i seguenti:

1.           Ingresse multipad per stazione Pad.

2.           Collegamento MIDI Thru.

3.           Collegamento ddrum-mini per allacciamento diretto al Performer con alimentazione.

4.           Regolatore metronomo per Performer ddrurn lato utilizzatore.

5.           Possibilita di disinserire i canali 1 -4, toglie il suono dalle uscite mix.

6.           UD - Nuova funzione MDE per abbassare la dinamica e la dinamica MIDI.

7.           Base FlashPae ehe eonsente di programmare i propri SoundPae.

8.           Migliore e piu equilibrato comportamento dei Pad. 

Queste novita ed aggiornamenti, ad eeeezione delle entrate e degli allaeciamenti supplementari, sono disponibili per tutti gli utilizzatori di ddrum2 al prezzo di Fr. 220. Lei ha quindi la possibilita di aggiornare l'apparecchio in suo possesso apportandovi tutte le innovazioni e puo' inserire anche nel suo ddrum2 la dinamiea aggiornata, il migliore rendimento e le nuove funzioni che consentono di utilizzare i Flashpac.  


Voglia gradire i piu distinti saluti

ddrum-svizzera

PS

Sono stati rubati gli apparecchi ddrum2 numero di serie 102'192 e 102'193. Nel caso le fasse offerto uno di questi apparecchi la preghiamo di mettersi in contatto con noi. Grazie.


ddrum on the road

Originelle Vorführidee des Digitalschlagzeuges ddrum2


Daniel Portner von ddrum-schweiz hat sich etwas einfallenlassen. Um das Digitalschlagzeug den Händlern und interessierten Kunden vorführen zu können, hat er in einem Mercedes-Kastenwagen ein komplettes ddrumset mit PA eingerichtet. Vorfahren, nächste Steckdose anzapfen und loslegen, heisst die Devise!

In der Dezemberausgabe 90 (Heft Nr. 12) wurde das ddrum2, Modell 2.2, bereits ausführlich vorgestellt. Jetzt ist das Modell 4 mit einer verbesserten Software auf dem Markt. Kosten für das Update der 2.2-Version: Fr. 220.-.

Die Idee

Die besten Argumente für das ddrum sind seine Soundqualität und die einfache Handhabung. Das lässt sich schwerlich über Prospekte oder Telefon erklären. So realisierte Daniel Portner das ddrum-Studio auf Rädern. Das einzige, was ein Musikhändler jetzt noch braucht, sind etwas Zeit, Parkiermöglichkeit für einen Kastenwagen und eine Steckdose in Kabelrollen-Reichweite. Interessierte Kunden sind natürlich ebenfalls herzlich willkommen.

Die Vorführung

Der Vorführwagen ist ein technisches Bravourstück. Der ganze Innenraum ist mit Teppich ausgekleidet. Während im vorderen Teil einige Stühle und ein Infoständer mit allen Prospektunterlagen Platz finden, ist im hinteren Teil das ddrum auf einem Rack eingebaut. Zwei Crest-Stereoendstufen (2 x 500/350 Watt) und vier EV-Boxen sorgen für den nötigen Power. Diverse Sound Pacs (1 M Bit und 2 M Bit) stehen zum Rein hören zur Verfügung. Das ganze ddrum-System mit Performer und Tubepads kann eins zu eins kurz erklärt und ausprobiert werden. Einziger kleiner Wermutstropfen für den Drummer; auf einen Hi­Hat-Ständer musste aus Platzgründen verzichtet werden.

Modell 4 -
Was ist neu?

Allgemein:

Verbesserte Trigger-Funktion. Neben der superschnellen Ansprache (2-3 ms) wurden die Spielmöglichkeiten der Pads nochmals verfeinert.
MIDI: Neben MIDI-in und -out ist jetzt auch eine MIDI­Thru-Buchse vorhanden. Performer: Der ddrum-Performer kann direkt mit dem ddrum verbunden werden. Daraus ergeben sich folgende Vorteile: das Netzteil entfällt; MIDI-Signale werden über das gleiche Verbindungskabel gesendet (keine zusätzlichen Kabel oder MIDI-Einstellungen nötig); die Metronome-Signale vom Performer können über den Kopfhörerausgang des ddrum empfangen werden; ein Sequenzer oder Drumcomputer wird über den Performer aktiviert. ddrum-Multi: Eine runde, 8polige Buchse auf der Rückseite des ddrum2 erlaubt den Anschluss der Pad-Station (Multipad mit fünf 6-Zoll­Schlagflächen).

Verbesserte Mischmöglichkeiten:

Was bei früheren Modellen nur mit der Bassdrum (Kanal 1) möglich war, nämlich das Ausfiltern eines Sounds aus dem Mix-out, funktioniert jetzt mit den ersten vier Kanälen (Kick, Snare, Rim, Tom 1). Somit können zum Beispiel Snare und Kick über die Einzelausgänge abgenommen werden, während die übrigen Pads über den Mix-out in Stereo übertragen werden.

MDE-UD:

Mit dieser Funktion lässt sich die Dynamik eines Pads auf ein Minimum reduzieren. Sie gibt dem Soundkanal ein fast komplett undynamisches Pad und geringe MIDI-Dynamik. Diese Einstellung ist sinnvoll für Musikstücke, die sehr gleichmässige (beinahe monotone) Kick- und Snareschläge verlangen.

Flashpacs:

Das Flashpac ist ein programmierbares Soundpac. Je nach Klanglänge können bis zu zwanzig Sounds darauf abgelegt werden. Die Speicherkapazität beträgt 2 MBit (8 s). Zur Auswahl stehen alle Sounds des ddrum sowie alle Soundpacs. Preis: Fr. 445.-.

Der Kick kann jetzt mit einem Double Header ausgerüstet werden. Das Spielen mit Doppelpedal ist somit sauber gelöst. Mit dem Double Header können entweder zweimal der gleiche oder zwei verschiedene Soundsproduziert werden. Der bestehende Kick kann selber umgerüstet werden. Preis für neue Doppelschlagfläche: Fr. 398.-.

Bild 2 Sesam öffne dich ...
Bild 3 Komplett ausgerüstet und spielbereit.

Fazit

Wer ein digitales Drumset ohne Kompromisse sucht, wird nicht um eine ernsthafte Konfrontation mit dem ddrum herumkommen. Der Vorführwagen von ddrum-schweiz bietet die Chance, sich unabhängig vom Wohnort beim Fachgeschäft der eigenen Wahl von den Qualitäten dieses schwedischen Spitzendrumsets überzeugen zu lassen.

TEST ddrum - Edel verpflichtet

Von Christoph Rocholl

Seitdem ich im Januar 89 zusammen mit Ullrich Eichner die Möglichkeit hatte, das Simmons SDX unter die Tester-Lupe zu nehmen, sind meine Vorgaben an ein komplettes E-Drum-System klar. Grob lassen sich die Kriterien wie folgt einteilen:

-             Soundauswahl und -qualität;

-             Umsetzung individueller Soundvorstellungen;

-             Spieldynamik,

-             Bedienungskomfort.

Damit ist der Testrahmen für die schwedischen High-Class Digital­Drums mit dem schlichten, aber verpflichtendem Namen ddrum abgesteckt. Vorhang auf: "Solo für Clavia". Und wer Clavia sagt, der muß auch ddrum sagen. Und wer ddrum sagt, der faßt sich unwillkürlich - fast wie im Affekt - an die vollgescheckte Brieftasche. Denn wer ddrum nicht nur sagen, sondern auch haben will, der braucht vor allem Eines: Kohle!

Vorweg ein paar Informationen zu den Einzelkomponenten. Dazu zählt das Klangmodul (Steuerzentrale) ddrum2/4, der Kit-Selector, die (MIDI) Pad-Station sowie die Pads. Speziell bei den letzteren bleibt nur zweierlei zu sagen: teuer und gut. Oftmals kopiert  (vgl. z.B.die Power­ Percussion-Pads), aber qualitäts­ und preismäßig nie erreicht. Auf die MIDJ-Pad-Station und den Kit­Selector werde ich im weiteren Verlauf noch eingehen, gleichwohl das Hauptaugenmerk dem Modell 2/4 gilt. 

Das ddrum-System auf einen Blick. Performer, Set, Pad-Station mit Controller und die Steuerzentrale 2/4.

Keine Nervensache

Ganze drei Mal führte mich der Weg zur Produktiv-Zentrale, ehe das ddrum 2/4 inklusive Bedienungsanleitung das Licht meines Test-Labors erblicken durfte. Beim ersten Anlauf war "mein" Modell gerade über den Ladentisch gegangen. So etwas ähnliches wie das niedersächsisch-/westfälische ddrum-Fieber schien die Drum-Ab­teilung in Atem zu halten und die Bestände drastisch zu reduzieren. Erst beim zweiten Versuch hatte ich mehr Erfolg, vergaß aber über den Drum-Plausch mit Ludger aus der Produktiv Drum-Abteilung das Manual ...

Ein Test ohne Anleitung? ddrum machts möglich und zerstreute diese Bedenken bereits nach den ersten Minuten. Will heißen: Für die ersten Stickkontakte mit dem schwedischen Digital-System, hat das Manual keine Anwesenheitspflicht! Vor dem Einschalten die Pads mit den Trigger-Input-Buchsen verbinden, Netzschalter in Richtung Power bewegen, den Stereo-Out in die Abhöre und losspielen. Das ddrum ist kein Spielverderber - ein Umstand, der im Musikelektronik­Alltag Freude aufkommen läßt, weil dies selten selbstverständlich ist. Gleich zu Beginn sammelt der Testling satte Pluspunkte auf dem Konto Bedienungsfreundlichkeit, denn sämtliche ab Werk voreingestellten Sets (64 an der Zahl) lassen sich auch vom Elektronik­Novizen ohne vorhergehende MIDI­ oder Programmier-Lektionen hör­ und spielbar machen. Elektronik ohne Frust - so soll es sein. Daß ich derartige Bedienungsoberflächen so stark hervorhebe, erklärt sich aus der z.Zt. noch absolut unbefriedigenden Anwender-Situation im heutigen Elektronik-Alltag, von der sich das ddrum wohltuend abhebt. Als ich am nächsten Tag ein drittes Mal in Sachen ddrum auf der bundesdeutschen Schnellstrasse unterwegs war, um das Manual abzuholen, war ich noch fest davon über zeugt, daß meine erste Begegnung sicherlich noch eine umfangreiche Programmier-Session bzw. Nachtlektüre der Bedienungsanleitung nach sich ziehen würde.

Wieder gefehlt! Im Prinzip hatte ich alle wichtigen Bedienungsfunktionen rein intuitiv am Vorabend herausgetrickst - in einer 3/4 Stunde. Klingt unglaublich, oder? Beim Lesender deutschen (!) Bedienungsanleitung wird der positive Eindruck bestätigt. In Wort und Bild finden sich hier alle Bedienungsebenen klar gegliedert und gut strukturiert, vom "MIDl-Dump" bis hinzursoundträchtigen "Link-Funktion".

Doch bevor ich völlig des "Kaisers Kleider" durch den Blick auf die Interna bzw. technischen Innereien lüfte, zunächst ein paar Worte zur Ausstattung.


Das Modell 2/4 - links im Bild die

Cartridge- Einschübe

Taster u. Schalter

Das ddrum 2/4 ist ein 16-stimmiges Drum-Modul mit 8 Trigger-Inputs. Auf der leicht abgeschrägten Frontseite finden sich sämtliche Bedienungselemente. Die Slots für Sound-Pacs/Kit-Pacs (zusätzliche Sounds und/oder Speicherplätze für komplette Sets) sind ganz links angeordnet. Daneben das Programmierfeld für Soundveränderungen und die MIDI-Funktionen inklusive einem LED-Display. In der oberen rechten Gehäusehälfte befindet sich eine Reihe mit Reglern für die Empfindlichkeit der Trigger-Inputs sowie pro Eingangskanal eine Peak- und Trigger-LED. In Richtung des unteren Gehäuserands warten acht Taster und wiederum ein LED­Display auf die Auswahl der voreingestellten Preset-Kits oder der selbstprogrammierten Kits. Rechts davon der Klinken-Kopfhöreraus­gang (6,3 mm) und drei Potis, mit denen sich der Master-Output, die Kopfhörerlautstärke sowie ein Metronom-Klick getrennt regeln lassen. Am Gehäuse vorgesehene Bohrungen ermöglichen den Einbau in ein 19"-Rack.

Die Rückseite wird größtenteils von den acht Trigger-Eingängen (6,3mm Klinke), den acht Einzelausgängen, dem Stereo-Master-Out, zwei Anschlüssen für den ddrum­Performer und die (MIDl)Pad-Station sowie einem Mono-Input für Line-Signale wie z.B. CD, DAT oder Tapie in Anspruch genommen (ebenso geeignet zum Monitoring von Sequenzerspuren!). Hier ist auch das MIDI-Trio untergebracht (IN/OUT/THUR) und sinnloserweise der An-/Aus-Schalter. Der wäre nämlich besser auf der Vorderseite plaziert.


Sounds und Dynamik

Das ddrum 2/4 ist kein Sampler im herkömmlichen Sinne, sondern zählt eher zuden auch bei DrummerInnen z.Zt. angesagten Preset-Modulen a la E-mu Proteus oder dem angekündigten Alesis D-4. Kein Laufwerk, keine Disketten, keine mit Koffein gestreckten Wartezeiten auf die Sounds. Damit müßte eigentlich klar sein, daß die Erstellung eigener Sample-Sounds mit dem ddrum zu den wenigen Dingen gehört, die nicht möglich sind. Allerdings entschädigen die 50 internen Sounds, die bei Bedarf durch die umfassende Sound-Pac-Library ergänzt werden können, meiner Meinung nach vollends.

Zumal nebender Sound-Qualität des ddrum die erreichte Dynamik und damit das authentische Spielgefühl seinesgleichen sucht. Des Rätsels Lösung für die wortwörtlich bestechende Dynamik geht laut ddrum­Anleitung auf ein Plus von 20 dB im Vergleich zum gewohnten MIDI­ Dynamik-Bereich von ca. 40 dB zurück.

Wie dem auch sei - das Plus an Dynamik ist hörbar, spürbar und vor allem angenehm spielbar. Im direkten Vergleich mit dem mir eigenen System bestehend aus Drum-to­MlD 1-1nterface und richtigem Sampler hat das ddrum eindeutig die Nase vorn. Vor allem, wenn ich daran denke, wie viele Tage und Nächte ich damit zugebracht habe, den mühsam gesampleten Sounds ein in Ansätzen vergleichbares Dynamik-Verhalten abzuringen. Neben der Dynamik liegt rein spieltechnisch gesehen ein weiterer Knackpunkt bei allen Digital-Drums in der Verarbeitung von offenen oder geschlossenen Wirbeln.

Ein a Tempo gespielter Paradiddle verkümmert nicht selten zu mit Maschinengewehrsalven unterlegten Golfkriegs-Impressionen. Zeitgeschichtlich gesehen durchaus passend - moralisch wie musikalisch gesehen absolut daneben. Auch in diesem Punkt ist das schwedische Digital-Drum überjeden Zweifel erhaben. Für jeden Eingangskanal werden grundsätzlich zwei Stimmen reserviert und zusammen mit dem von Clavia entwickelten Drumhead Vibration Algorythm gehören ungewollte Effekte wie der gerade beschriebene der Vergangenheit an. Bleibt die Frage nach den Möglichkeiten zur Kreation eigener Sounds.


Schritt für Schritt

Zur Erkundung der ddrum-Programmierebene muß lediglich eines der vorhandenen Sets angewählt und im Programmierfeld der Edit-Button gedrückt werden. Die entsprechende Sound-/Pad­ Kombination läßt sich durch Anschlagen des Pads oder die den Trigger-Inputs zugeordneten Taster einstellen. Die Taster erweisen sich beim Padunabhängigem Kontrollhören der Sounds (z.B. vor dem Gig über Kopfhörer) als äußerst nützlich. Zu den Edit-Parametern gehören die Auswahl der Sounds (Intern oder Sound-Pac), die Tonhöhe (eine Oktave mit 1/8-Halbton-lntervallen), Pitch-Bend (Absinken oder Ansteigen eines Tons nach dem Fellanschlag), Decay (Ausklingzeit der Sounds), zwei getrennt regelbare Filter (Bass: 600 Hz, +/- 15dB; Höhen: +/- 15 dB), Gesamtlautstärke (Level) der Sounds, Panorama im Stereobild bei Nutzung der Master-Outputs sowie die Mix-Funktion zur Trennung einzelner Kanäle aus der Stereo-Summe (z.B. Snare und Bass über die Einzel-Outputs, Toms und Percussion über die Stereo-Summe). Als optimal geeignet zur Erstellung individueller Soundvorstellungen hat sich im Test die Link-Funktion erwiesen. Sie ermöglicht die Kombination verschiedener Sounds (Layer) in Form von Doppel- oder Dreifachklängen. In der ddrum­Terminologie wird in diesem Zusammenhang zwischen Master- und Slave-Kanal unterschieden. Entscheidend dabei ist, daß die zugeordneten Slave-Sounds ebenfalls in allen oben genannten Parametern editiert werden können. Durch verschiedene Link-Modi läßt sich das Lautstärkeverhältnis zwischen Master und Slave abstimmen. Auch in Abhängigkeit der Anschlagsdynamik in Form einer Exponentialkurve (nur bei starkem Anschlag wird der Master- durch den Slave­ Sound ergänzt) oder einer Crossfade-Funktion (je stärker die Pads angeschlagen werden, desto lauter wird der Slave im Vergleich zum Master).

Derartige Beschreibungen haben die Eigenschaft ins trocken-theoretische abzudriften. Also riskiert doch mal einen Blick auf die Schaubilder. Alle hier beschriebenen Schritte in der Programmierebene lassen sich auf einem der 64 internen Kit­Speicherplätze ablegen (externe Erweiterungsmöglichkeit durch Kit­Pacs) und werden im ddrum-Manual an Hand von Beispielen erklärt. Absolut problemlos! Für den Fall, daß die ab Werk voreingestellten Kit­Presets versehentlich gelöscht werden (Kit-Nr.11-48), lassen sie sich mit der Backup-Funktion wieder zum rhythmischen Leben erwecken. Im bisherigen Testverlauf drehte es sich um das ddrum als Stand-Alone. Der MIDI-Verträglichkeit widmet sich der folgende Abschnitt.


Auf dem MIDI-Prüfstand

Über die Shift-Taste im Programmierbereich eröffnen sich die Kit­Speicherfunktionen auf RAM­Cartridge (Kit-Pac) oder Diskette (via MIDI SysEx), der einstellbare Trigger-Threshold (zur Vermeidung von Übersprechungen zwischen den Pads) und eine Anzahl von MIDI­Parametern. Als da wären der Sende und Empfangs-Kanal (für jeden Sound-Kanal individuell einstellbar), Local ON/OFF (Trennung der Verbindung zwischen Pads und Sounds), Noten-Nummer (pro Kanal), Gate-Time (Ausklingzeit zwischen MIDI Note ON/OFF), Programmwechsel ON/OFFunddie MIDl-Dynamic-Erweiterung.

In Kombination mit meiner Recording-Software verhielt sich das ddrum gewohnt spielfreudig, wobei leichte Abstriche im Dynamik-Bereich feststellbar waren. Dieses Manko kann aber nicht dem Hersteller angelastet werden, da es sich auf den per MiDi-Norm definierten eingeschränkten Wertebereich von 128 Abstufungen zurückführen läßt. Hinweise dazu finden sich in der Bedienungsanleitung. Trotzdem sind die digitalen Drum-Ergebnisse auf der MIDI-Ebene überdurchschnittlich brauchbar. Auch das Triggern der ddrum-Sounds über externe Pads via MIDI (im Test ein Roland SPD-8) oder über die ddrum Pad-Station bietet sich an, da die Ausstattung mit lediglich 8 Trigger­Inputs bei einigen Drummern sicherlich den Wunsch nach padmäßiger Erweiterung aufkommen läßt. Zwölf Trigger-Inputs wären für ein derart ausgefuchstes Gerät wünschenswert.

Speziell bei großzügigem Gebrauch der oben beschriebenen Link-Funk­tion werden die nicht belegten Trigger-Inputs - Input 7 oder 8 z.B. zur Doppelung der Snare - mit den Slave-Sounds belegt und stehen dem sei aus dem umfangreichen ddrum-Sortiment die ddrum (MIDl)­ Pad-Station und der Performer als nützliche Erweiterung empfohlen.

ddrum-Pads mit Remo-Fellen und echten Multikabel miteinander verbunden.

Neben den bekannten Tom-, Bass-Drum- und Snare Pads aus schwedischen Digital-Drum-Schmiede hat der der Hersteller ebenso das nach eigenen Worten weltschnellste MIDl-Pad (Verzö­gerung weniger als 1 Millisekunde) im An­gebot, welches sich zur Ergänzung des Basis-Sets anbietet. Beider Pad­ Station handelt es sich um ein Multi­ Pad mit fünf 6"-Schlagflächen, die mit Remo-Fellen und echten Spannreifen bestückt sind. Der Vor­teil der Pad-Station liegt ganz klar in der Dynamik und dem Spielgefühl. Beide Punkte stehen in Kombinati­on mit dem ddrum2/4 den bekann­ten ddrum-Pads in keiner Weise nach. Zusammen mit der Pad-Stati­on wird ein CoNTRoLLeR (der wird tatsächlich so geschrieben!) ange­boten, der die Programmierung und Speicherung von MIDI-Parametern wie Kanal, Noten-Nummer, Programmwechsel und Gate sowie Kurven für Anschlagsdynamik oder auch Trigger-Pegel in 16 verschie­denen Kits ermöglicht. Das im typi­schen ddrum-Rot gehaltene handli­che Kästchen verfügt über drei Tipptaster zur Parameter-Eingabe sowie ein LED-Display und läßt sich über eine mitgelieferte L-Halterung direkt in der Nähe der Pad-Station anbringen. Durch einen zusätzli­chen Trigger-Input kann z.B. eine Trigger­ Bass-Drum ange­schlossen werden, wodurch die Flexibilität der Anwendungen er­höht wird. Pad-Station und Controller (diese Schreibweise liegt mir besser!) sind über ein Multikabel miteinander verbunden. Auf der gleichen schlagenden Verbindung basiert die Kommunikation zwischen Controller und dem 2/4.  Über die mehr oder minder "interne" Ebene innerhalb der ddrum-Kompo­nenten eröffnet die Pad-Station-/ Controller-Einheit via MIDI-OUT den Zugriff bzw. "Zuschlag" auf beliebi­ge MIDI-Klangerzeuger.

...Performer

Er fungiert einerseits als eine Art Fernbedienung zum Umschalten der Kits im ddrum 2/4 durch einfaches "Ansticken" der entsprechenden mit Nummern versehenen Schlag­ flächen. Somit kann die 2/4-Zentrale problemlos im 19"-Rack verstaut werden, da während des Spiels alle Befehle zum Wechseln der Kits über den Performer laufen. Ich halte die­se Lösung für wesentlich effektiver und besser in die Trommelpraxis integrierbar als die Benutzung von Fußschaltern. Aufgrund der kom­pakten Abmessungen und der flexi­blen Befestigungsmöglichkeiten steht einer Positionierung zwischen Tom und Hi-Hat oder auch links neben der Hi-Hat nichts im Wege. Neben diesen Steuerfunktionen bie­tet der Performer ein auf 128 Speicherplätzen programmierbares Metronom. Der Level läßt sich durch einen Regler auf der Frontplatte des 2/4 anpassen, wobei das Signal im Kopfhörerausgang desgleichen an­ liegt. Bei Bedarf kann die Tempo­ Kontrolle auch optisch (Displayflak­kern) erfolgen. Zudem sendet der Performer das MIDI-Startsignal und M 1 Dl-Clock-Kontrolldaten an Sequenzer. Ein Schlag mit dem Stick auf das entsprechende Feldgenügt, der Performer startet mit dem vor­ programmierten Metronomwert und veranlaßt den Sequenzer, ihm an­ standslos zu folgen. Praktisch! Die Stromversorgung läuft übrigens di­rekt über das ddrum2/4. Ein separa­tes Netzteil für den Performer ist nicht erforderlich.


PLUS:

-             Soundqualität und -Auswahl

-             Dynamik und Spielgefühl

-             Bedienung und Manual

-             Update-Service und Zubehör

MINUS:  

-             Powerschalter an der Rückseite

-             Nur 8 Trigger-Inputs

Fazit:

Ohne wenn und aber?

Nach einer Woche: Ja! Im Bereich der Digital-Drums gehört das ddrum 2/4 zum Besten, was ich bisher zu hören und spielen bekom­men habe. Dynamik und Spielgefühl gehen einher mit vorbildlicher Bedienungsfreundlichkeit. Das Manual läßt sich lesen und (!) verste­hen, gibt für Einsteiger Hintergrundinformationen zum Thema MIDI & Co. als auch zahlreiche Praxis-Beispiele, die beider Programmierung für Studio- und Bühnen-Anwendungen hilfreich zur Seite stehen. Hervorhebenswert ist die optimale Abstimmung der ddrum-Kompo­nenten untereinander, der Update-Service sowie die umfangreiche ddrum Sound-Library.
Der einzige Wehrmutstropfen liegt im Preis. In Anbetracht des Ge­genwerts geht der schon in Ordnung, überschreitet allerdings für die Mehrzahl der Drummerinnen sicherlich die finanzielle Schmerzgrenze. Schade eigentlich, handelt es sich hierdoch um eines der wenigen musikelektronischen "Sahneteile", bei denen die musikalische Lust und nicht der musikelektronische Frust im Vordergrund stehen. Bei der folgenden Gegenüberstellung von Plus und Minus liegt das Ausrufezeichen eindeutig auf der ddrum-Sonnenseite - nur so als Tip für diejenigen, die nur das Fazit lesen...

ddrum2

Sound Power für Musiker...

Das ddrum2 bietet


ddrum2 ist ein digitales Schlagzeugset mit dem Klang und Spielgefühl eines Natursets - jedoch ohne dessen Nachteile. ddrum2 lässt wie ein normales Schlagzeug spielen, ist genau so dynamisch, gleiche Ansprechzeit, jedoch mit allen Vorteilen der Digital Technologie:

Programmierbarkeit, kompaktes Design und natürlich die vielfältigen Klangbe-arbeitungsmöglichkeiten und MIDI. ddrum ist also in jeder Hinsicht eine natur-getreue Reproduktion eines Akustik-Sets. Das Kit spricht schnell an, klingt natürlich und ist robust. Es lässt sich wie ein Naturset spielen und klingt auch wie ein solches.
Die Klangerzeugung basiert auf Sampling, aber das ist noch nicht alles. Die Pads bieten genau das gleiche Spielgefühl wie auf einen normalen Schlagzeug, sind jedoch robuster, wesentlich kompakter und leichter zu montieren. Es ist ein Schlagzeug!

The ddrum circuit board:

Mit höchster Qualität wird dadurch eine lange Lebensdauer garantiert.

und noch mehr!

Das ddrum2 ist ein 8-Kanal/16-stimmiges Drumsystem mit noch nie da gewesener Digitalbearbeitung von Samplessounds. Es benützt versteckte Algorithmen maasgeschneidert für jeden Sound. Dadurch wird das ganze System genauso spielbar wie ein Naturset. Das heißt im Klartext: Kein Maschinengewehreffekt beim Wirbeln auf der Snare und auch kein Drummaschinensound auf den Toms. So einfach ist das! Das ddrum2 verfügt über 64 Kits, diese rekrutieren sich aus einer Auswahl von 50 Schlagzeug - und Percussionsounds. Sounds von einer Länge von 24 Sekunder, welche noch beliebig modifiziert und zu Kits zusammen gestellt werden können durch unser One­Hand-Acces Editier System. Dadurch verlieren Sie keine Sekunde
unnötiger Zeit in der Soundbearbeitung nach Ihrem Geschmack. Das ddrumm kann während des Spielens, von einem Kit zum andern Kit umgeschaltet werden. Dies ohne Zeitverzögerung, ohne Einstellungen zu verlieren, ohne lästige Nebengeräusche und Aussetzer. Auch keinerlei Wartezeit um Sounds oder Funktionsparameter in ein Memory zu laden ...

Filters, Decay, Pitch, Bend und andere Parameter erlauben maasgeschneiderte Klänge. Die einzigartige Link-funktion ermöglicht es, mehrere Sounds übereinander zu legen oder Stereoeffekte zu bilden. Ob im Studio oder On Stage - ddrum2 ist das perfekte Werkzeug! Spiel mal den ddrum­Wirbel!
Mit dem ddrum2 können Sie ohne den typisch statischen und sterilen Drummaschinensound Wirbel spielen. Wir haben dies mit dem von uns entwickelten Drumhead Vibration Algorhythm (TM) realisieren können: Ein Schlag auf eine Trommel, oder ein Wirbel auf der selben, wird nie ganz gleich klingen. D.h. jeder Schlag erzeugt eine andere Vibration und somit ein gänzlich anderes Frequenzspektrum. Durch den Drumhead Vibration Algorhythm (TM) verlieren die Drumsounds ihre Sterilität, sind lebendiger und bekommen eine noch natürlichere Charakteristik.

Eine MIDI Drum Station...

Keines kann es besser wie das ddrum2. Durch die absolute MID (­ Spezifizierung ist genauso ein perfekter Pad-to-MIDI Konverter, wie auch als Klangerzeugung via MIDI. MIDI verfügt über eine sehr geringe Dynamic - nämlich nur 127 Steps. Das ist natürlich herzlich wenig für einen Schlagzeuger. Doch nun kommts! Das ddrum2 ist in der Lage diese geringe MIDI­ Dynamik auf volle 60 dB hoch zu kitzeln. Das ddrum2 in der MIDI Funktion kann gleichzeitig verschiedene Programmänderungen zu 8 externen Drumgeräten, Keyboards, etc. mit 8 verschiedenen MIDI Kanälen senden. Dies ist natürlich auch programmierbar. Die MIDI-IN und -OUT Geschwindigkeit wurde nochmals wesentlich gesteigert. Nicht zuletzt auch dadurch wird es in Verbindung mit Drumpads zur perfekten MIDI Drum Station.

...oder zusammen mit einem Naturset?


ddrum2 lässt sich auch mit einem Akustikset zusammen kombinieren. Denn viele Drummer triggern ihre Schlagzeuge um eine absolute Klangkontrolle zu erreichen. Mit dem ddrum bekommen sie halt den Sound den sie wollen. Ohne den berüchtigten Maschinengewehreffekt selbst wenn leichte Wirbel oder Flams gespielt werden. Wollen Sie während dem Spielen den Sound ändern? Kein Problem: - Mit dem ddrum2 gibt es keinerlei Fehltrigger oder andere unangenehme Nebengeräusche.

Das gibt's nur einmal ...

Das ddrum2 ist durch seine 6 Cartridge Eingänge erweiterbar. Eine grosse Anzahl von Sounds, die von Studiokits bis zuOrchesterinstrumenten reichen, ist mit den Sound Pacs erhältlich. Diese wurden mit besten Instrumenten in absoluten TopStudios aufgenommen. Die Klangqualität ist ausgezeichnet und durch die grosse Speicherkapazität erübrigen sich SamplingLoops (Schleifenbildung). Diese gehören der Vergangenheit an. Sie bekommen auch was Sie erwarten - Torus, die ausklingen wie sie sollen, Snares, mit der Fellansprache die sie wollen, und Kicks mit dem ganzen Hintergrund und Punch den man ebenbraucht.

Alle Sounds sind in ROM's abgespeichert, so dass wir keinerlei Ladezeit benötigen. Und die Souodpacs sind genauso robust und widerstandsfähig wie auch das ganze System selbst.

Fassen wir's zusammen!

Die ddrum Sounds wurden für den anspruchsvollen Musiker gemacht. Die Sounds sind präzise und klar herunter bis zum letzten Bit. Die Pads sind genauso natürlich zu spielen wie akustische Trommeln. Und die Elektronik ermöglicht eine Ansprechzeit und Dynamik wie es Ihre Spieltechnik erfordert. ddrum wurde für Drummer gemacht die es bevorzugen in der Zeit Schlagzeug zu spielen, wo andere Knöpfe drehen, - Floppy Discs laden, und Menus anwählen müssen.

d d r u m 2     d r u m k i t


ddrum Schweiz
GENERALIMPORTEUR FÜR DAS PROFESSIONELLE SCHLAGZEUG
TEL 01/451 00 08                POSTFACH 2116
FAX 01/451 14 91                       CH-8040 ZÜRICH

Unser berühmte Gast

Peter Erskine und ddrum2

Wir hier bei ddrum freuen uns, den berühmten Studiomusiker Peter Erskine in unserer ddrum-Familie aufnehmen zu dürfen. Vor kurzem kaufte Peter das Drumkit ddrum2, das inzwischen der Mittelpunkt seines Homestudios geworden ist. Dieses Schlagzeug hat er nun bereits für mehrere Aufnahmen und ebenso für seine eigene neue Platte Big theatre verwendet.

Peters ddrums kamen jedoch nicht nur im Studio zum Einsatz, sondern ebenfalls in Live-Auftritten mit Jazz-Musikern. So erntete er beispielsweise kürzlich in einem Konzert mit Kenny Wheeler (tr.), John Taylor (Kl.) und Mick Hutton (Bass) in Holland grossen Beifall. Seine Musikerkollegen standen der Idee, ein ganzes Jazz-Konzert mit einem elektronischen Schlagzeug zu spielen, eher misstrauisch gegenüber. Ihre Sorge war jedoch unbegründet. Das gesamte Konzert lief einwandfrei und jeder war begeistert von dieser neuen Erfahrung. Wir waren umso glücklicher, als man nicht einfach mit anderen verstärkten akustischen Instrumenten auf die Bühne steigt, insbesondere nicht für ein Jazz-Konzert, ohne vollstes Vertrauen in sein Instrument und dessen Möglichkeiten zu haben. Herzlichen Dank für den ersten Schritt, Peter!

Einführung der Signature-Soundpac Serie von ddrum

Als erstes Sound-Set werden Peter Erskines sagenhafte Klänge herausgegeben. Ein einzigartiges Soundpac, diese Toms, Snares und Kicks aus Peters Sound-Library. Andere Sets werden in Kürze folgen.

Hier die weiteren Nachrichten für Drummer:

Wir begrüssen Ed Thigpen. Ed kaufte vor einigen Tagen das Drumkit ddrum2. Er spielt zur Zeit pausenlos und ist fasziniert von der Vielfalt der neuen Möglichkeiten. Er kann es kaum fassen, aber die Dynamik und Anschlagsempfindlichkeit sind genau dieselben wie bei akustischen Kits.

Studiomusiker Jim Keltner sagt uns: Mein ddrumkit ist mein Body-Drum­kit. Wir hätten es nicht besser ausdrücken können, denn genau das ist ddrum: ein Body-Drumkit. Wie wir sehen, ist so einiges los bei ddrum, und wir freuen uns, allen Drummern und Percussionisten gleich mehrere umwälzende Produkteneuheiten vorstellen zu können.

Der ddrum Performer, das raffinierte Metronom für Schlagzeuger

Es handelt sich um die Kombination aus dem programmierbaren Metronom und einem Programmschalter (Kitselector). Der ddrum Performer gibt mit dem eingebauten Klick den Takt an. Der Schlagzeuger kann entweder in diesem Tempo spielen oder programmieren. Dabei kann der BPM-Wert (Signalton/Minute) an 128 verschiedenen Plätzen gespeichert werden. Die Werte sind durch einfaches Schlagen mit dem Drumstick abzurufen. Der ddrum Performer kontrolliert das Tempo eines Sequencers über MIDI. Eine grossartige Sache für alle, die mit einem Sequencer spielen. Mit dem Performer ist der Schlagzeuger nicht mehr gezwungen, den Song immer im gleichen Tempo zu spielen (vielleicht möchte er hin und wieder langsamer oder schneller beginnen), denn der Performer bietet ihm die Möglichkeit, mit dem Drumstick das Tempo seiner Wahl einzugeben. Der Sequencer startet erst, wenn er und die Gruppe bereit sind.

Ein Schlag mit dem Drumstick und das gesamte Program ist geändert

Der Performer kann auch als Kitselector verwendet werden, ein besonders praktisches Zusatzteil für das ddrum2. Die einzelnen Kits und Programme können ganz einfach durch einen Schlag mit dem Stick abgerufen werden. Der Performer enthält 8 Banken mit je 8 Drumkits, denen der Benützer seine eigenen Programme und Drumkitnummern zuteilen kann. Der Performer sendet Programmwechselbefehle über Midi. (Lieferbar Januar 1991)

Die ddrum Padstation jetzt up-to-date: mit MIDI - MIDI - MIDI

Last but not least! Das Multipad mit demselben Feeling wie die berühmten Pads von ddrum. Das erste Multipad mit echten Head- und Rimshots. Die Padstation triggert schnell und genau (das sogenannte WYP/WYG). Der Benützer kann den MIDI-Kanal, die Notennummer, die Gate-Zeit und die Anschlagkurve einstellen. Alle Parameter können auf äusserst einfache Weise als eine der 16 Kit-Konfigurationen gespeichert werden.

Zwei Multipads in einem!

Die Padstation verwendet nun eine Fernbedienung. Entweder kann sie zusammen mit der Fernbedienung sämtliche zur Verfügung stehenden MIDI-Module antriggern oder aber das ddrum2-Brain (Klangerzeuger) und andere triggerbare Einheiten steuern. Die elektronischen Teile sind in einem externen Gehäuse untergebracht, woran die Pads über ein Multikabel angeschlossen werden, so dass die Lebenszeit erheblich verlängert und das Risiko elektronischer Störungen (das ewige Problem der meisten anderen Systeme) verringert werden. Dies bedeutet zugleich, dass ddrum2-Besitzer keinen zusätzlichen Controller benötigen. Das gespaltenen Multikabelende wird einfach in das ddrum2-Brain gesteckt.

Einfach zu programmieren und einfach zu benützen!

Der Padstation-Controller ist ein kleines Gehäuse, das mit Hilfe der eingebauten Einschrauböse standardgemäss auf L-Racks aufgesetzt wird. Das Multipad selbst ist einfach an einen Standardstand für Toms oder Racksysteme zu befestigen. Dies ist vor allem notwendig, wenn die Instrumente manuell gespielt werden. 

Dynamisch, schnell und anschlagsempfindlich

Die ddrum Padstation ist ein äusserst dynamisches und anschlagsempfindliches Multipad. Es ist robust und für häufige Transporte geeignet. Zudem ist es einfach zu bedienen, wobei die MIDI-Parameter den wichtigsten Anforderungen entsprechen. Besonders aber wird die hohe Anschlagsgeschwindigkeit alle Drummer und Percussionisten erfreuen. Schliessen Sie die ddrum Padstation an das ddrum2 an, und Sie haben das leistungsstärkste Drumset der Welt!  Die Padstation und der Controller werden ab Januar 1991 in die Serie gehen.

Preise:

ddrum Padstation with controller, box and cabel   Fr. 1'890              

ddrum Padstation only                                                 Fr. 1'260

ddrum Performer                                                           Fr.   890


Mit bestem Dank für Ihre Aufmerksamkeit möchten wir Sie noch darauf hinweisen, dass Sie von der beigelegten ddrum Werbung ab Mitte Dezember 1990 Posters beziehen können. Rufen Sie uns an und bestellen Sie die gewünschte Anzahl ddrum Werbeposter - gratis.

Mit freundlichem Gruss  

ddrum - schweiz

PS

Können Sie nicht glauben, dass Sie mit ddrum über Atari und Notator von C-Lap das gespielte sofort wieder hören und visuell mitverfolgen und schlussendlich alles noch zu Papier bringen können? Wir laden Sie gerne zu uns in den Show-Room ein oder lassen Sie sich doch an der Musik- und Computer-Informationsveranstaltung der C-Lab Software AG am 8.12.90 im Casino Zürichhorn davon in Kenntnis setzen.

Le célèbre

Peter Erskine et ddrum2

Nous nous réjouissons tous chez ddrum d'accueillir le célèbre musicien de Studio Peter Erskine au sein de la famille ddrum. Peter vient de faire l'acquisition du drumkit ddrum2 et celui-ci occupe dorénavant la place d'honneur dans le Studio que Peter a aménagé a son domicile. Peter a d'ores et déjà utilisé sa batterie au cours de différentes sessions d'enregistrement, et ses fans reconnaitront sans peine son son caractéristique sur Big Theatre, le dernier album signé Erskine.

Mais Peter ne s'est pas contenté d'employer sa nouvelle batterie ddrums en studio il en également fait goûter la sonorité au public  assistant à ses concerts. Il a récemment fourni une prestation très appréciée aux Pays-Bas, en compagnie de Kenny Wheller (trompette), de John Taylor (piano) et de Mick Huttan (basse). Ses collègues étaient un peu effrayés par sa nouvelle idée de jouer taut un concert sur une batterie électronique, mais leurs craintes se sont révélées sans fondement. Le concert a été une réussite totale et ils se disent comblés par cette nouvelle expérience. Nous sommes également très heureux car personne ne se risquerait à donner un concert, à plus forte raison un concert de jazz, en compagnie de musiciens s'exprimant sur des instruments acoustiques, sans avoir une confiance totale en cet instrument et ses capacités. Merci d'avoir brisé la glace, Peter !

ddrum lance la série Signature-Soundpac

Le premier de la série sera Peter Erskine et sa merveilleuse sonorité. Un Soundpac pas comme les autres. Peter se sert de ses toms, caisses claires et kicks comme aucun autre batteur. D'autres merveilles suivront bientôt ...

D'autres informations du monde des batteurs

Nous souhaitons la bienvenue a Ed Thigpen. Ed vient d'acquérir une batterie ddrum2 et passe le plus clair de ses journées à se familiariser avec cet instrument. Il est absolument passionné par les nouvelles possibilités de son ddrum2. Et il a constaté avec enthousiasme qu'il est capable de contrôler toutes ces possibilités avec la verve et la sensibilité qu'on lui connait.


Jim Keltner, musicien de studio, ne cache pas sa ferveur, mon drumkit, c'est mon body-drumkit. Nous n'aurions pu l'exprimer mieux que cela, ddrum est un body­drumkit. Comme vous le voyez, nous ne nous ennuyons pas chez ddrum, et nous sommes heureux d'annoncer plusieurs grandes nouveautés pour les batteurs et les percussionnistes

Le ddrum Performer: le metronome intelligent du batteur

Il s'agit d'une combination d'un métronome programmable et d'un commutateur de programmes (Kitselector). Le ddrum Performer est équipé d'un click qui donne le rythme au batteur. Le batteur peut soit jouer, soit programmer selon ce tempo et enregistrer la valeur de BPM (Beats per minute) dans 128 mémoires differentes. Il retrouvera ensuite ces valeurs d'un coup de baguette.

Contrôle du séquenceur

Le ddrum performer commande le rythme d'un séquenceur grâce à l'horloge MIDI. Une banne chose pour tous ceux qui jouent avec un séquenceur. Le batteur n'est plus obligé de jouer toujours le même beat (il peut debuter plus rapidement on plus lentement selon son desir) car le performer lui permet d'adopter le tempo do son choix - le séquenceur débute seulement quand le groupe entier est prêt.

Changez taute votre configuration d'un seul coup de baguette

Le Performer remplit également la fonction d'un Kitselector, un accessoire extrêmement précieux pour le ddrum2. D'un simple coup de baguette, le batteur peut choisir instantanément entre différents kits et l'utilisateur est en mesure de programmer ses propres numéros de drumkit et de configuration. Le ddrum Performer transmet des commandes de changement de programme par le biais de l'interface MIDI. Le Performer est actuellement en cours de production.

La ddrum Padstation mise au goût du jour: avec MIDI - MIDI - MIDI

Il est enfin arrivé! Le multipad doté du même feeling que les fameux ddrumpads. Le premier multipad muni de véritables heads et rims. La Padstation réagit rapidement et avec une grande précision (WYP/WYG). L'utilisateur a la possibilité de regler le canal MIDI, le numéro de note, le temps de gate et la courbe de vélocite. Tous les paramêtres sont stockés dans l'une des 16 configurations de kit différentes.

Deux multipads en un!

Et oui, parce que la Padstation s'appuie sur un contrôleur a distance. Vous pouvez l'employer avec la télécommande pour jouer tous les modules MIDI dont vous disposez. Ou pour decléncher un cerveau ddrum2 et les autres unités qui gèrent les signaux de landement.

L'électronique est montée dans un boîtier externe et les pads sont connectés à ce boîtier par un multicâble assurant une longévite  maximale et réduisant le risque de mauvais fonctionnement électronique (ce qui pose un probleme pour la plupart des autres systemes). Cela signifie également que les propriétaires de ddrum2 n'ont pas besoin d'acheter le contrôleur. Il leur suffit de placer un multicâble a fiche fendue dans le cerveau du ddrum2.

Facile a installer. Enfantin a utiliser

Le controleur de Padstation est un élégant petit boîtier qui se monte au moyen d'un boulon à oeil s'adaptant das tous les L-Racks standards. Le multipad se monte aisément sur les stands de tom-tom standards au sur les systèmes de racks. Le Padstation se montre d'une grande stabilité une fois installée. Cette caractéristique est essentielle lorsqu'on joue avec les mains.

Dynamique, rapide et sensible

La ddrum Padstation est un multipad extrèmement dynamique et sensible. Robuste, elle se prête bien au transport et se révèle en outre d'une utilisation aisée. Les paramètres MIDI répondent aux besoins fondamentaux et de nombreux batteurs se réjouiront de constater à quel point la ddrum Padstation réagit rapidement. Connectez la ddrum Padstation à un ddrum2 et vous disposerez de la batterie la plus puissante du monde.

Les Prix:

ddrum Padstation with controller, box and cabel   Fr. 1'890

ddrum Padstation only                                                 Fr. 1'260

ddrum Performer                                                          Fr.    890


Nous vous remercions pour votre attention et nous vous signalons que vous pouvez demander notre enrôlement (vous trouverez un petit exemplaire ci-joint) à partir du 15. décembre 1990. Téléfonez nous et commandez nos Poster, ils sont gratuits. 

En attendant, veuillez agreer, Messieurs, l'expression de nos sentiments distinguees.

ddrum - suisse

PS

Vous pouvez avec ddrum grâce a Atari (avec Notator de C-Lap) imprimer directement ce que vous venez de jouer le controler et le réécouter. Si vous ne nous crojez pas venez nous rendre visite dans notre Show­Room nous vous invitons cordialement, vous pouvez egalement venir le 8.12.90 au Casino Zürichhorn à l'Exposition Musique et Ordinateur de C-Lab Software SA.

Noi di ddrum ci rallegriamo di poter 
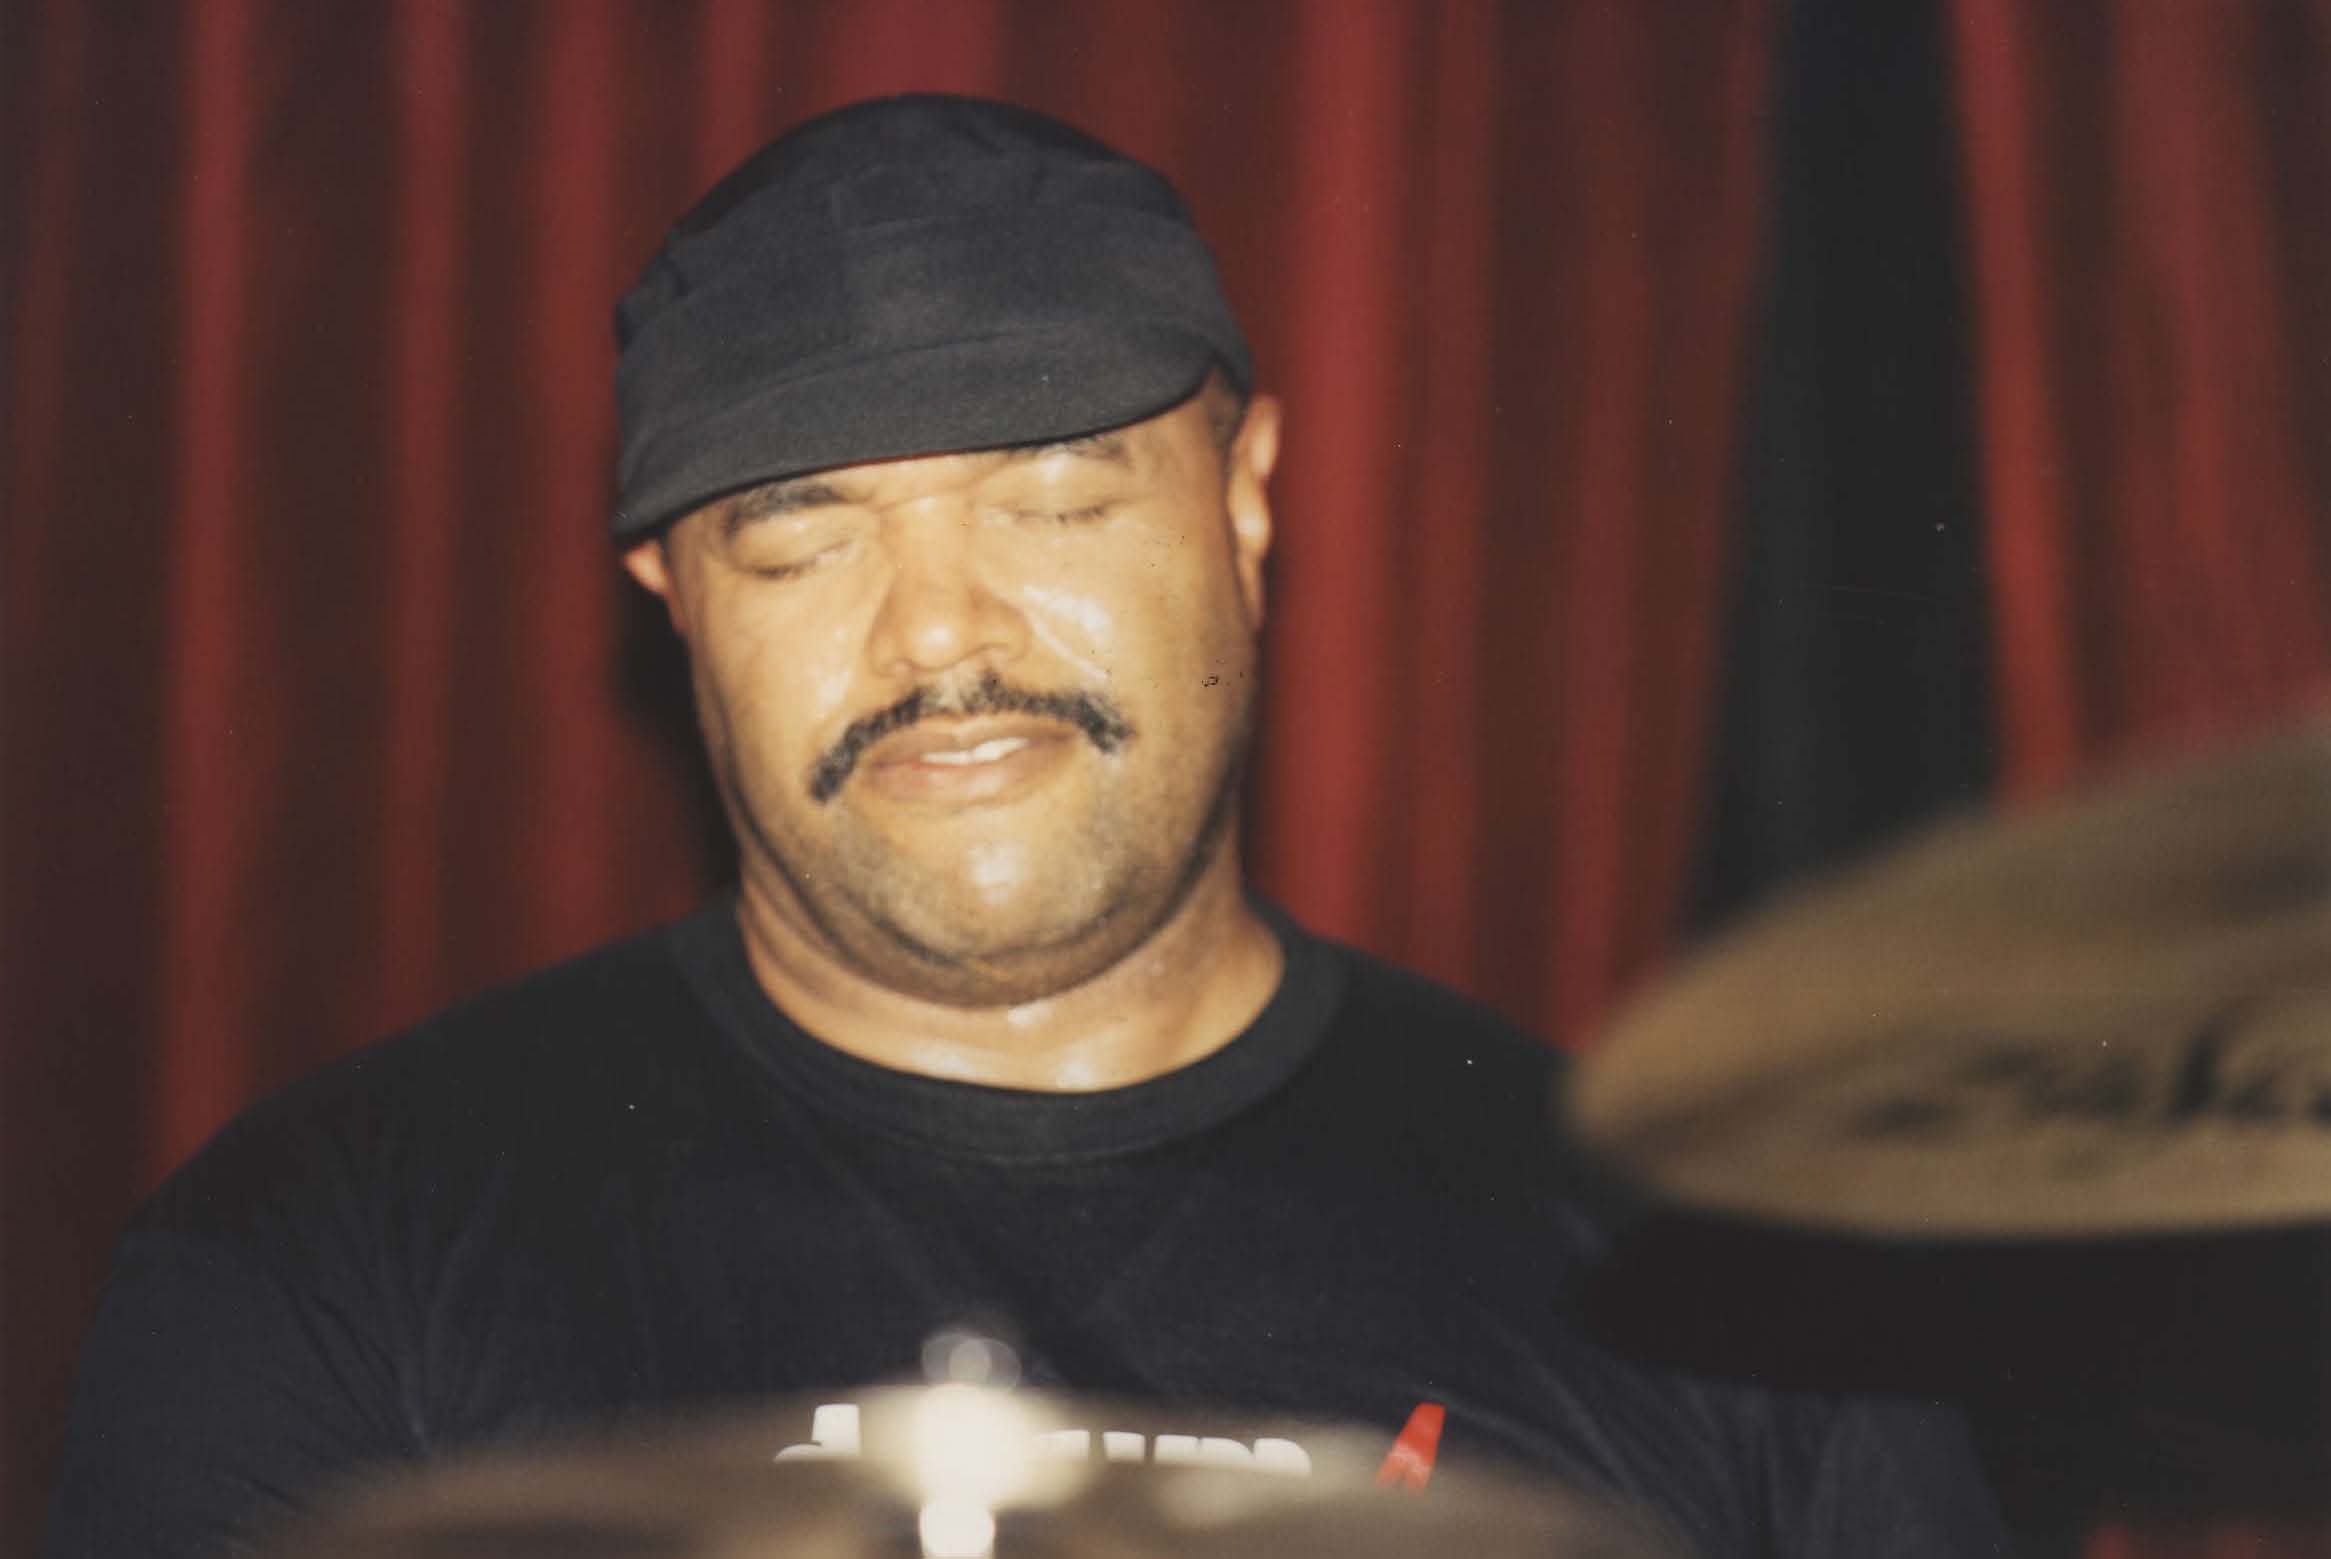
accogliere nella nostra famiglia il celebre musicista di studio Peter Erskine.

Peter ha recentemente acquistato un drumkit ddrum2 ehe oramai ha il posto d'onore nello studio ehe Peter ha montato a casa 
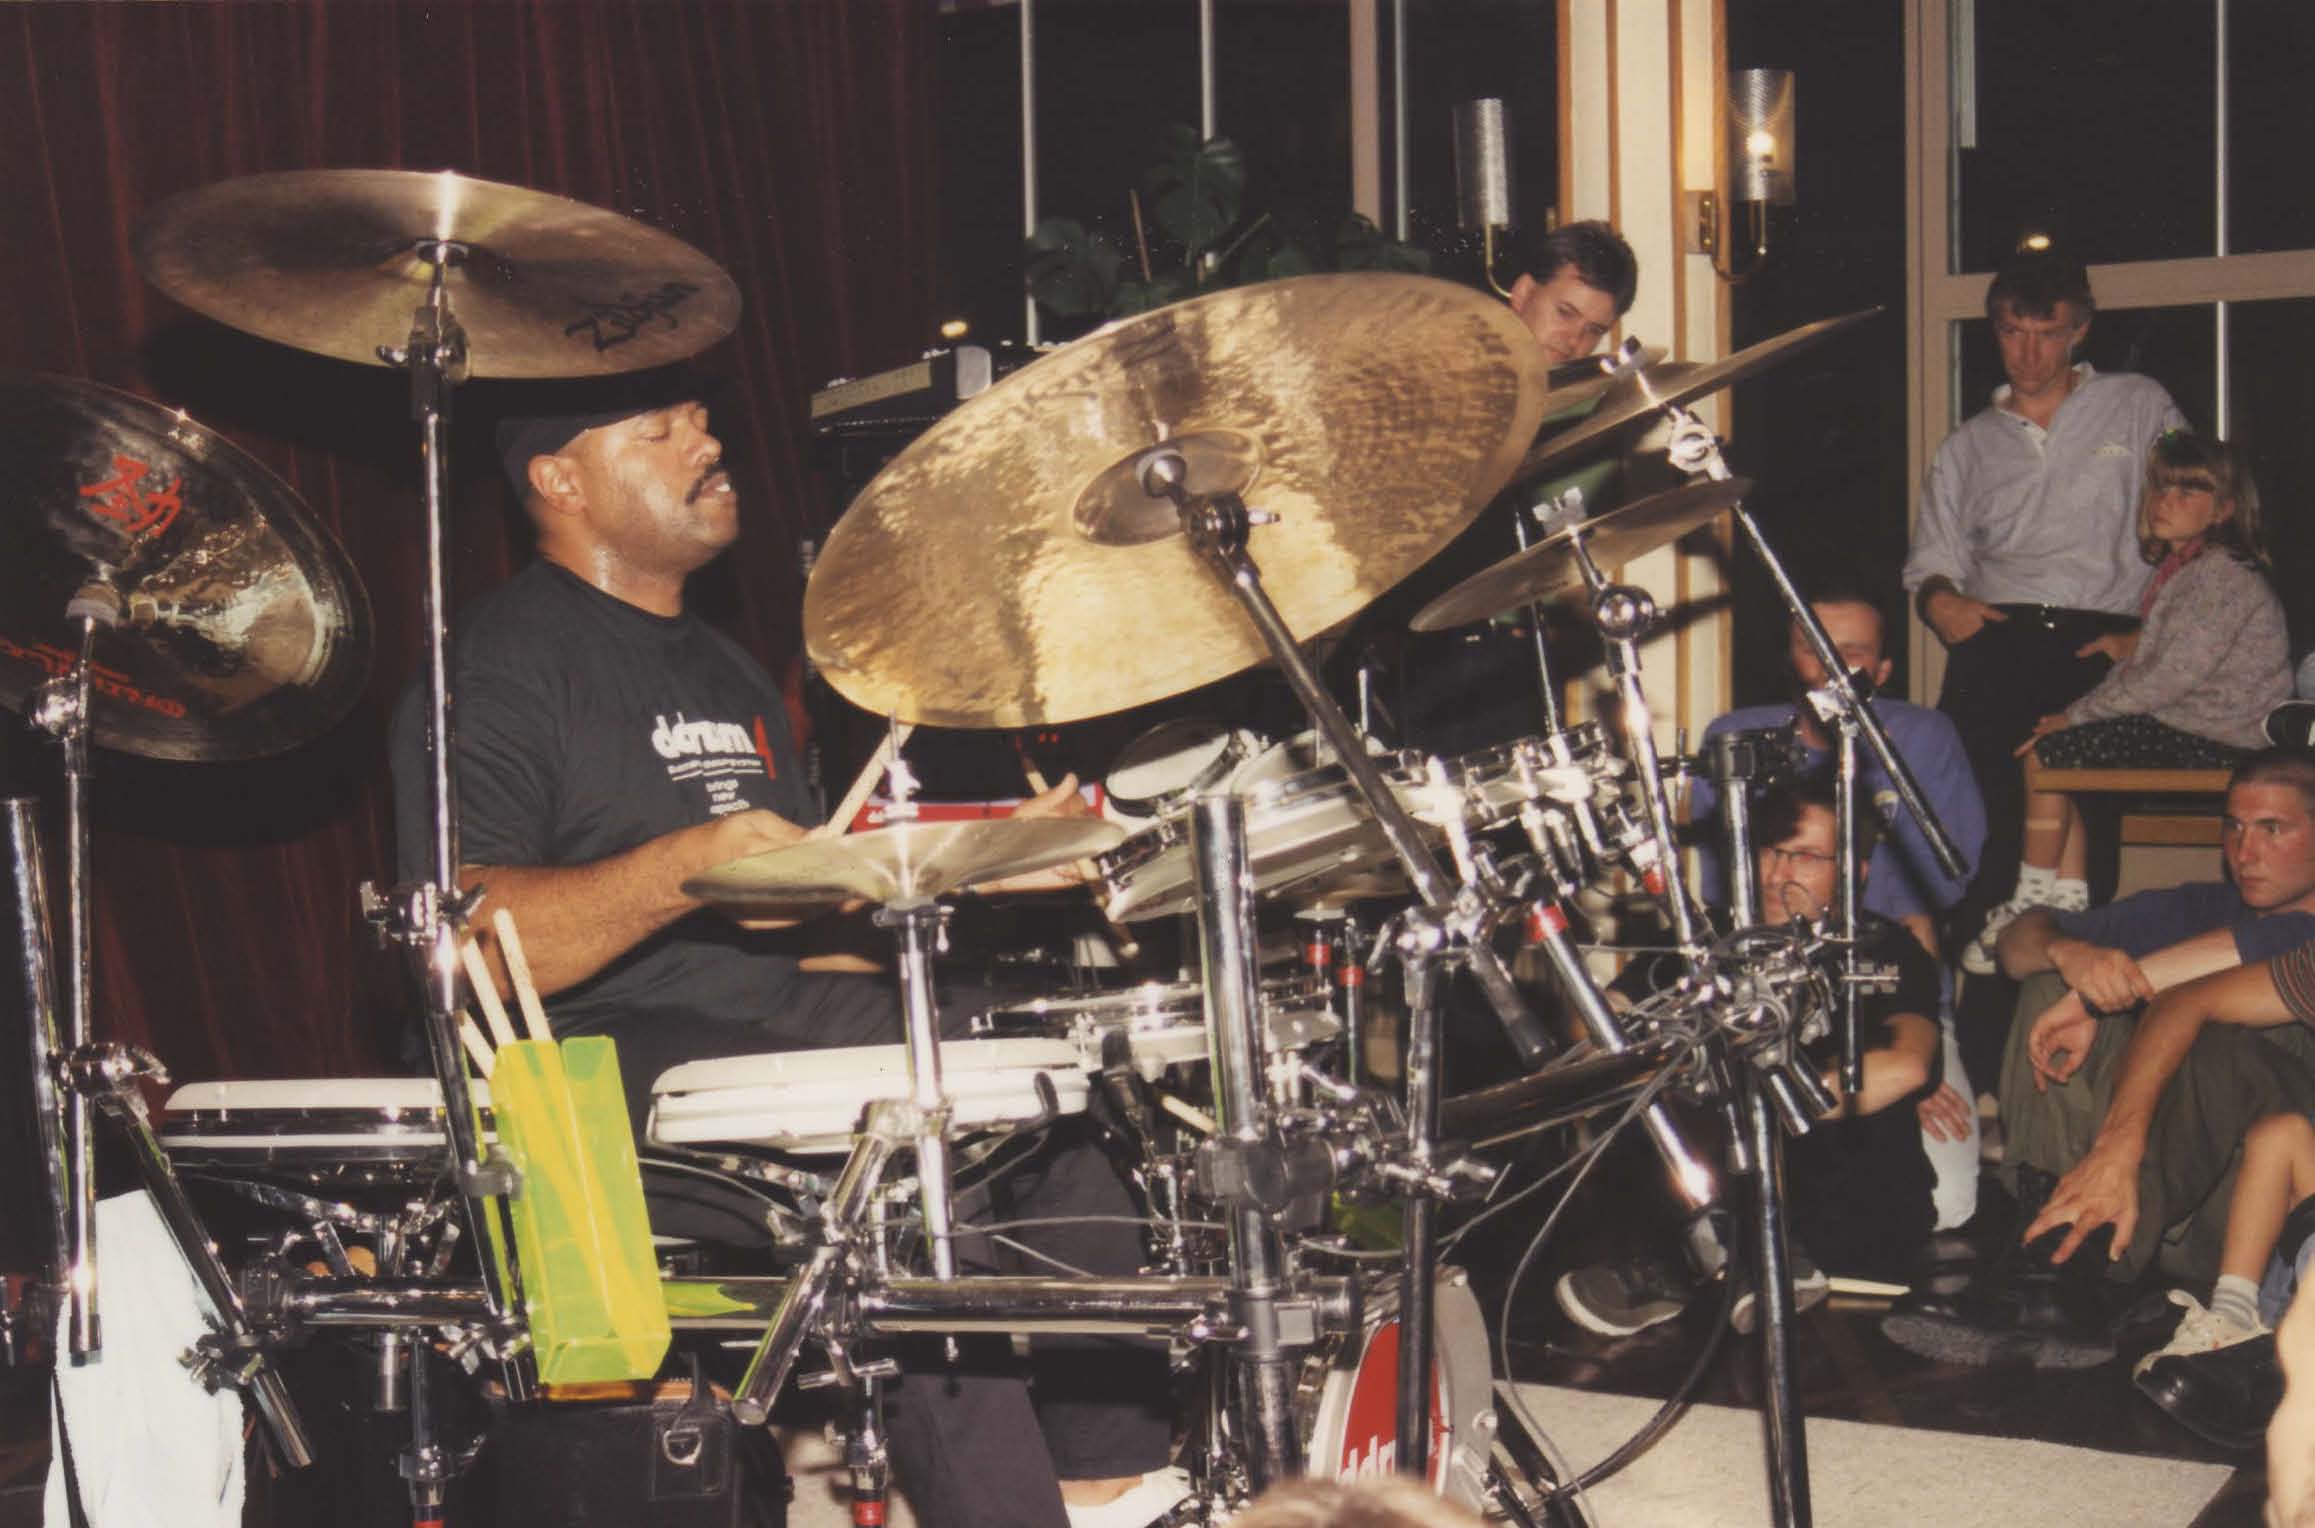
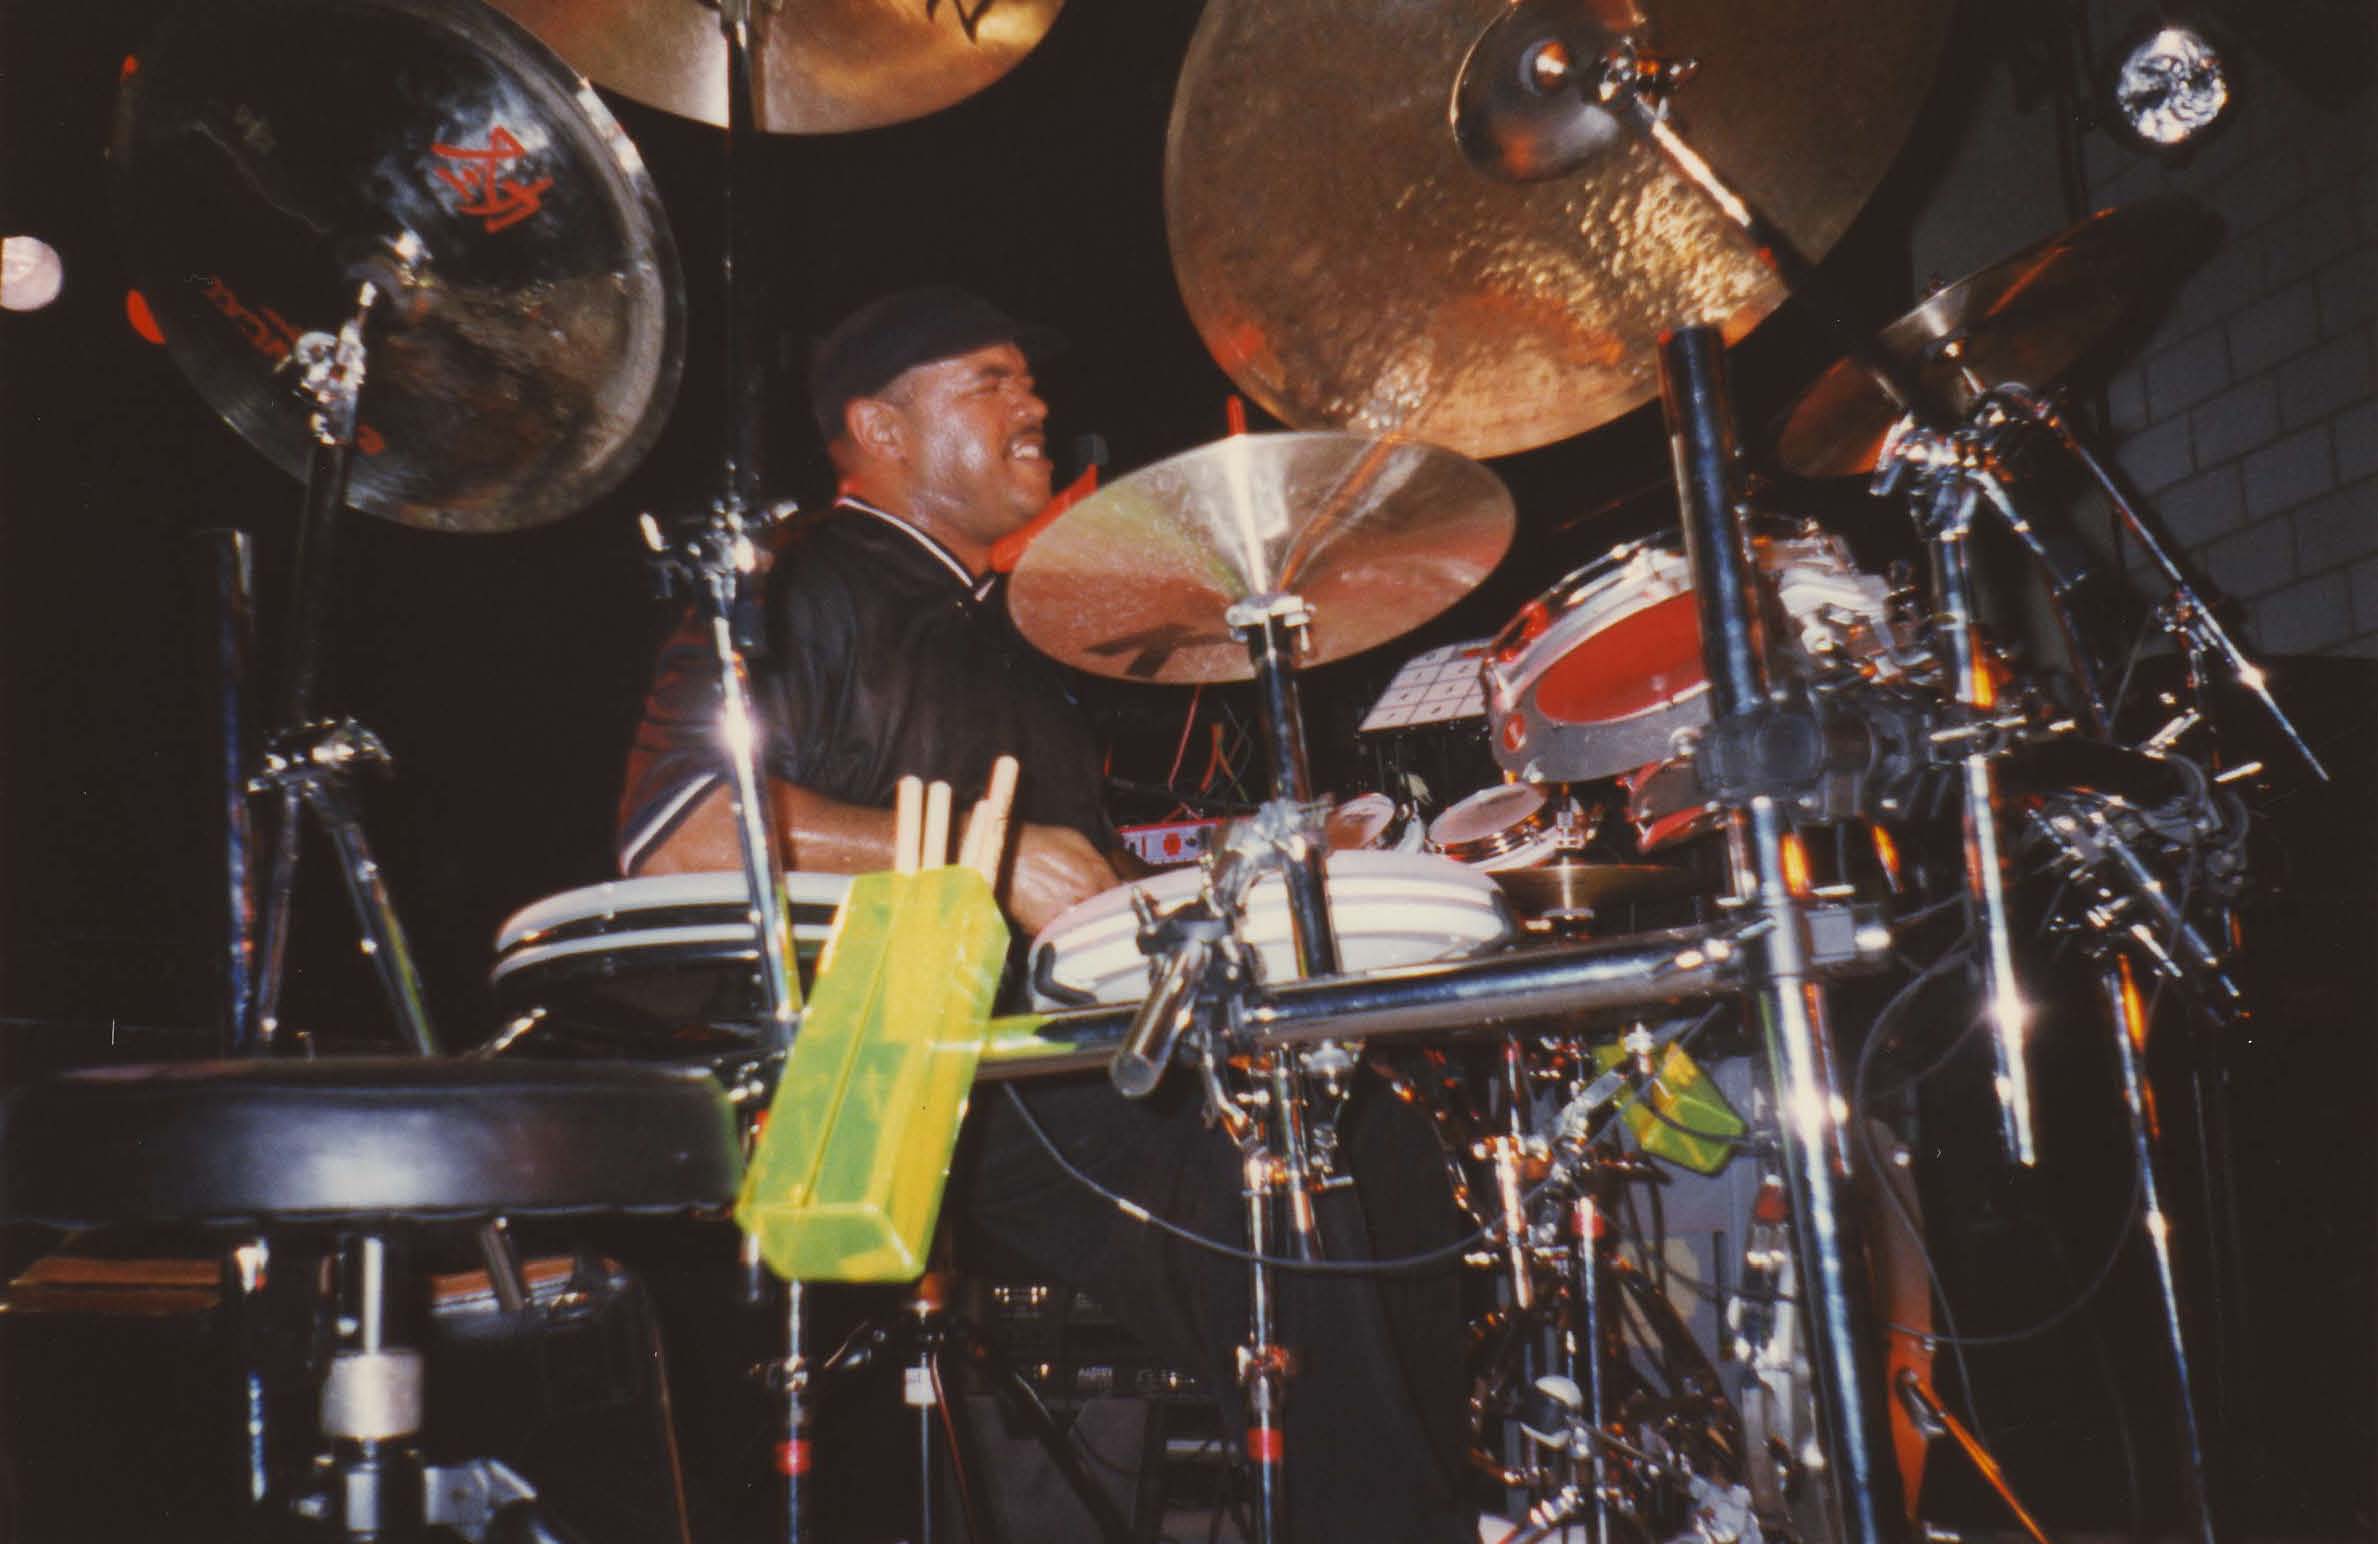
sua. Egli ha gia utilizzato la propria batteria in varie sessioni di registrazione e sul suo nuovo disco Big Theatre. Peter non ha solamente utilizzato la batteria ddrums in studio, ma ha anche fatto rappresentazioni dal vivo suonando in occasione di concerti. Recentemente, e apparso con successo in Olanda insieme a Kenny Wheeler (tromba), John Taylor (piano), Mick Hutton (basso). I suoi colleghi erano un po' spavantati da questa nuova idea di suonare un intero concerto su una batteria elettronica, ma la loro paura e presto scomparsa. Infatti, il concerto ha avuto un successo strapitoso e tutti sono stati molto soddisfatti di questa nuova esperienza. Ci rallegriamo anche perche nessuno prenderebbe il rischio di dare un concerto, e per di piu, un concerto di jazz, accompagnato da musicisti impersonati da strumenti acustici, senza avere una totale fiducia nello strumento e nelle sue prestazioni. Peter, ti ringraziamo di aver rotto il ghiaccio! 

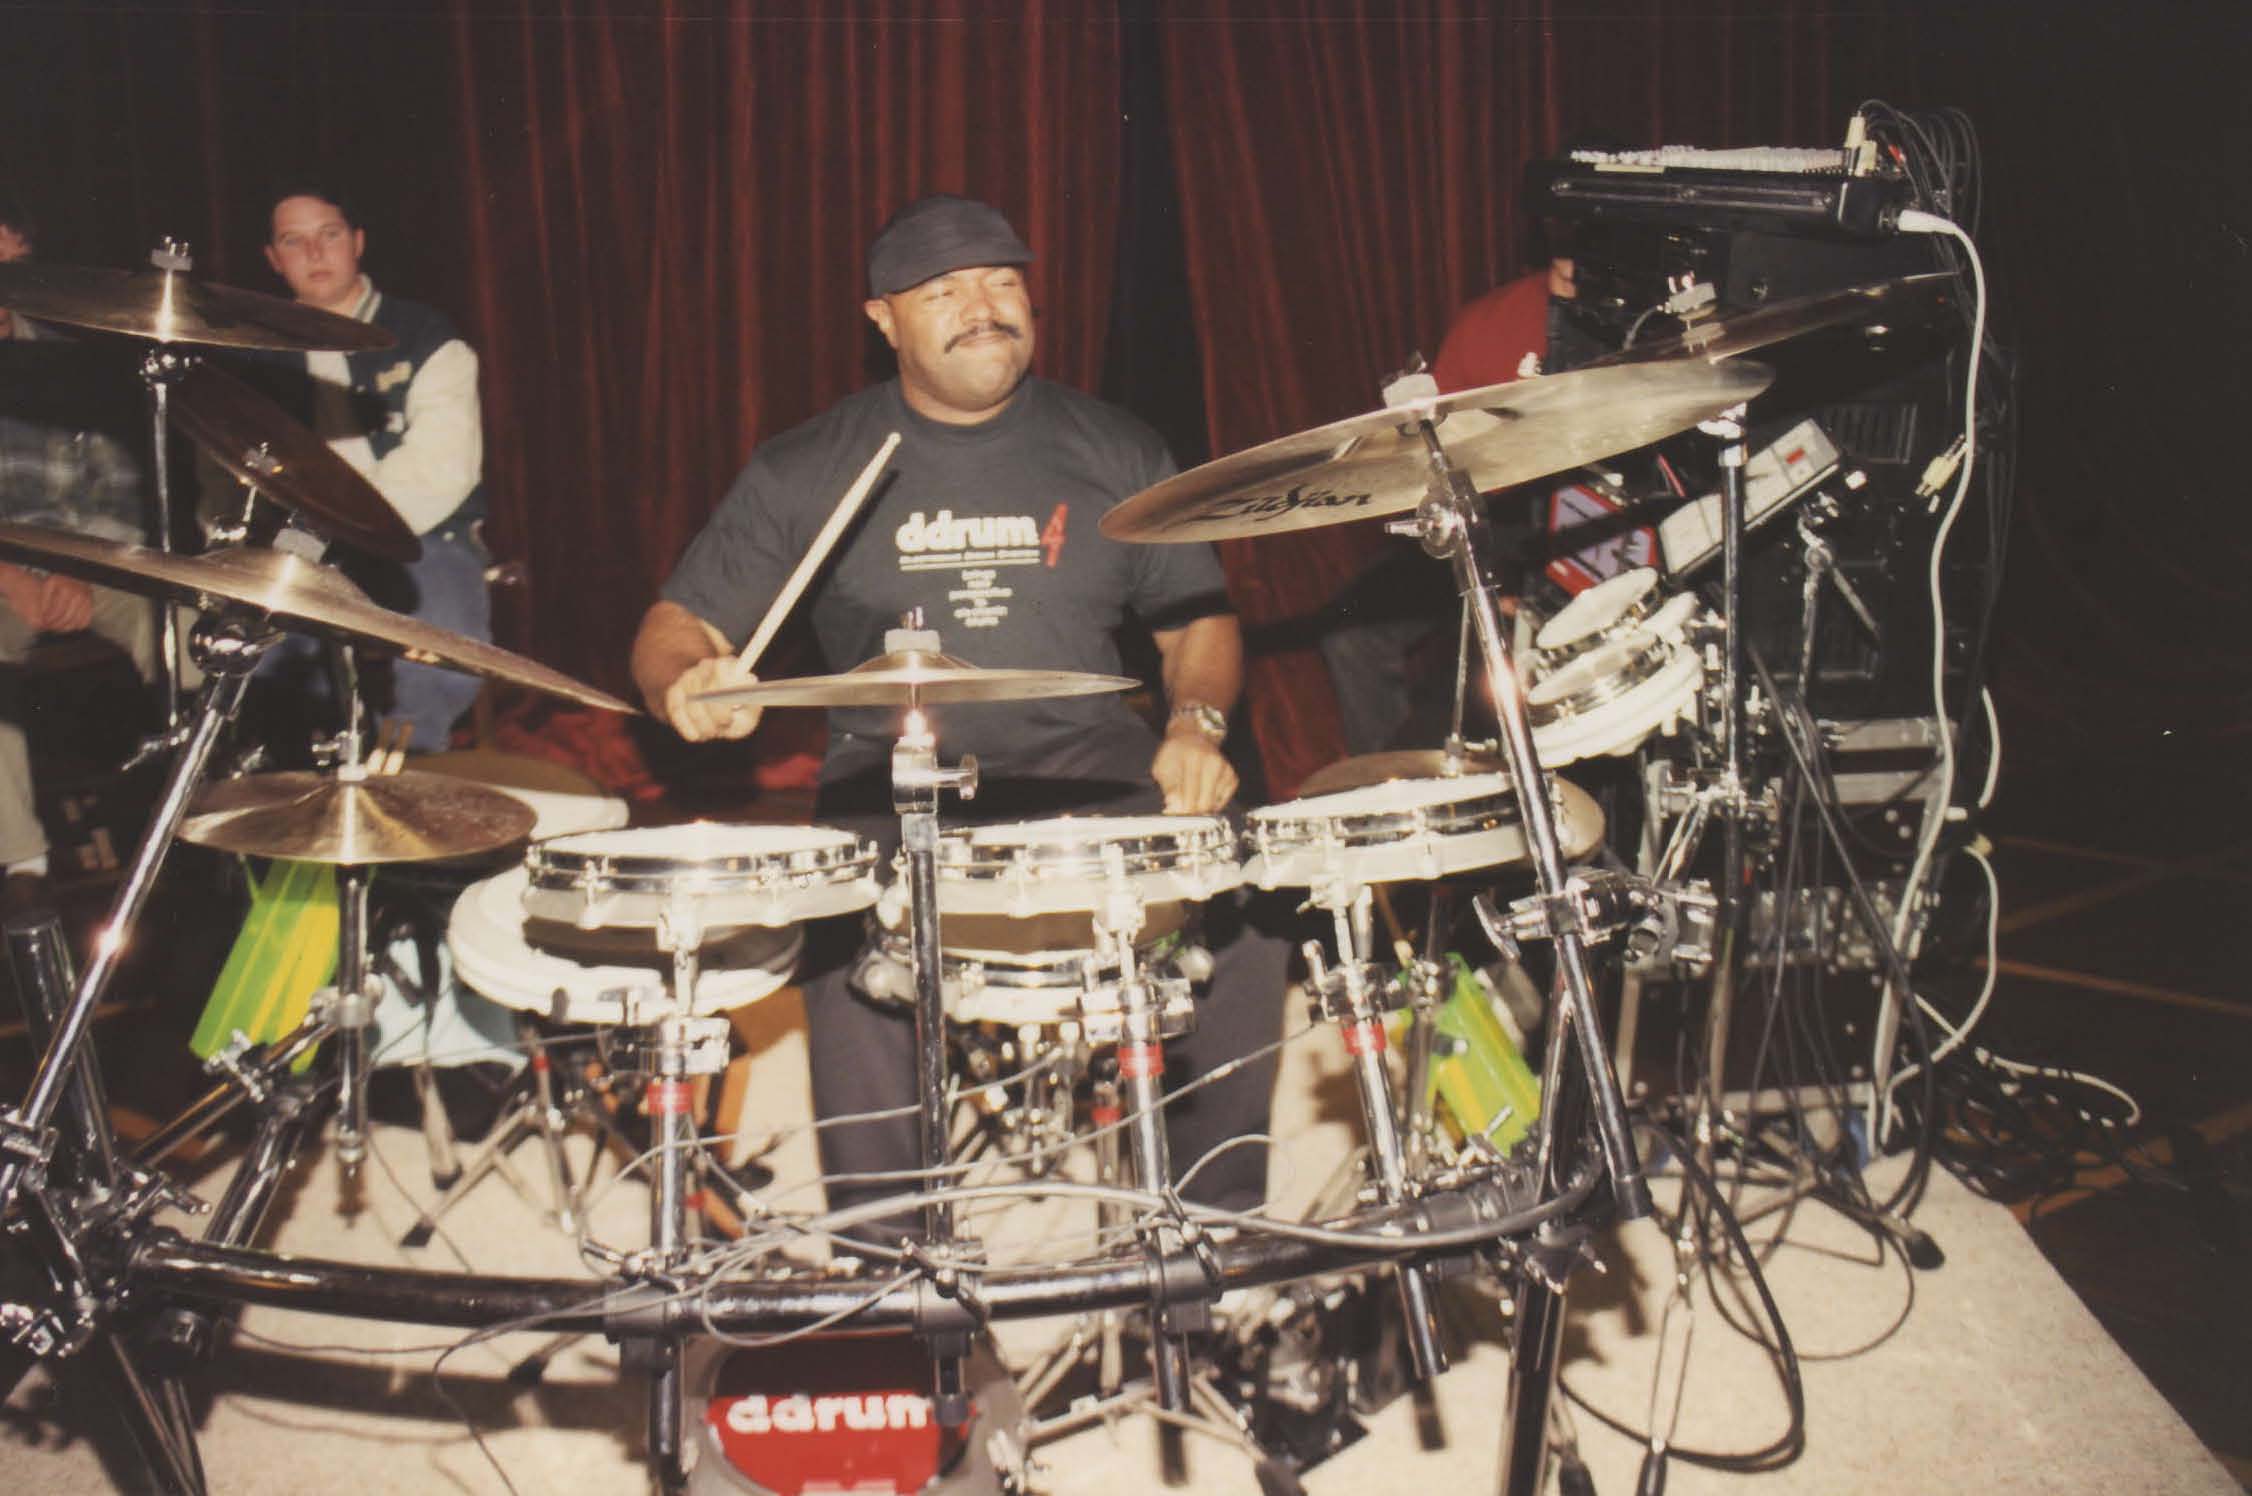
ddrum lancia la serie Siganture-Soundpack.

Il prima delle serie sara Peter Erskine e la sua meravigliosa sonorita. Un soundpac diverso da tutti gli altri. Peter usa i suoi toms, timbri e Kicks come nessun altro batterista. Presto ce ne saranno altri ...  

Altre notizie sui batteristi:

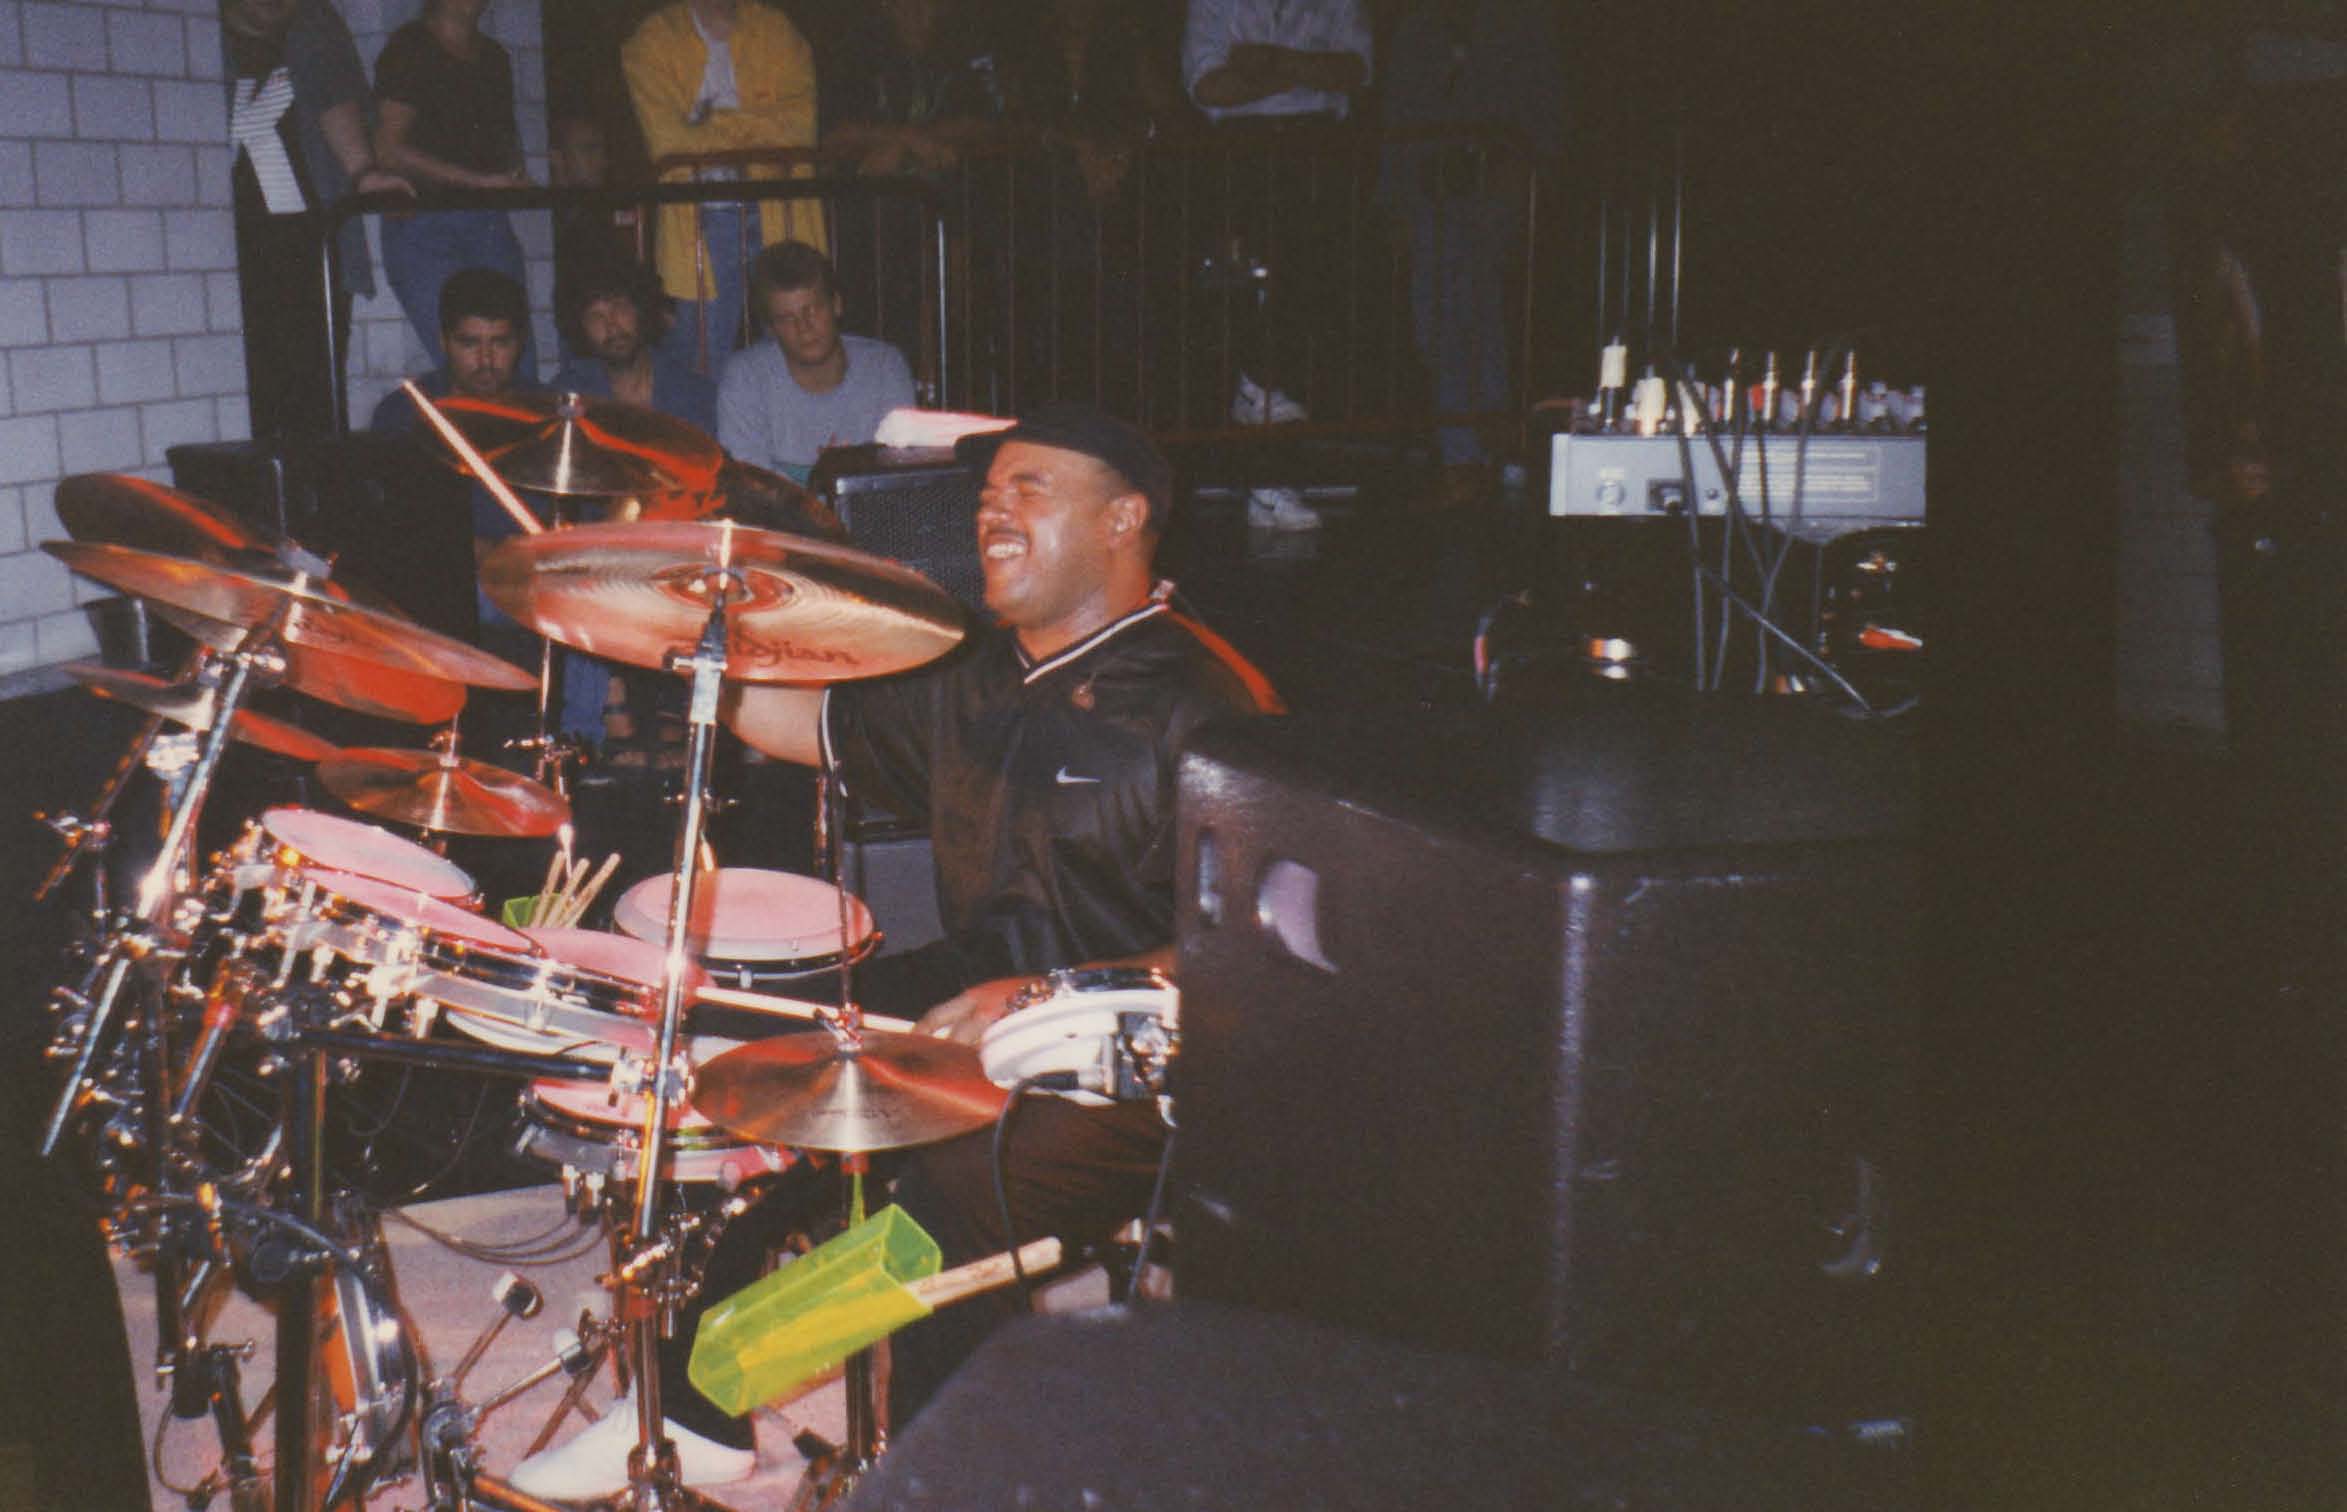
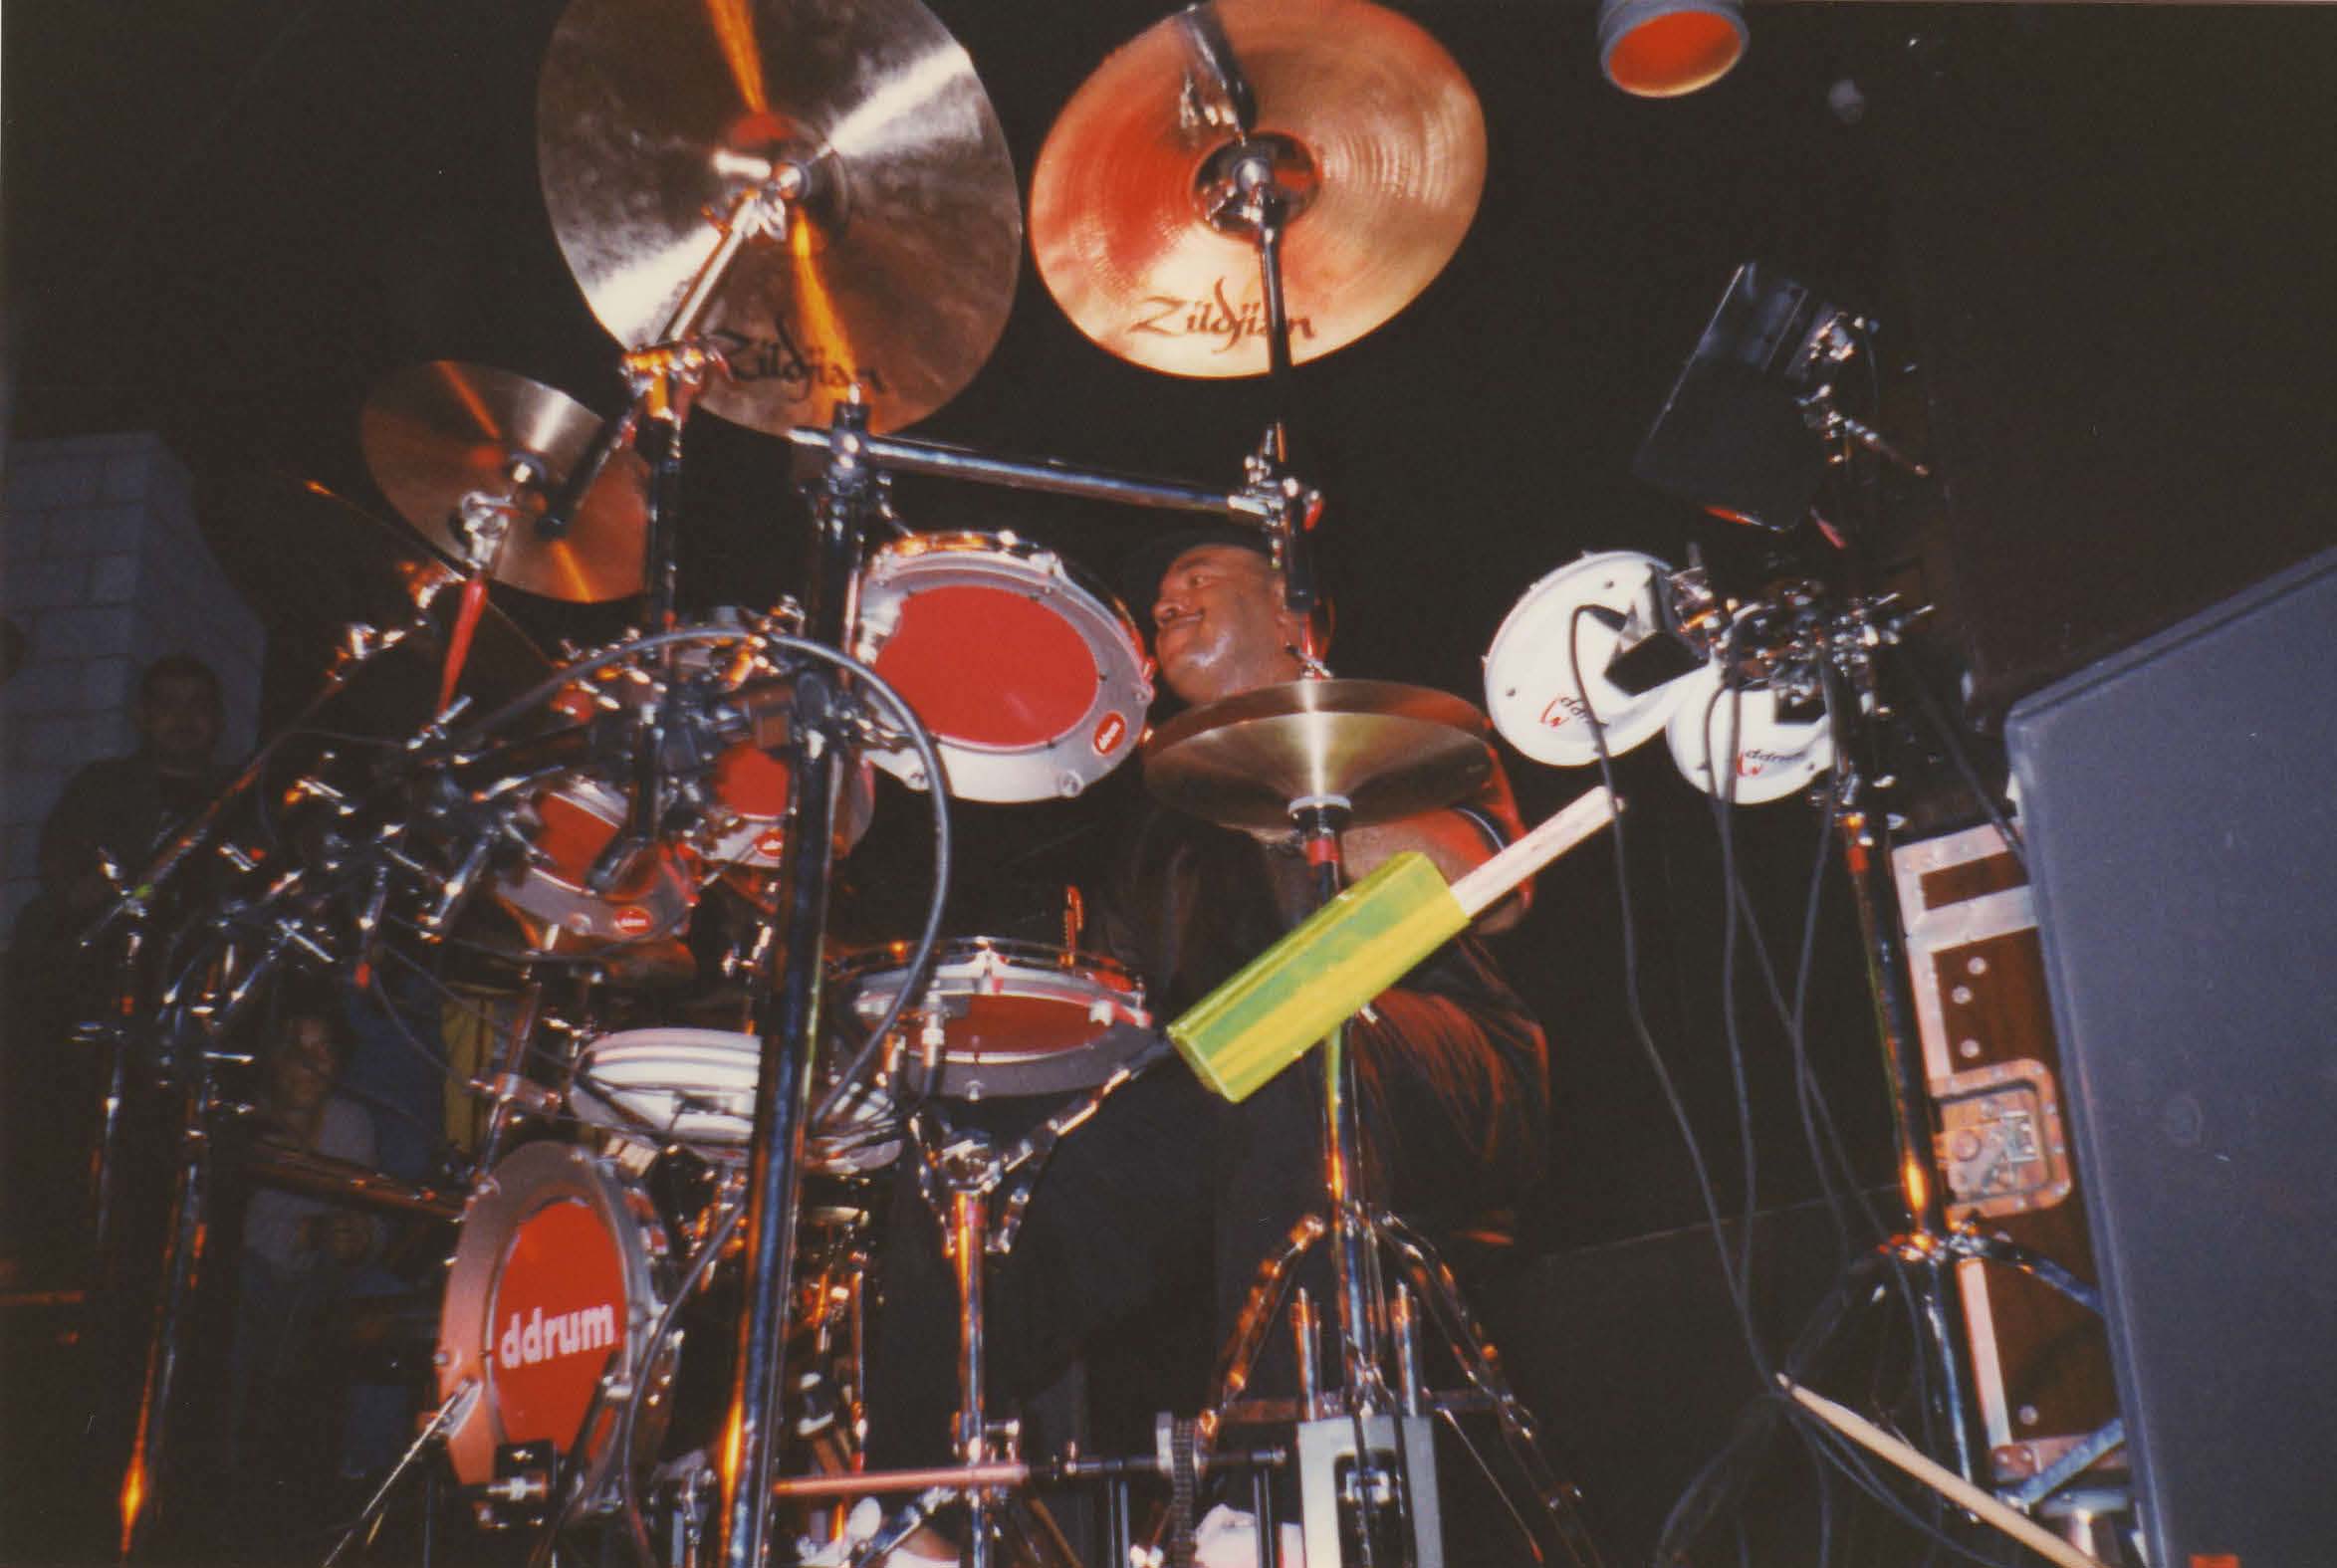
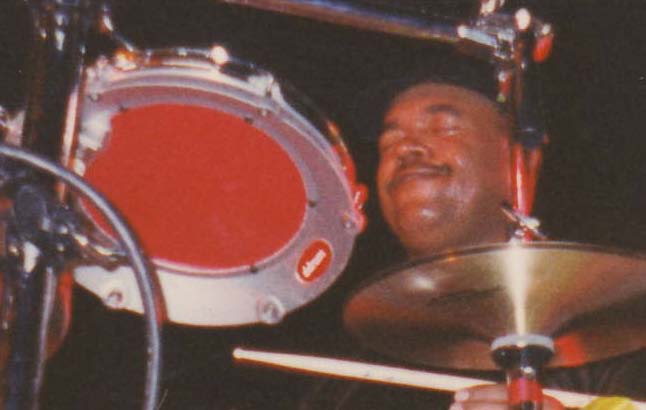
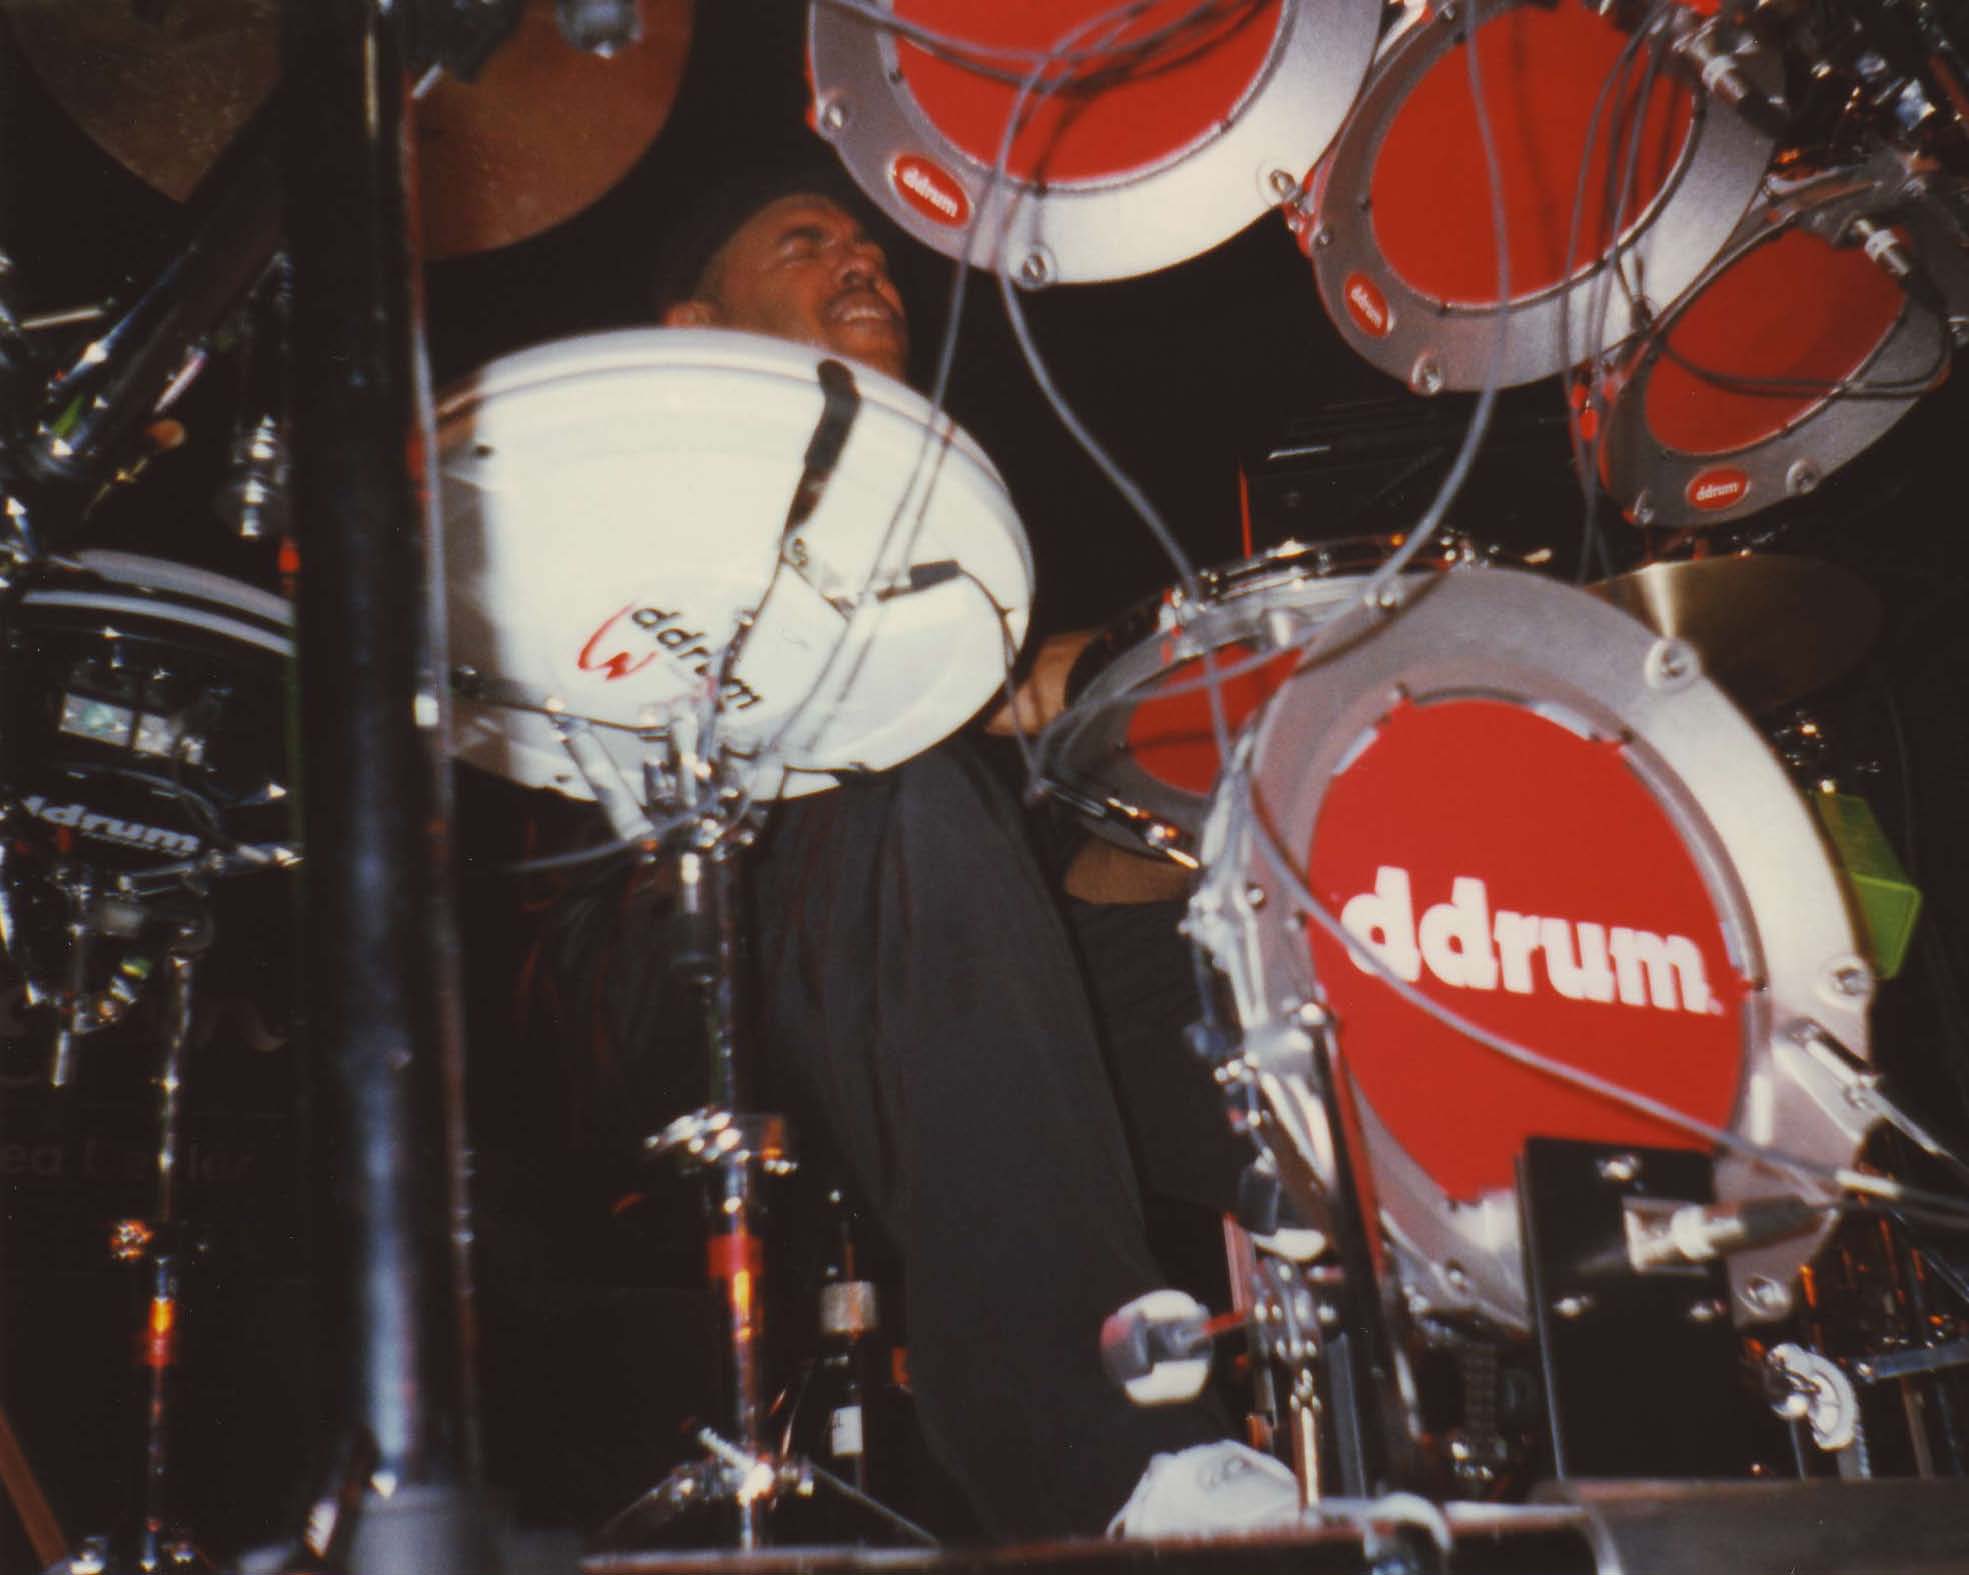
Diamo il benvenuto a Ed Thigpen. Ed ha recentemente acquistato una batteria ddrum2 e trascorre giornate intere a familiarizzarsi con questo strumento. E' particolarmente affascinato dalle nuove possibilita ehe offre la ddrum2. Ha constatato con entusiasmo ehe e capace di controllare tutte queste possibilita con la verve e la sensiblilita ehe lo caratterizzano.  

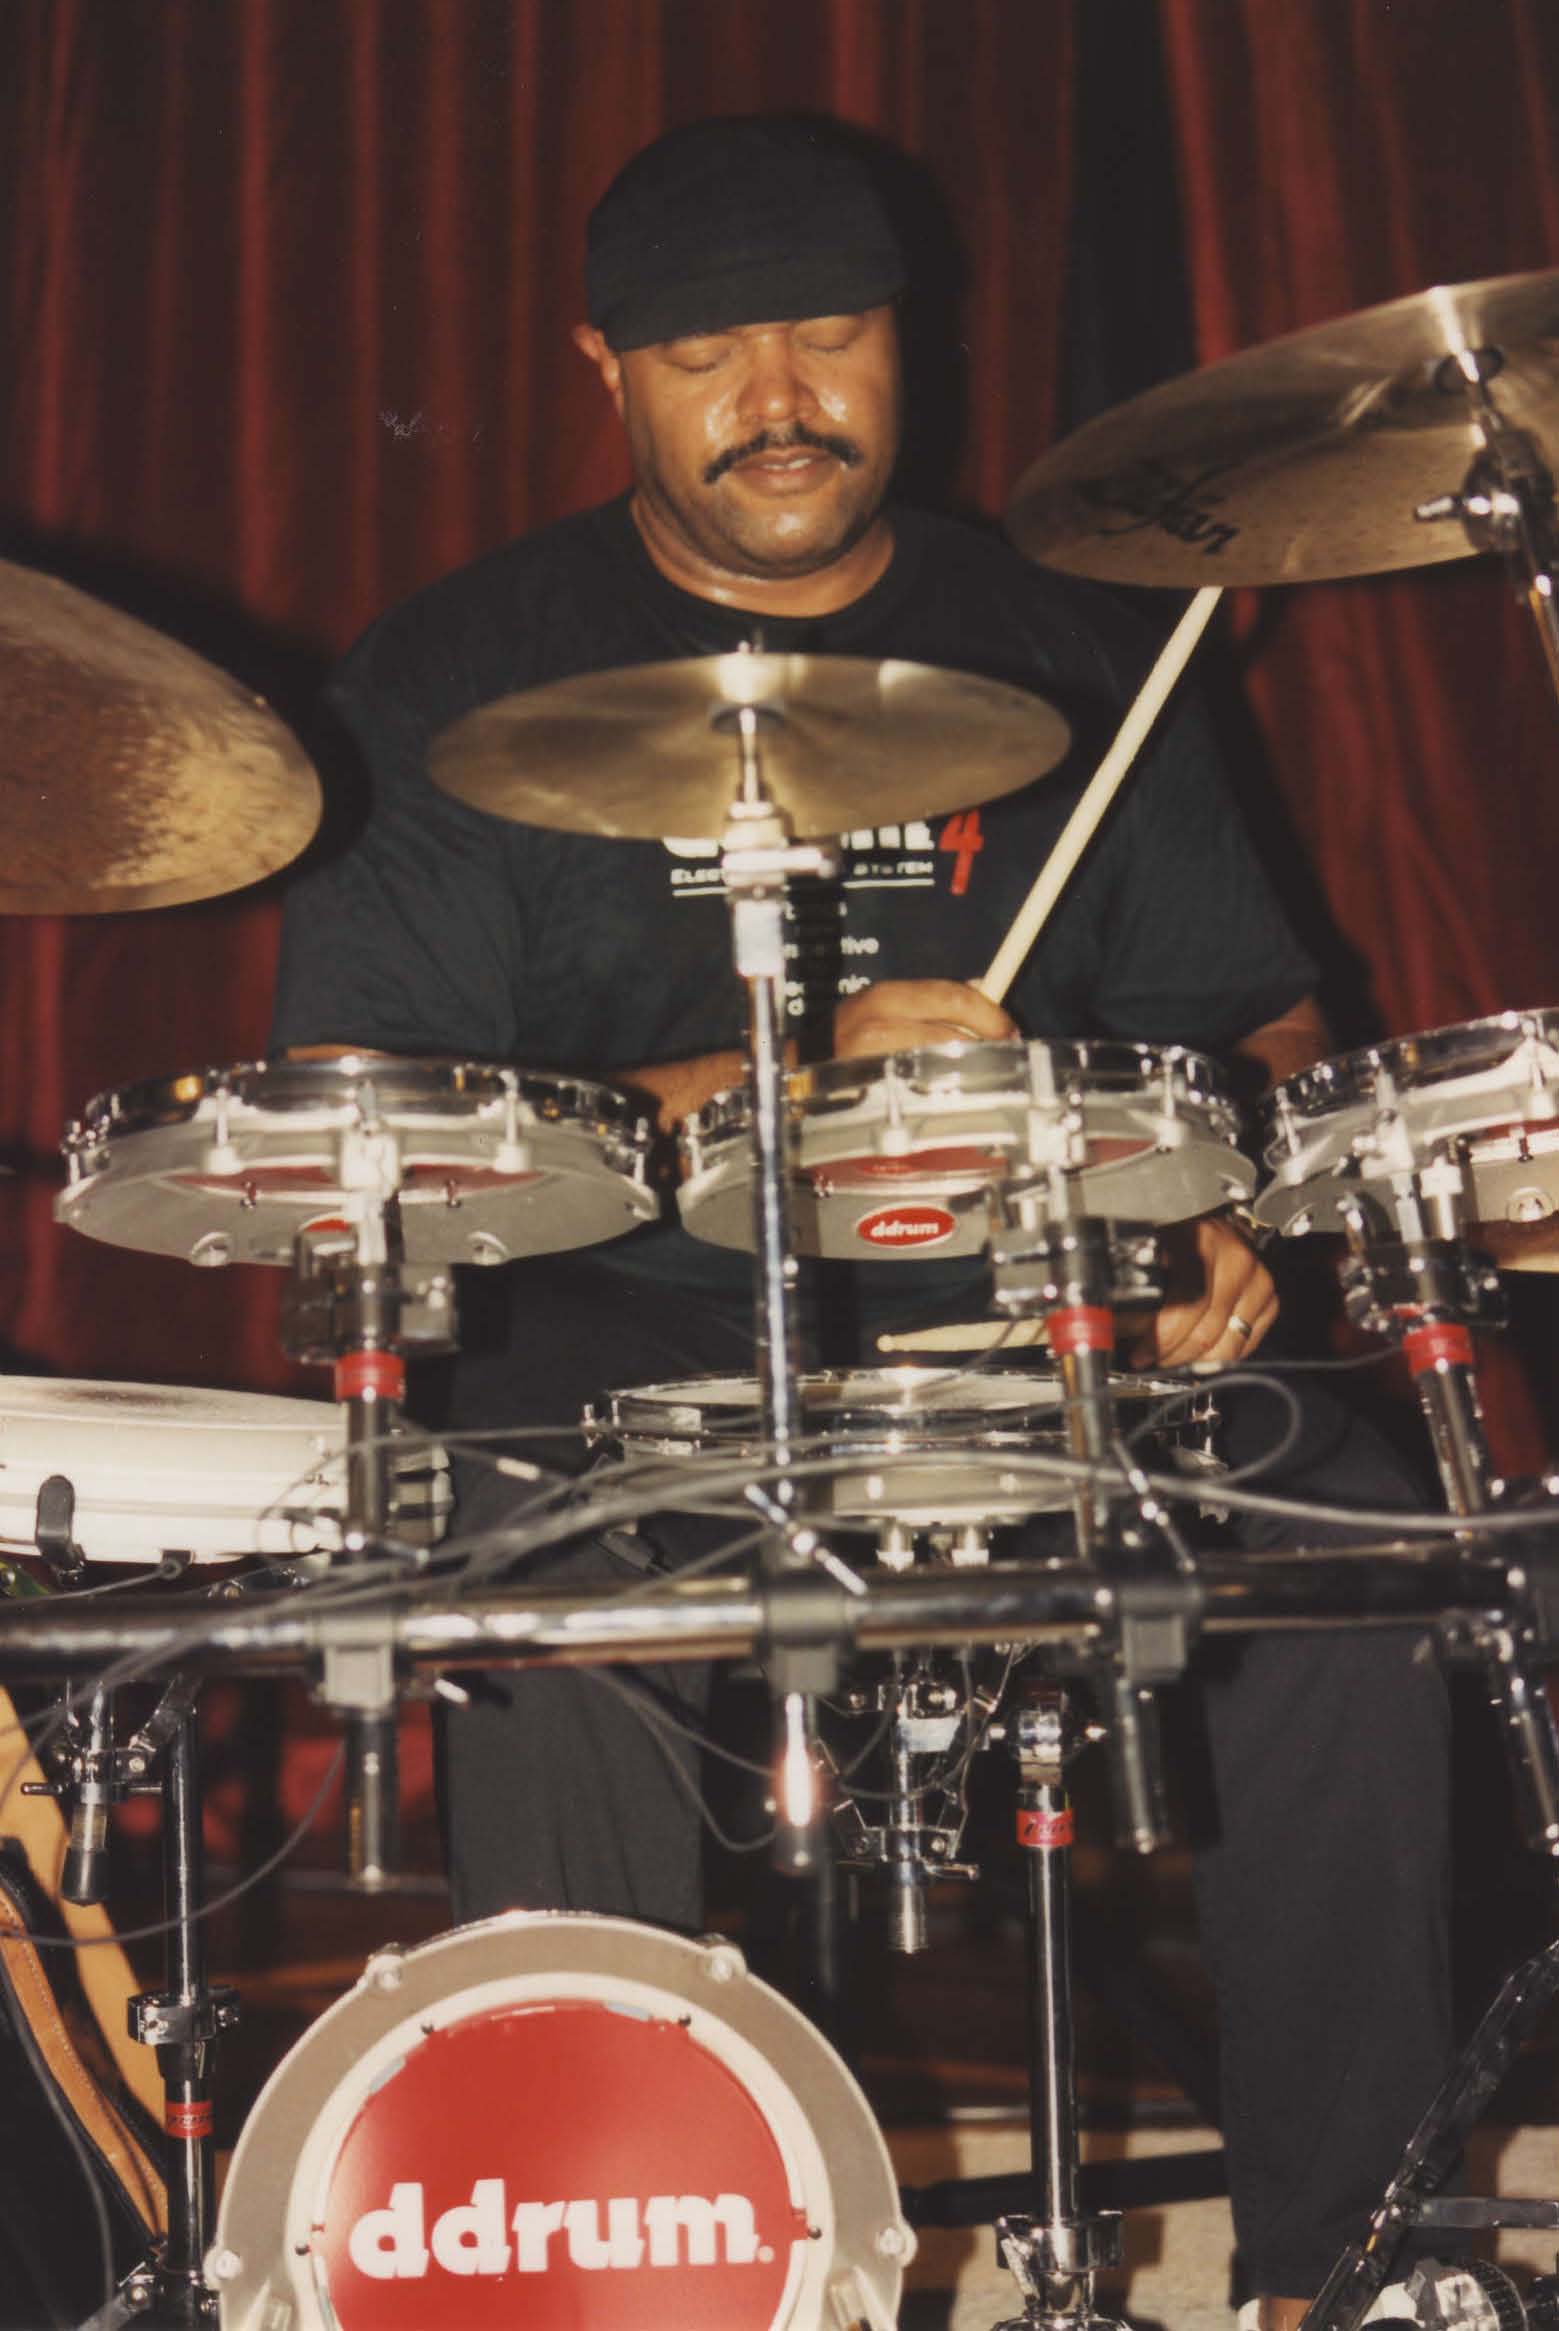
Jim Keltner, musicista di Studio, diehiara: Il mio drumkit e il mio body-drumkit. Non si potrebbe dare una definizione migliore: ddrum e un body-drumkit.

Ci si rende conto molto faeilmente ehe da ddrum tutto e in continuo movimento, e ci rallegriamo di poter annuneiare l'arrivo di numerose novita per i batteristi e i percussionisti .

Il ddrum Performer: il metronomo intelligente creato per i batteristi. Si tratta di una combinazione tra un metronomo e un commutatore di programmi (Kitselector). Il ddrum Performer e dotato di un click che dà il ritmo al batterista. Il batterista puo' sia suonare, sia programmare secondo il tempo e registrare il valore dei BPM (Beats Per Minute) su 128 memorie differenti. In seguito, questi valori potranno essere ritrovati con un volpo di bacchetta.  

Controllo del sistema sequenziale

Il ddrum Performer comanda un sistema sequenziale tramite un orologio MIDI. Un dispositivo indispensabile per i batteristi che usano un sistema sequenziale. Grazie al performer, il batterista non sarà più obbligato ad adottare lo stesso beat per un determinato pezzo (a volte preferisce accelerare o rallentare) dato che il Performer gli da la possibilita di scegliere tra diversi ritmi usando la propria bacchetta. Inoltre puo' mettere in moto il sistema sequenziale non appena è pronto (eon il suo gruppo). 

Cambiate la vostra eonfigurazione eon un colpo di bacchetta

Il Performer funziona anche come Kitselector, accessorio utilissimo per il ddrum2. Con un semplice colpo di bacchetta, il batterista puo'  scegliere istantaneamente tra diversi kits e configurazioni. Il ddrum Performer è dotato di 8 banche dati contenenti 8 kits che danno la possiblilita all'utente di programmare i propri numeri di drumkit e di configurazione. Il ddrum Performer trasmette questi dati peril cambiemento di programma per il tramite di un' interfaccia MIDI. Per il momento, il Performer e in corso di fabbricazione.

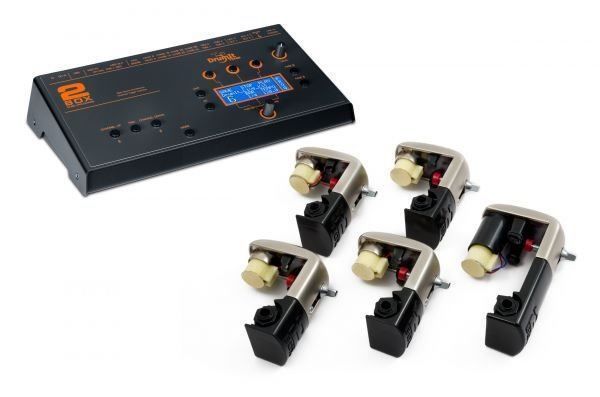
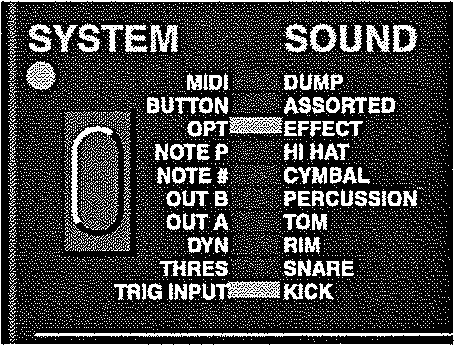
La ddrum Padstation sempre piu moderna: con MIDI - MIDI - MIDI

Finalmente, è arrivato! Il multipad dotato dello stesso feeling ddrumpads. Il primo multipad e dotato di veri e propri heads e rims. La Padstation risponde rapidamente e con molta precisione (WYP/WYG). L'utente puo' dunque programmare un canale MIDI, il numero di note, il tempo di gate e la curva della velocita. Tutti i parametri sono registrati in una delle 16 diverse configurazioni. 

Due multipads in uno !

Ebbene si', visto che la Padstation e collegata ad un telecomando a distanza. Potete utilizzarlo col telecomando per suonare tutti i moduli MIDI di cui disponente, oppure per mettere in moto un cervello ddrum2 e le altre unità che regolano i segnali di messa in moto. 

Tutta l'elettroniea è montata in una scatola esterna e i pads sono connessi a questa scatola tramite un cavo multiplo che garantisce al massimo la longevita e riduce il rischio di un cattivo funzionamento elettronico (problema per la maggior parte degli altri sistemi). Questo significa anche che i proprietari di ddrum2 non hano bisogno di comparere il telecomando. Basta che connettano un cavo multiplo nella presa con doppia uscita nel cervello del ddrum2. 

Facile da installare. un gioco da bambini.

Il controllore di Padstation è un elegante scatola che si monta usando un bullone a vite che si adatta a tutti gli L-Racks standard. Il multipad si monta facilmente sugli stands di tomtom o sui sistemi di racks. Una volta installata, la Padstation e estremamente stabile. Questa caratteristica e essenziale quando si gioca con le mani. 

Dinamico, rapido, sensibile

La ddrum Padstation è un multipad estremamente dinamico e sensibile, Robusta, puo'essere facilmente trasportata oltre ad essere molto facile da utilizzare. I parametri MIDI corrispondono ai bisogni fondamentali e numerosi batteristi constateranno con gioia quanto la ddrum Padstation reagisca rapidamente. Connettete le ddrum Padstation ad un ddrum2 e avrete a vostra disposizione la piu potente batteria del mondo. 

Prezzi:

ddrum Padstation with controller, box and cabel   Fr. 1'890

ddrum Padstation only                                                 Fr. 1'260

ddrum Performer                                                          Fr.    890


Vi ringraziamo della Vostre attenzione's Vi facciamo inoltre notare che potete ricevere poster della pubblicita ddrum allegata a partire dalla meta del mese di dicembre 1990. Ci chiamate per telefono ed ordinate il numero desiderato di poster pubblicitari ddrum - gratuitamente. 

Con distinti saluti

ddrum - svizerra


PS

Non potete credere che sia possibile di sentire immediatamente e seguire visualmente ed alle fine di mettere anche per iscritto che e stato sonato attraverso Atari e Notator di C-Lap? Vi invitiamo con piacere al nostro Show-Room oppure lasciate informarVi sulla  manifestazione d'informazione di Computer della C-Lab Software AG il 8.12.90 nel Casino Zürichhorn.

Separatdruck aus Workshop Nr. 12/1990 © by Aargauer Tagblatt AG, Aarau 

Drummers Dream - ddrum2 Modell 3

Reto Spörli und Christian Hunziker

Seit längerer Zeit ist es schon klar, dass das schwedische Produkt ddrum zur Spitze der elektronischen Schlagzeuge gehört. Hier versucht man, die Vorzüge eines Akustik-Drums mit denjenigen eines Elektronik-Sets auf einen Nenner zu bringen. Mit dem ddrum2 in der Version 2.2 ist man diesem Ziel schon recht nahe gekommen.

Für all jene, die bereits über ein ddrum der Version 1.7 verfügen, besteht eine U pdate­ Möglichkeit auf 2.2 für 900 Franken. Da ich im Show-Room der neuen Generalvertretung ein fertig aufgebautes und verkabeltes Set testen konnte, kann ich mich über Aufwand und Probleme dieser Art nicht äussern. Das ausführliche deutsche Handbuch gibt jedoch klare Anweisungen, die keine Komplikationen erwarten lassen.

Ausstattung

Das ddrum ist 16stimmig, das heisst, im gleichen Augenblick können bis zu 16 Stimmen erklingen. Das ist sicher mehr als genug, kann doch ein Schlagzeuger kaum je mehr als vier Klänge auf einmal entfesseln. Acht Einzelausgänge werden durch zwei Mono-Buchsen ergänzt, die zusammen den Stereomix ergeben.

Da das ddrum kaum in einem grösseren MIDI-Verbund eingesetzt werden wird, fehlt eine MIDI-Thru-Buchse, es sind also nur MIDI-In und MIDI­Out vorhanden. Ein Audio­Line-Eingang mit Lautstärkeregler ermöglicht den zumischbaren Anschluss einer externen Audioquelle (z.B. eines Kassettenrecorders).

Über den Audiobuchsen befinden sich die acht Trigger­Eingänge, an die die Pads anzuschliessen sind. Auf der abgeschrägten Vorderseite finden wir die schon erwähnten fünf Sound Pacs, daneben das Programmierfeld, das bei Sound-Veränderungen und MIDI-Einstellungen benützt wird. Rechts oben sind die Pad-Sensitivity-Regler mit den dazugehörenden Peak- und Trigger-LEDs, während rechts unten die Kits bzw. die Kanäle angewählt werden können. In einem einfachen zweistelligen Display werden diese angezeigt.

Funktionsweise und Aufbau

Über die speziellen Pads (=fellbespannter Trommelersatz) oder Tubes (=röhrenförmiger Trigger) gehen die Schlagimpulse in die Elektronik und von da ins Mischpult. Für die Pauke steht ein besonderer, äusserst attraktiv gestylter Trigger zur Verfügung. Die 50 intern gespeicherten Drum- und Perkussionsklänge können durch Cartridges (Sound-Pacs) beinahe unbegrenzt erweitert werden. Das neue Modell 2.2 verfügt über fünf Slots zu je 2 MBit, was je acht Sekunden Speicherzeit entspricht.

Bedienung

Ist das ddrum einmal aufgestellt, ist die Bedienung angenehm einfach, so dass man wirklich zum Spielen kommt und nicht den Kampf gegen die Technik antreten muss. Jedes Pad oder Tube wird mit einem Sound belegt, der über den entsprechenden Parameter stufenlos in Tonhöhe (±1 Oktave in 97 Schritten) und über die Sensitivity-Regler in Dynamik verändert werden können.

Über die weiteren Programmiermöglichkeiten möchte ich mich nicht weiter äussern, da es zu weit führen würde, Schritt für Schritt in die Geheimnisse der Kit-Zusammenstellung zu geleiten. Veränderbare Parameter sind: Decay (Ausklingdauer), Pitch (Tonhöhe), Pitch Bend (dynamik­abhängige Tonhöhenveränderung bzw. Abfallen oder Aufsteigen des Tons), eine Zweiband-Klangregelung (Bass, Treble), Panorama (15 Positionen im Stereobild) und Level (32 Stufen). Die letzten zwei Parameter wirken nur auf die Stereoausgänge. Will man nun eines der 64 internen Drum-Kits aufrufen, wählt man zuerst eine der acht Bänke (beim Einschalten ist immer Bank 1, Kit 1 präsent) und anschliessend das gewünschte der acht Kits pro Bank. Und schon kann man loslegen.

Die Elektronik: Das Herz von ddrum 2, welches mittels Update immer wieder auf den neuesten Stand gebracht werden kann.

Drums? - Drums!

Das Spielgefühl auf den ddrum-Pads kann absolut mit dem auf echten Trommeln verglichen werden; man spielt sozusagen auf mehreren Piccolo­Snares. Da normale Remo­Felle aufgezogen sind, ist auch das Handling der Pads identisch.

Die Tubes können mit Glocken oder Woodblocks verglichen werden. Höchstens beim Kick spürt man den Unterschied: Die Härte entspricht einem extrem satt gespannten Bass-Drum-Fell. Ein Kompliment den Designern von ddrum: Der Kick ist nicht nur schön, sondern auch absolut stabil.

Wenn man normalerweise hinter einem Akustik-Set sitzt, wirkt das ddrum zwar ein wenig wie ein Baugerüst, doch man fühlt sich schnell zu Hause, da alle Elemente in jede nur erdenkliche Lage gebracht werden können und jeder Sound an jedem beliebigen Ort spielbar ist.

MIDI

Als Drummer ist man ja nicht so MIDifiziert wie vielleicht ein Keyboarder, deshalb muss ich mich auf Informationen stützen: ddrum2 kann sowohl als Master wie auch als Slave benützt werden. Die einzelnen Sounds können jeder MIDI­Note auf allen 16 MIDI-Kanälen zugewiesen werden. Besonders hervorzuheben ist die Dynamik-Expansion-Funktion, die die MIDI-Dynamik um einiges verbessert. Via Sysex­Daten können einzelne Kits, ganze Bänke oder gar der ganze interne Speicher auf einem entsprechenden Medium (z. B. Sequenzer) abgespeichert werden.

Selbstverständlich können über MIDI (Program Change) auch Drum-Kits direkt aufgerufen werden.

Zubehör

Der Performer ist eine Kit­Selector-Box, die es erlaubt, mit Stöcken (oder auch nur mit den Fingern) Kits direkt anzuwählen. Es ist also damit möglich (natürlich nach geleisteter Vorarbeit), nach einem Jazz­Stück sofort ein Rock-Stück mit entsprechendem Drum-Set zu spielen, auf Stockschlag sozusagen. Vor allem für den Live-Betrieb ist der Performer ein empfehlenswertes Accessory.

 Wie klingt's? 

Gut! Die Sounds, die mir beim Test zur Verfügung standen, sind wirklich über alle Drum­Zweifel erhaben. Es ist völlig problemlos, saubere Crescendi-Wirbel zu spielen, die Dynamik überzeugt in jeder Hinsicht. Spielt man einzelne Becken-Sounds allein, mag man sich an gewissen Unsauberheiten im Ausklang stossen; ein echtes Becken tönt viel länger aus, doch während des Spiels fällt das überhaupt nicht mehr auf. Wer sich interessiert, was Profi-Drummer aus einem ddrum herausholen, dem sei die Demokassette wärmstens empfohlen. Erwähnenswert ist das immer wachsende Angebot neuer Sound Cartridges mit wirklich umwerfenden Klängen. Bedenkt man, dass man sich mit dem ddrum nicht nur einen «Ersatz für sein Akustik-Set anschafft, sondern eigentlich mindestens 64 verschiedene Drum-Sets hat, deren Sounds immer dem neuesten Stil (und Geschmack) angepasst werden können, so ist auch der im ersten Moment erschreckend hohe Preis relativierbar.

Fazit

Das ddrum2 Modell 3 ist zweifellos ein professionelles Instrument. Die beinahe unlimitierte Anzahl der Sounds, die stufenlos einstell bare Dynamik und besonders auch da natürliche Spielgefühl sind absolut überzeugend. Es wäre jedoch falsch, das ddrum als absoluten Ersatz für ein konventionelles Schlagzeug zu sehen: Einerseits gibt es doch diverse Dinge, die mit gesampleten Sounds nicht möglich sind (spielen sie mal ddrum mit Besen!), andererseits steckt in diesem Electronic-Drum-Kit wesentlich mehr als in einem Schlagzeug, es ist wirklich ein eigenständiges, neu zu erlernendes Instrument.

Der Preis von 7900 Franken für eine Grundausrüstung mit Kick, Snare und drei Toms scheint vorerst hoch, doch wird einem im Gegenzug wirklich viel dafür geboten.

Clavia ddrum 2 

Digital Drum Kit


by Nicholas Rowland
First there were Ddrums... Nicholas "animal" Howland returns to his skin-bashing roots to test a Swedish electronic kit that aims to replace its acoustic relative. The latest Ddrum kit claims to be the best electronic imitation of an acoustic drum kit the world has yet seen. Does double D really work wonders?

THEY'RE BLACK AND white with red go-faster stripes, they're built in Sweden and they're designed by the intelligent, to be driven by drummies.

That last word gives you a clue: no, not the latest model to smash its way out of the Volvo factory, but an electronic percussion system from Clavia Digital Musical Instruments AB, better known as the Ddrum 2.

The original Ddrum system was launched a couple of years ago to universal acclaim. At a time when some drum kits still went "pew, pew" and had all the response of a wet fish slapped on cardboard, here was one which sounded and played almost like the real thing. Amazing. Unfortunately, in this country the rumours were the nearest most people ever got to the actual product, since the Ddrums were not only prohibitively expensive, they were extremely difficult to track down.

Having just given a whole crateload over to their current British distributor, Evenlode Soundworks (those nice Steinberg people), Clavia are in the process of launching their number twos, albeit to a world where musicians have considerably higher expectations of electronic percussion. Pad design has improved tremendously across the board; high-quality digital samples are now the norm rather than the exception. Most significantly, the best of current percussion technology offers the same limitless sound creation possibilities which keyboard players have long taken for granted. The Simmons SDX (reviewed MT, April '88) for example, is not far short of a Fairlight triggered by pads.

If RRP's are the determining factor, then the Ddrum 2 system files under "state-of-tne-art" (read, "you and I can't afford it"). But unlike financially comparable systems like the Dynacord ADD-One or the Akai S900, this is one unit which prides itself on not offering boundless creative possibilities - on not giving the player control over every single function and parameter. Hence, since life is short and drummers are often shorter, the heart of the system is the preset sample, which users can manipulate to a certain degree, but not so much that they work up the sweat they should be saving for the live performance.

In other words, the Ddrum 2 is to the SDX, as digital pianos are to synthesisers. While the sound architecture is no less complex, it's dedicated to doing one job very well, rather than a lot of jobs fairly well. "Swedish engineering and smart software matched in simplicity - the ultimate sophistication" runs Evenlode's current advertisement. It's good, but not that good.

What the Ddrum lacks in technical versatility though, it more than makes up for in sheer playability. Quite frankly, this is the nearest that anybody's got to being allowed to add the sentence "the definitive replacement for the acoustic kit" to their advertising campaign. Just play the kits for a while and you'll see what I mean.

Let's talk sordid facts and filthy lucre. The basic Ddrum 2 outfit consists of an eight-channel control unit, one kick, one snare and three tom pads, plus all necessary cables. This will set you back a cool £3215 (including VAT) though you'll have to dig a little deeper to buy some stands. The other thing to remember is that even for this price you'll only get access to 25 sounds, 18 of which are held in the brain's internal memory, the other seven stored on a plugin ROM cartridge. Extra ROM cartridges, containing anywhere between two and 12 sounds (depending on length) are available for £79 a throw, so collect all 11 available so far, and you'll have spent a further £869.

The prices of extra pads and the remote selector (which allows you to change kits at the drop of a stick) quoted below will no doubt provoke a sharp intake of breath. Let me assure you, all the hardware - the pads, brain box, even the cartridge boxes - is of fantastically sturdy construction. If punishing world tours are your bread and butter, they should easily stand up to the gentle touch of Attila the Roadie. However, the opening pages of the manual warn you never to use the electronics or the pads at sub-zero temperatures, so if village halls rather than mega-stadiums are your usual gigs, be warned.
Since the Ddrum 2 is no snip, prospective purchasers are really going to be interested in just how well it does beat ye goode olde acoustick drummes at their own game. I stress again that Ddrums are as damn near perfect as you can get, but with this much money involved, no one would be stupid enough to take my word for it without trying them out for him/herself (would you?).


Sound Abilities


ANY INPUT CHANNEL can have any voice assigned to it, chosen from either of the two internal banks or from any or all of the six cartridges plugged into the slots on the left hand side of the brain's front panel. These voices can then be edited and the results stored as kits in any one of 64 memory locations. Should you need more than this, RAM cartridges or "Kit Pacs" are available, which plug into the cartridge slots too.

The 18 internal sounds are all conventional kit samples and feature four snares, four kicks, six toms, rimshot, tambourine, cowbell and claps. A list in the manual gives precise details of the original source (14"X6½" solid maple wood snare, 22"X16" jazzkick "tuned up", and so on). One cartridge is included with the module, labelled Assorted Percussion 1, and contains a small bell, a 26" tympani, low and high timbales, low and high open congas and conga slap. The sounds, not the actual instruments, you understand.

The other Sound Pacs range from ethnic percussion and cymbals to overtly electronic voices from the TR808 and Simmons SDS5. Most choice is given in the standard kit department with no less than four cartridges devoted to variations on the "snare, kick, toms" theme.

Being rather perverse, I personally preferred the more off-the-wall collections to be found under Metal and Ethnic. Here one could wallow in the delights of 'Large Aga gastube being hit by sledgehammer' or thrill to the merry donk of Tunisian clay drums.

Whatever their original source, all the samples are superbly recorded, two of the best undoubtedly being 'Large Churchbell' and '36" Tamtam', both 15 seconds long and both text-book examples of the devilish art of looping.

Play around with the samples and you realise that the Clavia boffins certainly know their swedes. There are a whole variety of different techniques to edit, process, then store each sample, in order to achieve maximum realism. For example, with the bell and gong just mentioned, it's obvious that the sample start time varies according to dynamic, since the harder you hit it the more attack you get. Many of the snare sounds, too, though they might appear straightforward enough, actually prove to be complex multisamples, which again change very subtly across the dynamic range.

The spec sheet reveals that there are two separate sound generators per channel - in other words, that for each sound two voices are triggered alternately so samples don't cut each other off (the dreaded "machine gun" effect.) But on the longer sounds you can hear how this is also related to dynamics. For example, when you trigger a loud gong or cymbal sound, then play a series of softer strokes, the softer ones do cut each other off while the louder note continues to play over the top. Clever stuff indeed.

Programmability

ENTERING EDIT MODE is a simple matter of hitting the Edit button situated in the programming area of the front panel, selecting a channel, selecting the appropriate parameter and dialling up a value on the large two-character LED display using the control knob. Like every other aspect of this instrument, the editing system has been extremely well thought out with lots of small LEDs to light your programming path.

Decay, Pitch, Amount and Time of Pitchbend, Bass, Treble, Pan and Level are the eight basic parameters. Note that these are programmable for each channel rather than each sound. In other words, whichever sound you assign to a channel, those values will apply. There are no default values associated with each sound. Also every value can be stored as part of each kit combination.

"Sensitivity is much in evidence when Ddrums are used as a Trigger-to-MIDI converter, making it the ideal in MIDI sequencing setups."

Sounds are given two-digit reference numbers. The first number tells you whether the sound is internal or cartridge, (numbers 7 and 8 are internal, while 1-6 refer to each of the cartridge slots). The second (either a number or a letter, depending on how many sounds are stored on the cartridge) represents the sound itself. The Ddrum 2 can automatically tell how many cartridges are plugged in and how many sounds each has and so will only display the numbers of sounds actually available, which makes things easier. However, it's not quite clever enough to tell one cartridge from another, so if the cartridges are swapped round, the programmed reference number might end up recalling a completely different sound or no sound at all. What should have been a mega Chinese gong and churchbell kit, could actually turn out to be two agogos and half a maraca. Just so you don't get mixed up, there's a little box on each Sound Pac so you can write slot numbers down.

Decay can be programmed in steps from 0-31, while pitch is adjustable in steps from 0-96. In the latter case each step represents an eighth of a semitone. (The original recorded pitch of any sound is quoted as "somewhere around 64".) Hence you have a whole octave to play with, which is generally fine if you want to keep the timbre within "realistic" limits. However, if, like me, you enjoy creating more outrageous effects by horribly distorting samples, then you might be a little disappointed.

In the same way, the available pitch-bend settings keep things within the bounds of credulity. Samples can be bent up or down by up to seven "steps", which in this case seems to work out at two-and-a-half tones. In either case, the sound will start out at the higher or lower pitch and then drop or rise to the pitch value as set by the Pitch parameter. Importantly, you're not allowed to go above or below the one octave limit, so samples tuned very high or low can't always have pitch-bend applied.

Pitch-bend is affected by dynamics. In layman's terms: the harder you hit it, the more bent it becomes - this also applies when a channel is triggered over MIDI. One of the Pitchbend Time settings allows you to expand on this further by making the overall pitch of the drum rise or fall according to dynamics. Again, this can be accessed over MIDI, though as before, the amount is still subject to the one octave limit set by the Pitch parameter.

Sounds can be considerably modified by the "tone controls", very active bass and treble filters. Turning up the treble proves particularly useful on bass drum and low tom sounds to simulate the click of the beater or stick against the head.

The Pan function allows each channel to be placed in the stereo field - seven "steps" to either side - and is used in conjunction with the Left and Right outputs on the rear panel. Even if you're using the eight individual outs, this facility proves useful for setting up a separate stereo monitor mix, or even two slightly different mono mixes. Incidentally there's also a Line In socket on the back panel, which could prove useful for adding a click track or a sequencer pattern to the drummer's own studio or stage monitor setup.

The stereo capability of the Ddrum 2 really comes into its own when used in conjunction with a function called Link which allows you to simultaneously trigger sounds from any one of the other seven channels whenever the current one is hit. It can be simply used to double up on sounds, particularly in situations where you'd need to grow another pair of hands or feet; sounds with very fast attacks, with ones with a slow decay to create a much more gut-wrenching effect. Or you can get more creative by, say, assigning the same sound to both "slave" and "master", panning them hard left and right and detuning one against the other in the best tradition of analogue synths.

Since any channel can be both a slave and a master at the same time, you can quickly set up some very interesting networks of interdependent sounds. The manual even recommends slaving a quiet, trebly snare to all the other channels to simulate the snare rattle you get on an acoustic kit. I'll leave you to consider the ironies of this for yourself.

Link is certainly one of the most exciting program functions. It would be even more fun if you could assign more than one slave to a channel. Or indeed if the Ddrum 2 was a 16- rather than an 8-channel unit. But I'll save those gripes for my conclusion. In the meantime let's plug in some MIDI leads.


Link Ability


THE DDRUM 2 has MIDI In and Out, but no Thru. Each channel can receive and send on a separate MIDI channel, and this is programmable for the unit as a whole. However, the MIDI note number for each channel is programmable for each kit, as are program change numbers sent or recognised. Also programmable for each channel in every kit is the Local On/Off function, which when using the Ddrum 2 as a Trigger-to-MIDI converter allows you to select which of its own sounds are to be used in conjunction. When using the module in this way, you can program the Gate Time of each channel to precisely match the sound source you're triggering.

As you've probably gathered by now, the Ddrum responds in much the same way over MIDI as it does when triggered from pads. That sensitivity is also much in evidence when the Ddrums are used as a Trigger-to-MIDI converter, thereby making it the ideal quasi-drum machine in MIDI sequencing setups.

Its application in a recording environment is further extended by a function called Trigger Threshold, which allows you to match the inputs to triggers other than pads, the most obvious use here being to trigger from tape and thereby replace old sounds with new. Even here, the Ddrum 2 manages to retain all the dynamics. I even tried triggering it with a recording of an acoustic snare roll and got an extremely passable result.


Sensibilities


THERE'S NO DOUBT that the Ddrum 2 is a first-rate piece of kit which lives up to all the claims made for it. It sounds good, it plays like an acoustic drum kit, it's easy to use and it's as versatile as it needs to be within its self-imposed brief. I'm sure many drummers will love it. I'm sure many others will see it as a complete waste of time and money. How it fits into your setup depends on your approach to music making and your sympathy for drummers (or, if you're like me, past experience of being one).

Personally, I don't like the idea of paying a fortune for a closed-ended system. Only eight channels? No pitch-bend over MIDI? No tuned percussion as yet available? No possibility of user-sampling those favourite James Brown riffs?

Clavia are the only electronic drum manufacturers who seem to have tapped in to the true mentality of drummers (nay, musicians). The majority don't want an intense relationship with their data entry slider, they just want an instrument which will make them sound good.

If this is your aim (and you're filthy rich) then the Ddrum 2 is for you. As I say, designed by the intelligent to be driven by drummies.

Prices Ddrum 2 5-piece kit £3215; Ddrum 2 brain £2295: Snare pad £235; Tom pad £180; Kick pad £280; 1Mbit Sound Pac £79; Remote Kit Selector £319.

Music Technology - Copyright: Music Maker Publications (UK), Future Publishing.  

ddrums


Electronic Percussion System

by Dan Goldstein


Marketed in the US as E-Drums, these Swedish-built percussion units combine high quality digital samples with immense constructional sturdiness. Dan Goldstein again.

They're DDrums in Europe and E-Drums in the States, but either way, these digitally-sampled percussion modules sound pretty impressive. Dan Goldstein

There can be no denying that digital technology is about to have a drastic effect on the way modern drummers play and sound - if it hasn't done so already. Digital drums enable the advantages of analogue electronic percussion - instantly-repeatable, easily-recorded sounds at a fraction of an acoustic drum kit's setting-up time - to be enjoyed without making analogue's sonic sacrifices. In other words, with digital, you can sound how you like, where you like, when you like. Or so the theory goes.

Background


The DDrum originates in Sweden, of all places, where engineer Hans Nordelius has been busy getting the best out of standard, commercially-available EPROMs and where they are manufactured by one Greg Fitzpatrick. In the meantime, the Swedes have entered into an agreement with E-mu Systems in the States, whereby the latter company has the sole rights to manufacture and distribute Nordelius' design and market it as the E-Drum. However, since no E-Drums will be appearing in the UK, it's probably safe to confine our attention to the Scandinavian variant.

Each DDrum unit is sold with one sound EPROM of the buyer's choice, of which there are some 39 from which to choose - but more about those later. Each unit has a series of front panel controls, these being concealed under a metal lip at the bottom of each pad out of harm's way, though fortunately the corresponding legend for each control is screen-printed on a flat surface at the top of the pad.

The controls are pitch (continuously variable over one octave), sensitivity (just about anything from finger to stick response), pitch sensitivity (whereby pitch can be made to lift depending on how hard the pad is struck), decay (continuously variable from 50mS to the maximum length available on the cartridge being used), and active bass and treble EQ controls. In addition, two pushbuttons take care of sound selection, as some DDrum EPROMs have two or four sounds, depending on the amount of memory space taken up by each sample.

The back panel contains DC mains connections (several DDrum modules may be powered from one mains source by daisy-chaining units together in series), external trigger and CV inputs, the audio out connector, and the all-important cartridge bus connector. Now, I must say the DDrum solution to the problem of how to protect sound chips from the ravages of being transferred from storage to triggering module and back again is just about the most elegant I've seen. Each EPROM is encased in a light, black-painted plastic cartridge box - small enough to be carried around by the dozen yet strong enough to withstand all but the worst rigours of life on the road/in the studio. What's more, changing cartridges takes all of about five seconds, I should think, which is pretty quick by anyone's standards.

Sounds

DDrum cartridges come in three guises: 'B' cartridges, which use 16K EPROMs, 'C' cartridges (32K) and 'D' cartridges (64K), though none of the last-mentioned variety are yet in production. 'B' cartridges are used for the vast majority of samples in the DDrum library, the only exceptions being the orchestral tymp and large gong sounds, which are on Cs.

The 'B' EPROMs give a maximum sample length of 0.6 seconds - not quite long enough to capture the last decaying nuance of sound generated by some percussion instruments (most notably cymbals), but on the other hand, judicious use of the decay control can bring any side-effects down to manageable proportions.

One of the most attractive aspects of the DDrum system is the sheer variety of percussion samples on offer. At the time of writing, these include no fewer than eight different toms, a similar number of cymbals, five snares (with rimshot being an alternative sample on two of them - a nice, logical touch), and a selection of more off-the-wall sounds such as elephant bells, pistol shots and even a bass tone from a Yamaha grand piano.   "The range of available samples includes a selection of off-the-wall sounds such as elephant bells, pistol shots, and even a bass tone from a Yamaha grand piano."


And according to Mark Hickling, DDrums' European marketing manager, the company's engineers are at this very moment working on more samples to expand the range even further. These will include plenty of Latin and ethnic percussion voices, as well as some 'industrial' (for want of a better word) samples such as hammers hitting garbage containers and so-called 'mystery sounds'. The percussionist's mind boggles.

As far as sound quality goes, I can only report that - the odd slight decay time problem excepted - the DDrum samples are some of the best I've yet heard. As I mentioned in last month's Trade Show report, some of the drum voices were recorded with the aid of digital reverberation equipment, which certainly adds a feeling of space to, say, Simmons toms, but even samples that were recorded dry have an uncannily realistic quality about them: all in all, they turn the DDrums into highly desirable units.

The standard bass drum cartridge contains four different (and all highly usable) samples, from a Ludwig 22" acoustic kickdrum to a sampled Linn voice - essentially a sample of a sample, but it sounds great! A conventional-looking bass drum pad, complete with stand and suitable pedal, is available as an option. Meanwhile, some of the less commonly-used percussion voices (the ethnic samples, for instance) look set to add spice to many a drummer's sonic vocabulary, and although the looping techniques employed to obtain the gong sample's seven-second decay time are audibly apparent, many people will still consider its use preferable to carrying around a 16' diameter version of the real thing.

Conclusions


Cost of one DDrum unit in the UK is expected to be in the region of £295, including a 'B' cartridge of your choice, a mounting bracket, and full instructions, while additional 'B' cartridges will be about £59 each, 'C' variants £145. Now whichever way you look at them, those prices are not cheap, but although the cost of one unit is certainly a little on the excessive side, the EPROMs aren't too bad considering the drastic fluctuations in chip supply rates that most of 1984 has witnessed.

In addition to the extensive and expanding range of factory-sampled voices, the Swedes are also in the process of offering a custom recording service that'll enable owners to have a recording of their own percussion sound sampled onto EPROM for about £60, though DDrums are reserving the right to reject users' own samples on sound quality grounds. An exchange service is also in operation whereby if a DDrum owner gets bored with a particular sample, he/she can send it back to Sweden and get a new one put in its place for something like £15, which can't be bad.

Although a complete 'kit' comprising six or more DDrum modules may be beyond the financial reach of many people (though they'll doubtless be of interest to studios and the like), it shouldn't be too long before a number of drummers start adding the odd module or two to complement their existing set-up, especially as changing sounds in a live situation is so straightforward.

In that context, the DDrums are both a revolution and a revelation. Roll on those mystery sounds. Electronics & Music Maker - Copyright: Music Maker Publications (UK), Future Publishing

Die Geschichte von ddrum Clavia 1983 - 2005

Ddrum begann 1983 in Stockholm und ihr erstes Produkt war eine Schlagzeugplatte. Es handelte sich um eine 9" quadratische flache Metallbox mit einer Gummischeibe auf der Oberseite. Wenn man mit einem Schlagstock auf die Scheibe schlug, wurde ein Ton von einem darin befindlichen EPROM-Wechselchip ausgelöst. Die Klänge waren 8-Bit-Samples (nach heutigen Standards von geringer Qualität), aber die Dynamik war großartig und es war das einzige Pad seiner Art. Man darf nicht vergessen, dass der Rest der Welt Simmons-Trommeln verwendete - große sechseckige Plastikpads, die einen sehr einfachen analogen synthetischen Klang auslösten - kaum realistisch.

Ein amerikanischer Unternehmer sah das Percussion-Plate und bestellte 25 Stück. Das Design wurde bereinigt und Ddrum brachte 1984 ihr erstes richtiges Produkt auf den Markt, das Digital Percussion Plate DP1 mit seinem quadratischen Gummipolster und roten Grafiken (von Ddrum bis heute fortgesetzt). Das überarbeitete DP1 hatte einen Kassettenschlitz für die EPROM-Chips, und obwohl jedes Pad nur einen Ton auf einmal abspielen konnte, verkaufte es sich gut an Fachleute, die das Potenzial erkannten (und zu der Zeit war die Technologie nicht billig).

Das erste ddrum kam ebenfalls 1984. Das ddrumRack und das ddrumStudio waren fünfteilige drumsets mit echten Schlagzeugfellen auf den Pads und einem modularen "Gehirn" mit Steckplätzen für acht Soundmodule, die alle in einem hölzernen 19"-Rackgehäuse montiert waren. Die Optik der Kits wurde bis zur ddrum3 beibehalten, und austauschbare Kassetten lieferten die Sounds. Da sie jedoch teuer war, brachte Clavia das ddrumPlus! (komplett mit Ausrufezeichen), ein 6-Kanal-System, das 4 Samples auf jedem Kanal aufnehmen konnte.

Das ddrum2 kam 1986 auf den Markt, und zu diesem Zeitpunkt wurde Ddrum wirklich ernst genommen, als Drummer wie Larry Londin und Jim Keltner begannen, ddrum in der LA-Studio-Szene einzusetzen. Dieses Gerät hatte 8 Kanäle, 16 Stimmen und MIDI und verfügte über einen sogenannten Drumhead-Vibrationsalgorithmus, der den "Maschinengewehr"-Effekt verhinderte, wenn Samples wiederholt ausgelöst wurden. Die Klänge waren nach Geschwindigkeit schichtbar (Geschwindigkeitsüberblendungen) und es konnten SoundPacs (Kassetten mit jeweils 2 bis 20 Sounds) gekauft werden, um die Bibliothek mit weiteren Sounds zu verstärken.

Das ddrumAT war der Nachfolger vom ddrum2, welches nur auf den sich entwickelnden Trigger-Markt abzielte. Es wurde 1990 herausgebracht und war das einzige ddrum-Gehirn, das nicht im traditionellen Rot war. Ddrum-Trigger wurden dafür herausgebracht und diese wurden zum Industriestandard (und viele würden argumentieren, dass sie es auch heute noch, 30 Jahre später, sind).

Der Big Daddy von allen kam 1993 mit dem ddrum3. Es handelte sich zu dieser Zeit um ein immens leistungsstarkes Gerät, obwohl es mit 4 Megabit Speicher im Vergleich zur heutigen Zeit bescheiden war. Die Trigger-Schnittstelle hatte die schnellste Reaktionszeit aller Geräte (einschließlich aller modernen Geräte) von 1,5 Millisekunden. Die Pads waren nicht nur unglaublich empfindlich (1000 Stufen im Vergleich zu 127 bei den meisten heutigen Geräten), sondern sie waren auch positionssensitiv und konnten sowohl erkennen, wo das Pad getroffen wurde als auch wie stark. Es konnte über seine digitalen Eingänge aufzeichnen (hatte aber keinen direkten Abtasteingang) und verfügte über ein Flash-Speichersystem zum Speichern und Laden ganzer Kits. Man konnte seine eigenen Samples von einem Computer über MIDI einlesen, und die Klangqualität war atemberaubend. Das Gehirn war rahmenmontierbar und JEDE große Tournee der Zeit hatte eines in den Schlagzeugregalen. Die Heavy-Metal-Drummer haben sich sehr stark auf ddrum eingelassen, als sie merkten, dass sie ihre schnellen Double-Kick-Patterns sehr leicht auslösen und die Elektronik groß, fett, laut und gleichmäßig klingen lassen konnten. Es ist auch das einzige Kit, das man in einem Studio mitnehmen kann und es GENAU wie ein Akustik-Kit klingen lassen kann, was genau der Grund dafür ist, dass so viele Profis ein solches Kit hatten/haben. Es klingt nicht groß und verarbeitet, sondern einfach wie ein echtes Kit mit Mikrofonen darauf. Wenn Sie eines davon haben - behalten Sie es!

Die ddrum4 wurde in den späten 90er Jahren veröffentlicht und war ein verkleinertes ddrum3. Man kann immer noch seine eigenen Samples laden, und das Triggering ist immer noch hervorragend, aber Clavia geriet mit ddrum zu diesem Zeitpunkt hinter der Konkurrenz zurückzubleiben - das Modul hatte keinen Klick, keine Backing Tracks und keine Pfeifen und Glocken, was genau der Grund ist, warum die Profis sie weiterhin kauften, aber die breite Öffentlichkeit mehr wollte. ddrum lieferte später Mesh Head Pads die vom Schweizer Distributor unter der Marke Tdrum / Triggerhead 1999 auf den Markt kamen. Darauf lancierte Calvia die billigeren Redshot Trigger.

Mit den neuen Besitzern der Marke ddrum werden wir also schauen, was passiert, aber eine Ära ist definitiv vorbei. Werden die neuen Besitzer versuchen, mit der neuen Art von E-drums zu konkurrieren? Wird die Marke aus dem Blickfeld verschwinden? Wird ein neuer Name aus den USA auftauchen und den Markt beherrschen? Wer weiß das schon? Es dürfte interessant werden.

Geschriebene Geschichte mit freundlicher Genehmigung von John Williams (2005)

The History of ddrum / Clavia 1983-2005


Ddrum started in 1983 in Stockholm and their first product was a Percussion Plate. This was a 9” square flat metal box with a rubber disk on the top. When you hit the disc with a drum stick, a sound was triggered from an EPROM removable chip inside. The sounds were 8 bit samples (low quality by today’s standards) but the dynamics were great and it was the only pad of its kind. You have got to remember that the rest of the world was using Simmons drums – big hexagonal plastic pads that triggered a very basic analogue synthetic sound – hardly realistic.

An American entrepreneur saw the Percussion Plate and ordered 25 pieces. The design was cleaned up and Ddrum launched their first proper product, the Digital Percussion Plate DP1 with its square rubber pad and red graphics (continued by Ddrum to the present day) in 1984. The revised DP1 had a cartridge slot for the EPROM chips and despite each pad only being able to play one sound at a time, it sold well to professionals who could see the potential (and at the time the technology was not cheap).

Ddrums first kit came in 1984 too. The ddrumRack and ddrumStudio were five piece kits with real head pads and a modular ‘brain’ with slots for eight sound modules, all mounted in a wooden 19” rack case. The kits visuals were kept right up until the Ddrum 3 and replaceable cartridges provided the sounds. However it was expensive so Ddrum released the ddrumPlus! (complete with exclamation mark) which was a 6 channel system which could hold 4 samples on each channel.

The ddrum2 came in 1986 and this is when Ddrum got taken really seriously as players like Larry Londin and Jim Keltner started to use them in the LA studio scene. This unit had 8 channels, 16 voices and MIDI and featured something called Drumhead Vibration Algorithm which prevented the ‘machine gun’ effect when samples were repeatedly triggered. Sounds were layerable by velocity (velocity crossfades) and SoundPacs (cartridges with 2 to 20 sounds each) could be purchased to increase the sounds.

The ddrumAT was a version of the ddrum2 which was just aimed at the triggering market which was taking off. This was released in 1990 and was the only Ddrum brain which wasn’t in the traditional red. Ddrum triggers were released for it and these became the industry standard (and many would argue that they still are today, 15 years later).

The Big Daddy of all came in 1993 with the ddrum3. This was an immensely powerful unit that would still be selling well today if it were still produced. The trigger interface had the fastest response time of any unit (including all the modern units) of 1.5milliseconds. Not only were the pads incredibly sensitive (1000 levels in comparison with 127 on most units today) but they were also positionally sensitive and could tell where the pad was hit as well as how hard. It could record over its digital ins (but had no direct sampling input) and had a flash memory system to save and load whole kits. You could load your own samples in from a computer via MIDI and the sound quality was stunning. The brain was rack mountable and EVERY big tour of the time had one in the drum racks. Heavy metal drummers got into Ddrum in a big way when they realised they could trigger their ridiculously fast double kick patterns very lightly and allow the electronic to make it sound big, fat, loud and even. It is also the only kit you can take in a studio and make it sound EXACTLY like an acoustic kit, which is precisely why so many pros had/have one. It doesn’t sound big and processed, it just sounds like a real kit with microphones on it. If you have one of these – keep it.

The ddrum4 was released in the late ‘90’s and is (was) a scaled down ddrum3. You can still load your own samples and the triggering is still superb but ddrum began to get behind the competition at this point – the brain had no click, no backing tracks and no whistles and bells, which is exactly why the pros continued to buy it but the general public wanted more. Ddrum provided mesh head pads later and also cheaper triggers (the Redshots) but it would appear that sales were going to the DTX’s and Vdrums.

It would appear that ddrum and Armadillo are continuing product support for the products so I wouldn’t worry if you have recently bought one – in fact, go and buy one if you find one as they are very reliable and road worthy and they should last 10 years or so (I know a few guys who have ddrum3 kits who would sell them for the world and who haven’t had a problem since 1993 – how many modern kits can you say that about?). The ddrum4 is excellent for triggering and sounds if you can do without the flashy extras.

So, with new owners for ddrum, we will look and see what happens but an era has definitely passed. Will the new owners try and compete with the new breed of kits? Will the brand disappear from view? Will a new name appear from the US and corner the market? Who knows? It should be interesting.

Written history courtesy of John Williams (2005)  

USER MANUAL

ddrum4 SE

SOFTWARE VERSION 1.SX

IMPORTANT SAFETY INSTRUCTIONS

SAVE THESE INSTRUCTIONS


Warning - When using electric products, basic precautions should always be followed, including the following:

1. Read all the instructions and observe the graphic symbols above before using the product.

2. Do not use this product near water - for example near a bathtub, washbowl, kitchen sink, in a wet basement, near or in a swimming pool, a swamp or the like.

3. This product should be used only with a cart or a stand that is recommended by the manufacturer.

4. This product, either alone or in combination with an amplifier and headphones or speakers may be perfectly capable of producing sound levels that could cause permanent hearing loss. Do not operate for a long period of time at a high volume level or at a level that is uncomfortable. If you experience any hearing loss or ringing in the ears, you should consult an audiologist.

5. The product should be located so that its location or position does not interfere with or obstruct it s normal flow of ventilation.

6. The product should be located away from heat sources such as radiators, heat registers or other products that produce heat.

7. The product should be connected to a power supply only of the type described in these operation instructions or as marked on the product.

8. The power supply cord of the product should be unplugged from the outlet when the product is left unused for a lang period of time.

9. Care should be taken so that objects do not fall, or liquids are not spilled into the enclosure through openings.

10. The product should be serviced by qualified service personnel when:

A. The power supply cord has been damaged; or
B. Objects have fallen or liquids have been spilled onto the product; or
C. The product has been exposed to rain; or
D. The product does not appear to operate normally or exhibits a marked change in performance ; or
E. The product has been dropped or the enclosure has been damaged.

11. Do not attempt to service the product beyond those means described in this operating manual. All other servicing should be referred to qualified service personnel.

Copyright by Clavia DMI AB, 2003

1 • INTRODUCTION


WELCOME!
We would first like to congratulate you on your purchase of the ddrum4 SE system! The ddrum4 system has been on the market a few years already and has become the choice of many professional and amateur drummers. With the ddrum4 SE system Clavia introduces the Signature Edition of the ddrum4 system, with multi-sampled instruments from Simon Phillips, Dennis Chambers, Kenny Aronoff and Mel Gaynor and a lot of other nice features!


ABOUT THIS MANUAL
Please read it. lt contains a lot of useful information. The first section contains the necessary information for connecting your system parts. The reference section contains information regarding all the functions of the ddrum4. Every time this manual refers to a physical object on the ddrum4, a button on the panel, an indicator LED etc., it will be printed LIKE THIS, e.g. Press the SYSTEM button.

READING THE MANUAL IN ADOBE ACROBAT READER
This manual is also available in the digital PDF-file format. lt can be downloaded, free of charge, from Clavia's web site at http://www.clavia.se. When reading the manual as PDF-file, you will need Adobe Ac­ robat Reader 4.0 or later. This program can be downloaded, free of charge, at http://www.adobe.com. With Adobe Acrobat Reader it is possible to use special navigation features like hyperlinks. This means that you can dick with the mouse on a word or sentence and automatically get to the location indicated by the word/sentence. To better show what words or sentences are hyperlinked in this manual, these words are written in magenta.

ABOUT THE DDRUM4 SE SYSTEM
The ddrum4 SE system is a 10 channel percussion system. One channel can hold one sound, e.g. channel 1 could be the kick drum, channel 2 the snare etc. The sounds are digitally reproduced with the propri­ etary ddrum sound engine. The sounds have been carefully selected and edited by the Clavia crew. All the sounds in the ddrum4 SE have been edited and stored using a unique method. The intelligent play­ back engine eliminates machine gun effects during rolls and other unwanted artifacts that are typical in other electronic drum systems.

DDRUM4 MEGA DRUMKITS SIGNATURE SERIES SOUNDS
The major part of the ddrum4 SE drum sounds are built up with a lot of samples (multi samples) in order to produce a more realistic simulation of how an acoustic drum sounds when struck with different veloc­ities. The ddrum4 SE features sounds played and recorded by the famous drummers Simon Phillips, Dennis Chambers, Kenny Aronoff and Mel Gaynor! "Dynamics" is one of the keywords describing the functionality of the ddrum4 SE. lt is designed to make available every acoustic nuance of the drum sounds. The dynamic sound possibilities of the ddrum4 SE are one of its major features compared to sam­ plers and ROM based playback machines.


THE PADS
The pads come in two different models. The Cast Precision Pads feature real drum heads. The Cast Pre­ cision Pads also detect pressure and position (Where on the pad you strike). They are also dampened for more quiet acoustic noise. The other model is the Cast Precision Mesh Head Pads which feature a "silent" web drumhead for minimum acoustic noise. To minimize the acoustic noise even more, the rim hoops are rubber coated. Both pad models are assembled in conjunction with a cast aluminum shell. The feel of the pads is as important to the overall function of the ddrum4 SE system as the sounds themselves.

THE CAST CYMBAL & CAST HI-HAT
The Cast Cymbal offers both bell and ride zones. Since they are also chokeable you can either choke them with your hand or with the drumstick itself. The Cast Cymbals are füted on a special spring to make them feel like acoustic cymbals. The innovative hi-hat triggering interface and the Cast Hi-hat makes it possible to play with a continuous three-way action, foot, open or closed sounds. The playing response is as close as you can get to the "real thing". The Cast Cymbal and the Cast Hi-hat's playing surface is rubber coated metal for the right feel.


EXPAND YOUR SOUND LIBRARY
At the Clavia web site (http://www.clavia.se), you will find more sounds (free of charge) to download to your ddrum4 SE. These sounds are in the MIDI file format. Use the ddrum4Tool program (PC) to listen to the sounds and to download them to the ddrum4 SE brain. The ddrum4Tool program is included on the CD ROM that comes with the ddrum4 SE module. You could also open the MIDI files in a standard MIDI sequencer, and download them to your ddrum4 SE as standard MIDI Sysex files.

2. OVERVIEW


THE LEFT FRONT PANEL SECTION

The front panel is divided in two sections. To the left side you see the channel slots with the CHANNEL
buttons, the PALETIE select buttons and the INPUT SENSITMTY knobs.

You can play the sounds by pressing the CHANNEL buttons. They are not velocity sensitive but you can program the velocity level that they should use to play the sounds (see "Button" on page 23).

The CHANNEL buttons are also used for selecting channels when you wish to edit the sounds or the func­ tions of the channels. The LED above the channel buttons flashes when a channel receives a trig signal and is continuously lit when a channel is selected for editing. You can only select one channel at a time for editing purposes.

THE RIGHT FRONT PANEL SECTION

To the right you have the edit section with the edit buttons, the ROTARY DIAL, the SYSTEM INDICATOR bar, the DISPLAY and the MASTER LEVEL control.

The SYSTEM INDICATOR bar will show activity when you are playing. This is an indication that the ddrum4 is not subject to any editing and it displays an approximation of the volume of the sounds. Ifyou trigger a channel that has no sound, the system bar will not indicate anything. The system bar will also under certain circumstances help you to set the proper input sensitivity level.

If the display shows a 'P.' or 'F.' followed by a number, then the ddrum4 SE is in the Kit mode. Ifthe display shows 'PAL' then the ddrum4 SE is in the Palette mode. You can always press the PALETTE but­ tons repeatedly to select different sounds from the four main channel groups, kick, snare, toms and per­ cussion, no matter if the ddrum4 is in the Kit or Palette mode.

The MASTER LEVEL knob affects the line level outputs Al, A2 and the PHONES output. Note that the Master Level control does not send or respond to MIDI Volume (CC#7). Please refer to "Opt/MIDI Volume" on page 22 for information on how to control the ddrum4 SE volume via MIDI.

THE REAR PANEL

The rear panel contains all the TRIGGER INPUT, audio ÜUT and HEADPHONES jacks, the MIDI con­ nectors and the POWER SWITCH. The ddrum4 SE outputs are unbalanced line level.

The ten TRIGGER INPUTS for the pads or external triggers correspond to each sound channel. They are identical in function except for the following:

• Inputs 1, 2, 8 and 9 are capable of detecting pressure sensitivity. Ifyou have pads that can transmit pressure, connect them to these inputs.

• Input 10 is also capable of detecting pressure sensitivity but only with the special ddrum Hi-Hat. This input has a special stereo jack connector, but it may be used with any other pad or trigger source for ordinary triggering.

Tip! Pressure can he very useful ifyou want to play a tabla sound and change the pitch with your hands, or to choke a ddrum Cymbal. Note that the pressure sensitivity function only works with Cast Precision Pads, ddrum Cymbal and ddrum Hi-hat - not with the Cast Precision Mesh Head Pads.

3. SETTING UP


CONNECTIONS

1. Make all the connections before turning on the ddrum4 SE. Turn on the ddrum4 SE module with the MASTER LEVEL knob at 0.

2. Connect the pads to the ddrum4 SE module according to the illustration below.

Kick Snare Rim Tom High Tom Mid Tom Low Perc Cymbal Cymbal Hi-hat

3. Connect the main outputs, marked A1 and A2 on the ddrum4 SE rear panel, to a suitable sound sys­tem. If you'd rather use a pair of headphones, a headphones jack has been provided. The MASTER LEVEL knob lets you adjust the output volume of the HEADPHONES output and of the line level out­ puts Al and A2. The line level outputs B3 to B6 are not affected by the MASTER LEVEL knob.

4. Connect the mains cable and power-up your system in the following order: ddrum4 SE - mixer - amplifier.

The very first thing that will appear in the ddrum4 SE DISPLAY is the software version number. After a brief moment, 'PAL' will appear in the DISPLAY. This indicates that the ddrum4 SE is in the Palette mode.

SETTING UP THE INPUT CHANNELS

The ddrum4 SE module can be used with a variety of pads. After you have-connected the pads of your choice, please proceed with the following procedure. When shipped from the factory the ddrum4 SE is set to kick (bAS) trigger on the kick challnel, rim (rin) trigger on the rim channel, pad (PAd) trigger on the tom and percussion channels, cymbal (CYb) trigger on the cymbal channel and hi-hat (HHt) on the hi-hat channel. Ifyour ddrum4 SE was shipped with ddrum Cast Precision Pads, you do not have to change the settings. If your ddrum4 SE system was shipped with the Cast Precision Mesh Head Pads the snare, toms and percussion channels should be set to mesh head 1 (nh1).

SELECTING TRIG INPUT TYPE

1. Press the SYSTEM button. The first segment of the SYSTEM INDICATOR bar will light up. (If not, press the SYSTEM button repeatedly until the TRIG INPUT segment of the SYSTEM INDICATOR bar lights up or hold the SHIFT button and press the SYSTEM button to scroll backwards).

2. Press one of the CHANNEL buttons, e.g. the KICK button. This will trigger a sound and it will also select the channel for editing. This is indicated with a steady light from the kick CHANNEL LED. You can also select a channel by hitting a pad, however once you select a channel by pressing a chan­ nel button, the pad select is disabled. To enable it again, press ExIT and go back to edit mode.

3. The DISPLAY will indicate the Trig Input type of the selected channel. Ifyou turn the ROTARY DIAL, you will scroll through the possible Trig Input types that are implemented in the ddrum4 SE. These Trig Input types have their respective characteristics and by selecting the most appropriate for each channel, the ddrum4 SE will perform at its best. Please refer to "Trig Input" on page 18 for more details regarding the trigger options.

4. To select another channel for editing, just press any other CHANNEL button. A steady CHANNEL LED light will indicate which channel is selected for editing. Ifyour ddrum4 SE system was shipped with the Cast Precision Mesh Head Pads the snare, toms and percussion channels should be set to Trig Input type 'mesh head l ' (nhl).


5. To leave the System mode, press the ExIT button.

ADJUSTING THE INPUT SENSITIVITY


1. Choose the Trig Input option from the system menu by pressing the SYSTEM button until the TRIG INPUT segment of the SYSTEM INDICATOR bar lights up. Select the channel you want to adjust by pressing the corresponding CHANNEL button. Hit the pad (not the channel button) and look at the CHANNEL LED, located above the (selected) channel button. lt will dim briefly when the channel receives a trig signal. In this System mode, the SYSTEM INDICATOR bar will indicate the trig input level.

SELECTING TRIG INPUT TYPE bAS

2. Adjust the trig input level with the INPUT SENSITITY knobs. Turning the INPUT SENSITIVITY knob clockwise will make the trig input more sensitive. You should adjust the INPUT SENSITIVITY knob so that the top segment of the SYSTEM INDICATOR bar lights up lights up only during the hardest hits.

ADJUSTING THE INPUT SENSITIVITY

IMPORTANT! The sensitivity settings are crucial to the general feel and sound of your ddrum4 SE system. Dynamics is what it's all about. Take your time and adjust the sensitivity to your playing style. Do this on a good sound system if you can, in order to really hear what's going on. Do not use the INPUT SENSITMTY knobs as a volume controls. Controlling the dynamic range and con­ trolling the volume of the ddrum4 SE are two completely different things. The INPUT SENSITIVITY knob's settings are not stored in the ddrum4 SE's memory.

IMPORTANT! Make sure the dynamic curve setting for each of the channels is set to 'O' (recom­ mended) and definitely not to 'OFF' (this will spoil your sensitivity settings)! Please refer to "Dyn" on page 20 for more info on how to set the dynamic curve.

SETTING THE THRESHOLD


This is helpful if you find that, e.g. one of your tom pads triggers the other toms as well or that the kick triggers the snare. You then need to adjust the trigger threshold value.

1. Press the SYSTEM button twice (or repeatedly) to select the THRES segment of the SYSTEM INDICATOR bar.

2. Let's say that your toms are also accidentally triggering your snare. You would need to raise the threshold value of the snare channel. Select the snare channel for editing by pressing the snare CHANNEL button.

3. Adjust the threshold value of the snare with the ROTARY DIAL while playing the tom pads. Increase the threshold value until the toms no longer trigger the snare. The higher the threshold value, the less chance of a weak trigger pulse triggering that channel. The default value is 15 for all channels except for the snare channel which is set to 10.

The three things that we have selected and adjusted here: Trig Input type setting, Input Sensitivity and trigger Threshold, are vety important to get the right feel when playing the ddrum4 SE system. You might want to go back and adjust these settings later on but there is no need for doing this every time you want to play. The system selections that you have made (trigger input selection and threshold) are auto­ matically stored in ddrum4 SE until you decide to change them.

There is another parameter called DYN, which can be used to set a dynamics curve for each input. Please refer to "Dyn" on page 20 for more details about the dynamic response curves.

4. KITS & SOUNDS

PALETTE MODE

When you switch on the ddrum4 SE module, it will default to the Palette mode, indicated by 'PAL' in the DISPLAY. Each one of the four main instrument groups, Kick, Snare, Torus and Percussion has a PAL­ ETTE button with which you can quickly choose one of five sound setups. You can also program your own selection of sounds in the Palette. See Chapter "6. Panel reforence" on page 18 and onwards, for more details regarding programming.

Press the PALETTE buttons repeatedly to scroll through the five selections that are available for the differ­ent instrument groups.

IMPORTANT! All editing is automatically stored in the Palette memory. Please be careful when you start to explore the different possibilities and parameters of the ddrum4 SE module. Ifyou do this while being in Palette mode, the ddrum4 SE will store every changes you make. Until you are familiar with the ddrum4 SE parameters, do your exploring in Kit mode instead (See below).

KIT MODE

If you turn the ROTARY DIAL clockwise from the Palette mode, the DISPLAY will change from 'PAL' to a 'P.' or an 'F.' followed by a number. This is the Kit mode. The number identifies the 99 different drum kits that are available in the ddrum4 SE module. Keep turning the ROTARY DIAL to scroll through the kits. You can program your own selection of sounds in the 'P.' kits, numbered from 1 to 26. The kits that are in the memory locations 27 to 99, indicated with an 'F'. and a number in the display, are the ROM factory kits. The factory kits can be edited but you can only store any edits or sound selections to the 'P.' (1-26) kits.


THE FACTORY PRESETS


The ddrum4 SE comes from factory with the following line-up of kits:

• Kits Pl-P5 all have long decaying tom sounds

• Kits P6-P10 holds toms with shorter decay times and are intended mainly for use live.

• Kits Pl 1-Pl5 holds "latin percussion" kits

• Kits P16-P20 contains sounds for different kind of percussion purposes

• Kits P21-P26 all contain "mixed" styles of kits

• Kits F27-F99 holds different types of drums that can be used as base for creating your own custom drum kits. You can then store your kits in any of the P l-P26 memory locations (see "Storing your kit" )

SELECTING SOUNDS


To select/change sound for each channel, do like this:

1. Press the SOUND button.

2. Select a channel by pressing a CHANNEL button.

3. Select a sound by turning the ROTARY DIAL. As you turn the ROTARY DIAL, the sound numbers are shown in the DISPLAY. When selecting sounds the SYSTEM INDICATOR bar indicates to which sound group the selected sound belongs. There are 10 sound groups (categories) in the ddrum4 SE module: Kick, Snare, Rim, Tom, Percussion, Cymbal, Hi-hat, Effects, Assorted and Dump. Ifyou want to jump directly to another sound group, hold down the SOUND button and turn the ROTARY DIAL.

4. Repeat the procedure from step 2 above for the other channels.

For information on how to edit sounds, please refer to "Sound functions".

STORING YOUR KIT


As previously mentioned, all editing that you do while the ddrum4 SE is in the Palette mode is automat­ ically stored. In the Kit mode, however, you have to manually store your edits. You can only store edits in the first 26 kits, the 'P. l' to 'P.26' kits. When you have edited anything in a kit, a dot appears after the kit number, e.g. 'P. l.'

This is to alert you that the edit(s) has not been stored. Ifyou were to select another kit, the edit would be lost and the edited kit would return to the way it was. To store a kit, do like this:

1. Hold the SHIFT button and press the KIT STORE button. In the DISPLAY the 'P.' will begin flashing and you will be able to choose a kit location (a number) to store your edited kit to.

2. Choose a kit number by turning the ROTARY DIAL. If you like to overwrite the edited kit, go straight to step 3.

3. Confirm your intent by pressing SHIFT and KIT STORE again. If you change your mind, abort by pressing ExiT (don't press the SHIFT button this time).

IMPORTANT! Storing an edit to memory location will permanently overwrite the kit currently in that memory location. Ifyou run out of memory locations to store to, you might want to dump the entire system setup, all the kits, settings etc. to an external MIDI device (a sequencer or a computer) using the dump function. See page page 23 for more details.

5. Good DRUMSOUNDS

ABOUT YOUR SOUND SYSTEM

Since the ddrum4 SE is an electronic drum system it's totally dependent on a good sound system. Since all of the ddrum4's sounds have been recorded in the best studios, you will obtain the best results using good quality amplification. The sounds coming from your ddrum4 SE will only sound as good as the sound system you are playing them through.

We recommend a full-range sound system that is capable of reproducing all sounds as clear, strong and uncolored as possible. PA-systems, studio monitors with good amplifiers and systems specifically de­ signed for electronic drums belong in this category. The attack portion of drums and percussion sounds are very rich in transients, thus requiring a powerful and fast power amplifier to sound good (not the same thing as loud). Do not underestimate the effect and speed requirements of the power amplifier used with your ddrum4 sound system.

A hi-fi system can be used and will probably sound quite good at low volume levels. There is however a risk that the ddrum4 SE could cause serious damage to a hi-fi system, so we do not recommend using one.

Guitar and bass amplifiers are optimized to reproduce guitar and bass sounds and typically do not work well with percussion sounds.

HEADPHONES

Choose headphones with high sensitivity. Your ddrum supplier can probably help you to select a good headphones model.

MIXER

The ddrum4 SE outputs are unbalanced line level. Please connect these only to the appropriate inputs on a mixer. Avoid microphone inputs. To much amplification in the inputs (as in microphone inputs) may lead to a distorted sound.

6 . PANEL REFERENCE

SYSTEM FUNCTIONS

The System functions are active for editing when the SYSTEM LED is lit.

1. Select a system function by pressing the SYSTEM button repeatedly until the desired function is shown by the corresponding segment of the SYSTEM INDICATOR bar. Press the SHIFT button together with the SYSTEM button to scroll backwards.

2. Select the channel that you wish to edit by pressing one of the CHANNEL buttons. You can also select a channel by hitting a pad, however once you select a channel by pressing a CHANNEL button, the pad select is disabled. To enable it again, press ExIT and go back to edit mode.

3. Edit the selected System parameter with the ROTARY DIAL. The current value or function will be indicated in the DISPLAY.

4. Choose another system function, if desired, with the SYSTEM button or another channel with one of the CHANNEL buttons.

5. To exit the system functions, press ExIT.

There is no need to manually save or store the parameters of the system functions menu. Every change you make is automatically stored.


TRIG INPUT

Here you select Trig Input type separately for each trigger input channel:

'bAS': Use with the ddrum Cast Precision and Cast Precision Mesh Head Kick pad.

'PAd': This is the one to use when playing ddrum Cast Precision pads with sticks.

'rin': The ddrum Cast Precision and Cast Precision Mesh Head Snare pad has a special rim sensor. Use this trig input type if a channel is triggered from the rim sensor.

'AcP': Use this with the ddrum Cast Acoustic pads.

'Hnd': Select this if you want to play on the pads with your hands.

'Ac1 ': Use this one if you are using an acoustic snare drum together with a ddrum Trigger microphone.
Ifyou get multiple trig signals, tty and raise the threshold value for the channel or select 'Ac2'.

'Ac2': This one is slightly less sensitive than 'Acl '. Tty this one if you are using a ddrum Trigger micro­ phone mounted on acoustic toms or kick drums.

'Ac3': This is the least sensitive "acoustic" trig input type. lt is designed for triggering long, sustained acoustic drum sounds using a ddrum Trigger.

'Cyb': Use this one if you are a ddrum Cymbal.

'nh1-3': Select one of these if you're playing on acoustic drums füted with mesh head and triggering with ddrum Trigger. Use 'nh l ' for small heads, 'nh2' for medium and 'nh3' for large heads. Ifyour ddrum4 SE system was shipped with the Cast Precision Mesh Head Pads the snare, toms and percussion channels should be set to mesh head 1 (nh1).

'HHt': This should be used if you're using the ddrum Hi-hat. The ddrum Hi-hat must be connected to trigger input number 10 on the ddrum4 SE module to work as intended. When you're using a ddrum Hi-hat for the first time, and select the 'HHt' trigger type, the ddrum4 SE module needs to be calibrated to the Hi-hat. While in Trig Input mode (in the System menu) for channel 10, loosen the clutch from the hi-hat rod, let the clutch slide all the way down and then hold Shift and press Exit. The DISPLAY will confirm the calibration by briefly showing 'CAL'. Ifyou connect another ddrum Hi-hat or change the clutch, you will have to recalibrate.


THRES

The threshold prohibits weak or stray trigger signals from triggering a channel. Ife.g. your toms trigger the snare as well or if your monitor speakers are loud enough to actually trigger sounds, increase the threshold value on the channel that receives external triggering. The higher the threshold value, the less sensitive the channel becomes. Change the threshold value by turning the ROTARY DIAL.

Values: 1 - 100, the default value is 15, except for the snare channel which is 10.


DYN

This function lets you adjust the dynamics response curve for each channel. The number indicates one of the dynamic response curves. The default value is 0, which is a linear type of curve. By turning the ROTARY DIAL counter-dock:wise, a negative number appears, indicating that medium-soft to medium­ hard hits will be less pronounced. Ifyou turn the ROTARY DIAL all the way back, the DISPLAY will show 'OFF', meaning the dynamics response curve is totally deactivated. In 'OFF' mode, all sounds appear at 75% velocity level regardless how hard or soft you play. This could be useful if you want your playing to sound static. Turning the ROTARY DIAL dock:wise will select the positive curves, where medium-soft to medium-hard hits will be more pronounced (see the figure below).

NOTE: Ifyou set the dynamic curve to 'OFF' it could be wise to raise the Threshold value for the channel(s) to prevent accidental triggering (see "Thres" on page 19).

Values: OFF, -15 - 0 - 15.

trigger level max
linear dyn curve (preset)
neg. dyn curve (-15)
min to max  striking force

OUT A

This is where you position a channel in the stereo image at the outputs Al and A2, like a pan-pot on a mixer. You can pan each channel individually. The stereo image stretches from 1.00 (full left) via 1.50 (center) to 2.00 (full right) (see the figure below). There are 25 steps to either side of the center position. By turning the ROTARY DIAL all the way counter dock:wise you may switch off a channel from the A outputs, by selecting 'OFF'.

Values: OFF, 1.00 - 2.00.

Sound

OUT B

Here you can assign and set the panning of a channel to the outputs B3, B4, B5 and B6.You could con­ sider this function a pan control between four outputs rather than the normal two. Ife.g. you would like to send one channel to a separate input on a mixer, set Out A of that channel to OFF, raise the Level B parameter (see page 27) to anything above 0 and set the Out B parameter to any integer. A value of 3.00 corresponds to output B3 only, a value of 3.50 makes the channel present equally in both of the B3 and B4 outputs, a value of 4.00 is output B4 only etc. (see the figure below). Change the pan setting for each channel with the ROTARY DIAL.

Values: OFF, 3.00 - 4.00 - 5.00 - 6.00


SOUND TO LEVEL B  -  OUT B3 / B4 / B5 / B6

NOTE #

Here you can set the MIDI Note number that each channel is transmitting and responding to. MIDI Note number 60 (middle C) is equivalent to C4 in the ddrum4. Ifyou press the Shift button, you will get a numerical read-out in the display instead of the "musical" note value. The sharp notes (F#, C# etc.) are indicated by a small square in the display. Select Note numbers for each channel with the ROTARY DIAL.

Values: C-1 - G9 or 0 - 127

NOTE P

Here you set the "note position" of the channel. Sounds that can be triggered utilizing position sensing will transmit the note number selected with the 'Note #' above at its "center position". Depending on the 'Note P' setting, the range from the center to the edge on the pad, will be transmitted as 1, 2, 4 or 8 con­ secutive MIDI note numbers, starting from the selected 'Note #'. Asnare that sounds different depending to where on the pad you strike will transmit that particular information as different MIDI note numbers. This means that when you play multisampled sounds across the head, the playing information is record­ able into a MIDI sequencer as separate MIDI Note numbers. Select Note position number for each chan­ nel with the ROTARY DIAL.

IMPORTANT! The Hi-hat channel needs all 8 note numbers so leave its setting at 8!

Values: 1, 2, 4, 8.


OPT/MIDI VOLUME

The Option function is used to set (or view) the overall MIDI Volume. MIDI Volume is useful mainly when controlling the overall volume of the ddrum4 SE module from an external MIDI application such as a sequencer. The MIDI Volume setting affects all six ÜUT jacks as well as the HEADPHONES output and is transmitted and received as MIDI CC#7. Change the MIDI Volume with the ROTARY DIAL. Note! When you restart the ddrum4 SE module, the MIDI Volume will default to '127' (max volume).

Values: 0 - 127

BUTTON

Here you can set the velocity that the CHANNEL buttons should use to trig the sounds. This is helpful for checking sounds at different velocities without pads. Remember that the ddrum4 SE sounds are extreme­ ly velocity sensitive and to judge the quality and playability of a single sound, you need to hear it triggered at various velocities. Select velocity value with the ROTARY DIAL.

Values: 1 - 127

MIDI

The MIDI function has several modes. You step through these modes by pressing the SYSTEM button repeatedly. To step backwards, hold SHIFT and press the SYSTEM button.

C1 - 16
Here you select the MIDI channel that the ddrum4 SE should use for transmission and reception of MIDI data. Select MIDI channel with the ROTARY DIAL.

P.ON, P.OF, P.TH
This function allows you to choose whether the ddrum4 SE shall receive and transmit MIDI Program Change messages or not. 'tH' is the Thru mode where any incoming Program Change messages are im­ mediately throughput to the MIDI OUT jack. Please refer to "MIDI Program Change messages" on page 33 regarding how the ddrum4 SE interprets these messages. Select mode with the ROTARY DIAL.

L.ON, L.OF, L.PD
This is the MIDI Local Control function. lt is used if you are transmitting MIDI data to a sequencer, an external sound source or a computer. IfLocal is switched off, it prevents the pads (trigger inputs) from playing the internal sounds directly. The MIDI data will only be transmitted through the MIDI OUT jack. To hear yn urself playing, make sure that the sequencer or computer is echoing the MIDI notes back to the MIDI input on the ddrum4 SE. lflocal is switched on, this could cause double trigging and flam­ ming when the MIDI notes arrive back at the MIDI IN jack and trigger the sounds again. The 'pads dis­ abled' mode (L.Pd), can be used if the ddrum4 SE is only played via incoming MIDI. The trigger interface for the pads is then switched off, allowing the ddrum4 SE to react even faster to incoming MIDI data. Select mode with the ROTARY DIAL.

A.CN, A.OF
Here you select whether the ddrum4 SE shall receive and transmit MIDI Afi:ertouch messages or not. This will only be transmitted from those inputs/channels that are connected to appropriate pads that are able to transmit aftertouch to the ddrum4. Those inputs are number 1, 2, 8, 9 and 10. Select on or off with the ROTARY DIAL.

D. AL, D.SY, D.PA, D. 1 - D.26
Here is where you can initiate a MIDI System Exdusive dump to store the settings of the ddrum4 SE to a sequencer or a computer. The first option is dumping all of the system settings (AL). 'Sy' is the System functions, 'PA' dumps the Palette settings and by choosing a number, you can transmit any individual Kit setting. You initiate the transmission by holding SHIFT and pressing EXIT. While transmitting the data, the DISPLAY will show a 't' for the short moment it takes, to perform the transmission. Select the type of MIDI Sysex dump with the ROTARY DIAL.

F.--, F.AL, F.SY, F.PA, F. 1 - F.26
This function allows you to initialize different settings in the ddrum4 SE to the factory defaults. The pos­ sibilities are the same as described above for the MIDI System Exdusive dump. Hold SHIFT and press ExIT to initialize the desired option to the factory settings. The DISPLAY will show an 'L'. during the in­ itialization. The '--' option acts as a safeguard to prevent accidental initialization.

SOUND FUNCTIONS

With the sound functions you can select how the different sounds that are assigned to the channels in the ddrum4 SE behave when triggered and how they sound. One particular sound can be used in several Kits and in the Palette. The sounds can also have different sets of sound parameters in each and everyone of those kits.

1. Select the channel that you wish to edit by pressing one of the CHANNEL buttons.

2. Press one of the sound function buttons. They are situated in the horizontal row below the DISPLAY.

3. Edit the selected parameter with the ROTARY DIAL.

4. Save the edited sound(s) by using the Kit Store function described on page 16

5. To leave the sound functions, press the ExIT button.

SOUND 

No matter if the ddrum4 SE is in Palette mode or in Kit mode, this is where and how you select a sound for a particular channel. Any sound in the ddrum4 SE can be assigned to any of the ten sound channels. The sounds are indicated with a number in the DISPLAY and by a lit segment in the SYSTEM INDICATOR bar to indicate sound group (category).

1. Press the SOUND button.

2. Select a channel by pressing a CHANNEL button.

3. Select a sound by turning the ROTARY DIAL. As you turn the ROTARY DIAL, the sound numbers are shown in the DISPLAY. When selecting sounds the SYSTEM INDICATOR bar indicates to which sound group the selected sound belongs. There are 10 sound groups (categories) in the ddrum4 SE module: Kick, Snare, Rim, Tom, Percussion, Cymbal, Hi-hat, Effects, Assorted and Dump. Ifyou want to jump direcdy to another sound group, hold down the SOUND button and turn the ROTARY DIAL. Ifyou want a channel to be silent, turn the ROTARY DIAL counter clockwise until '---' is shown in the DISPLAY. This could be useful if you would like to trigger external sounds over MIDI, without having the ddrum4 SE making any sound of its own.Tip! You can quickly select consecu­ tive sounds to adjacent channels. This can be very useful for the Tom channels. Ifyou e.g. select a sound for the high tom, hold down the SOUND button and press the Mm and Low tom buttons. The sounds that are next in order to the first selected one, will be assigned to the other two chan­ nels.

If a channel in a kit is silent, the sound assigned to that channel may have been deleted from the sound memory. Ifyou select that channel in the sound function mode, the DISPLAY will flash. You can then reload the sound or select another sound to the channel. See page 32 for details on how to load sounds to the ddrum4 SE.


VARIATION

In some sounds several variations can be selected. A variation uses the same sound sample or multi sam­ ples, but with some additional programming or tweaking. This could be different equalization, different velociry selections etc. Try them out! Select variation with the ROTARY DIAL.
Note: The Variation function also works for your custom MIDI Sample Dump sounds. For MIDI Sample Dump sounds, Variation #5 is a "mono trig" variation which means that any new trig of the

sound will automatically mute the previously played hit. This could be useful especially for long de­ caying sounds. Please refer to page 31 for more info on loading MIOI Sample Dump sounds.

Values: 1 - 10, (differs from sound to sound)

PITCH 

With this function you can tune the sound. The range is between +12.0 and -48.0 semitones. Select pitch with the ROTARY DIAL. Ifyou hold the PITCH button, you are able to fine tune the sounds in 0.1 incre­ ments.

Values: -48.0 - +12.0


DECAY 

Here you can set the decay of the sound. You can shorten any sound by setting this parameter to anything below the default value '100', which is the maximum, original length. The lower the value, the shorter the sound. This is very useful if you e.g. have tuned down a sound. The lower the tuning, the longer the sound. Shorten it if needed, with the ROTARY DIAL.

Values: 0 - 100


LEVEL A

This sets the level of the selected sound in the two main outputs Al and A2 and to the HEADPHONES output. Set the level with the ROTARY DIAL.
Note! The total level of the Al and A2 (and HEADPHONES) outputs are also affected by the MASTER
LEVEL setting as well as by the MIDI Volume setting described on page 22.


Values: 0 - 100


LEVEL B

This sets the level of the selected sound in the four alternate outputs B3-B6. Set the level with the Ro­ TARY DIAL. Note that a sound can be present at both the A and the B outputs at the same time.
Note! The total level of the B3-B6 outputs are NOT affected by the MASTER LEVEL setting but IS af­
fected by the MIDI Volume setting described on page 22.

Values: 0 - 100


SHIFT FUNCTIONS

To access the shift functions you should press and hold the SHIFT button and then press any of the sound function buttons.

The ddrum4 SE has a large sound memory. When the ddrum4 SE is shipped from factory it's loaded with the ddrum4 SE factory sounds. Most of the shift functions are related to sound and memory man­ agement including erasing and replacement of sounds.

IMPORTANT! lt's very important to understand that the entire sound memory including the factory sounds can be erased and replaced with other sounds. There are no factory sounds that cannot be re­ moved or replaced. This sets a new standard of flexibility but it presents a potential problem; the un­ intended erasing of sounds, or the entire sound memory. After such an operation, you would need to reload the ddrum4 SE with sounds in order to be able to use it again. We have made it a bit difficult to erase the memory but please read the following paragraphs before you start to experiment with these functions. Another good thing to do is to download the factory sounds from our web site at http://www.clavia.se/ as a precaution.


SHIFT SOUND

With this function you can select a single sound (or an entire sound group) for Memory Size check, Lis­ tening or for MIDI Sysex Dump. lt defaults to the last sound that you have triggered from a CHANNEL button. Select a sound with the ROTARY DIAL. A dot in the right corner of the DISPLAY indicates that the sound is used in the Palette or in one or more of the Kits. To select entire sound groups (categories), hold the SOUND button while turning the ROTARY DIAL. The DISPLAY will show 'G.xx', where the 'xx' indicates the total number of sounds in the selected group. This is especially useful if you plan to erase an entire sound group to be able to make room for downloading new sounds. When you turn the ROTARY DIAL after having selected an entire sound group you can see each individual sound of the selected group.


SHIFT - SIZE

This shows the size (in Blocks) of the sound(s) you have selected using the Shift-Sound function described above. This information could be useful if you are planning to delete sounds to be able to load new sounds into your ddrum4 SE. One Block is very close to a kilobyte. If, e.g. you have a sound in a computer that is 34,2 kilobytes in size, you will need 35 Blocks of free space in the ddrum4 SE.

SHIFT MEM LEFT

This indicates the total unused sound memory in the ddrum4 SE in Blocks. One Block is very close to a kilobyte. If, e.g. you have a sound in a computer that is 34,2 kilobytes in size, you will need 35 Blocks of free space in the ddrum4 SE. Please note that the 'Mem.Left' indication also includes any sounds that are marked for removal. This is indicated with a flashing number in the DISPLAY. In this case, the number in the display indicates the memory that will be free, but not until you have performed the delete procedure. There are 8128 Blocks in the original ddrum4 SE sound memory. Any number of blocks above 999 is indicated by a digit, a dot and two more digits. Ife.g. 1280 blocks would become free, this is indicated as 1.28 in the DISPLAY.


SHIFT- LISTEN

Pressing SHIFT and LISTEN will play the sound that you have selected with the shift-sound function de­ scribed above. The sound will be played through outputs Al and A2 and through the HEADPHONES out­ put.


SHIFT- MARK

Pressing SHIFT and MARK will mark the selected sound for removal. A dot in the right corner of the dis­ play warns you if the sound that you have marked for removal is being used in at least one of the Kits or in the Palette. The dot is just a warning however, you can still remove the sound, leaving the Kit or the Palette that used the sound incomplete. To select entire sound groups (categories), hold the SOUND but­ ton while turning the ROTARY DIAL. The DISPLAY will show 'G.xx', where the 'xx' indicates the total number of sounds in the selected group. This is especially useful if you plan to erase an entire sound group to be able to make room for downloading new sounds. Then press the MARK button to mark the entire sound group.

When a sound or a sound group is marked for removal, the DISPLAY will flash. To un-mark a selected sound/sound group, just press the SHIFT and MARK buttons again. When you turn the ROTARY DIAL afrer having marked an entire sound group you can see each individual sound of the selected group flash­ ing in the DISPLAY. lt's possible to unmark individual sounds of a sound group by scrolling with the Ro­ TARY DIAL and pressing SHIFT and MARK for each individual sound. It's also possible to mark several sounds by selecting sounds with the ROTARY DIAL and mark them by pressing SHIFT and MARK. Ifyou have marked some sounds and leave the shifr functions without deleting the sounds, they will be un­ marked and you have to start all over, marking them again at a later stage. Ifyou are unsure whether your sounds should be deleted, simply leave the Mark function by pressing ExlT.


SHIFT DELETE

You are now ready to delete the sounds that you marked for removal (see above). Be aware that this is going to be a "no-going-back" operation:

1. Hold the SHIFT and press the DELETE button. The DISPLAY will flash, indicating the total number of Blocks that will be deleted (the total number of Blocks for all marked sounds).

2. Confirm the deletion by holding the SHIFT button and pressing the DELETE button again, or abort by pressing Ex.IT.

While the ddrum4 SE is clearing up its sound memory, the DISPLAY will count down as the Blocks are deleted. This operation will take a while, depending on the size and location of the sounds that are re­ moved. You must wait until this operation is finished, which will be indicated by a zero in the DISPLAY. IMPORTANT! Do not turn off the ddrum4 SE module during this process!


SHIFT EXIT

Sounds that are marked, as described above, can be transmitted as ddrum4 MIDI System Exclusive data via the MIDI OUT connector. Hold SHIFT and press Ex.IT to starr the transmission. The DISPLAY will count down the Blocks of the individual sounds being transmitted. You may interrupt the procedure by pressing Ex.IT. The transmission will then stop after any current sound has been completely transmitted.

Note: The data will be transmitted as several MIDI System Exclusive data packets. The number of pack­ ets will depend on the size and number of sounds that are included in the transmission. You can not re­ store any individual sounds that have been a part of a multi-sound transmission. Ifyou want to be able to restore individual sounds, you must transmit them one by one.

7 . SOUND FORMATS AND MIDI

The sounds in the ddrum4 SE reside in a memory that is technically called a Flash ROM. This means that besides storing sounds, you can delete sounds that you do not want and replace them with new ones. The Flash ROM also retains its content when the power is switched off. You can load sounds into the ddrum4 SE module via MIDI in two different formats, the ddrum4 format and the MIDI SDS (Sample Dump Standard) format. Sounds in the ddrum4 format can be accessed from the Clavia web site, free of charge. Point your browser to http://www.clavia.se/ for more information.

DDRUM4 SOUNDS

A ddrum4 sound contains one or more samples that have been converted to a proprietary format. It has been carefully edited by the Clavia crew and finally compressed (by a factor 3-6 times). The compression technology allows for the sounds to take up less memory so that we can put more of them into the ddrum4 SE. Each ddrum4 sound has a unique name, which assigns it to the appropriate sound group. The sound numbers do not have to be consecutive. A ddrum4 sound can also contain a couple of varia­ tions, which are different sets of functions that affect the sound and how it behaves when played back. These special functions/parameters cannot be edited by the user. One type of variation function would be the crossfade information for multi samples or dynamic filter settings.

DOWNLOAD NEW SOUNDS FREE OFF CHARGE

At the Clavia web site you will find all sounds as zipped MIDI föes. Fetch them with your web browser and unzip them. Then you can load the MIDI fües to the ddrum4Tool (PC) or to your sequencer, and download them to your ddrum4 SE. Do not forget to download a copy of the factory sounds. This could be very handy to have around, if you delete sounds and then change your mind.

MIDI SAMPLE DUMP

A MIDI Sample Dump sound is a sample in another format that can also be transmitted via MIDI. There are many devices that can transmit and/or load MIDI Sample Dumps. All you need is access to a sampler or computer software with this capability. Ifyou would like to have your own personally sampled sounds, and have access to a sampler that can transmit sample dumps, you can exchange every single sound in the ddrum4 SE.

These samples will not be compressed as much as the ddrum4 sounds (only by a factor 2), making them bigger than a corresponding ddrum4 version of the same sound, and making the transfer process slower. A MIDI Sample Dump has not the sound group identification data like the ddrum4 sounds have. There­ fore the MIDI Sample Dump sounds are placed in the Dump group in the ddrum4 sound memory. They are numbered according to the MIDI Sample Dump standard. Check your sampler for information re­ garding how it is numbering samples. The ddrum4 will truncate these numbers to fit within the range of 1 to 999. A MIDI Sample Dump lacks the special variations of the ddrum4 sound format. But we have made it possible for MIDI Sample Dumps to benefü from the variation functions. There are cool varia­ tions to check out on the sample dump sounds.
Note: For MIDI Sample Dump sounds, Variation #5 is a "mono trig" variation which means that any new trig of the sound will automatically mute the previously played hit. This could be useful especially for long decaying sounds. Please refer to page 31 for more info on loading MIDI Sample Dump sounds.

If you start to make new drum sounds in a sampler, please remember that you have to edit them in the sampler before you transmit them to your ddrum4 SE. Make sure that the sample start point is correct (no space before the actual sound) etc. Please note that the ddrum4 SE playback sample rate is 44.1 kHz. Ifyou load a MIDI sample that is sampled with a lower sample rate, the ddrum4 SE will automatically adjust them. Sounds with a higher sample rate will be played back with a lower pitch. Adjust this with the Pitch function described on page 26.

If you have the sounds on your computer hard disk, you need to check their size to see if they fit in the ddrum4 SE sound memory. Ifyou have a PC, just look in the directory to see the size of each sound file. Ifyou have a Mac OS computer you will have to check the size of the MIDI file with the "get info" com­ mand (command-I). Look for the info "bytes used:". The Mac OS will not tell you the exact size of a file if you just look in the directory of the Finder or in a folder. On the ddrum4 SE a 'Block' is approximately 1 kB. You can check the available space in the ddrum4 with the shift-mem.left function described on page
28. Ifthe space isn't enough you will need to delete sounds from the ddrum4 SE sound memory.


LOADING SOUNDS INTO DDRUM4 SE

This is extremely easy. You do not need to do anything with the ddrum4 SE module in order to receive sounds via MIDI. Just make sure that the connections are correct and start the transmission from the sending device (software, the sequencer or the sampler).

1. Connect the MIDI Out from your computer or sampler (if you are transmitting a MIDI Sample Dump Standard sound) to the MIDI IN on the ddrum4 SE module. Ifthe other device needs a dosed loop connection, also connect the MIDI OUT of the ddrum4 SE to the MIDI Inof the send­ ing device.

2. Start the MIDI Sysex transmission on the sending device.

The ddrum4 will automatically recognize the format of the incoming data. During this transmission, the ddrum4 display will indicate the amount of blocks to load from each sound in the transfer. The trans­ mission of these sounds to the ddrum4 SE can take a while, especially if you want to load lots of sounds or very long sounds.


ERROR CODES


FUL
Ifyou try to load a sound to the ddrum4 SE that does not fit in its memory, the DISPLAY will alert you by showing you the 'FuL' (full) error code. Ifthis happens, please stop the transmission and wait a little while until the ddrum4 SE reverts to normal operation (shown by the DISPLAY returning to a normal appearance).

DUP
Ifyou try to load a ddrum4 sound to the ddrum4 SE that already exists in the memory, the display will alert you by showing you the duplicate error code, 'duP', and the data of that particular sound will be ignored. This error code may also occur if you try to load two identically numbered MIDI Sample Dumps into the ddrum4 SE. Please consult your Sample Dump sources manual for information regard­ ing the numbering of the samples in a sample dump.


ERR
The 'Err' message will appear if anything goes wrong with the transmission. Ifthis message appears, please abort the operation on the transmitting device. The ddrum4 SE will return to normal operation after a short while. The file being transferred when this error message appeared, might be partially stored in the ddrum4 SE memory. Please delete it using the Shifr-Mark and Shifr-Delete described on page 29 and page 30.

MIDI PROGRAM CHANGE MESSAGES

The ddrum4 SE has a special way of interpreting MIDI Program Change messages.


The kits, P. 1 - 26 can be selected by sending MIDI Program Change numbers 0 to 25 to the ddrum4 SE. The factory kits, F.27 - 99 use MIDI Program Change numbers 26 to 98.

MIDI Program Change 99 is used to turn the ddrum4 SE to the default Palette mode, the default mode when you turn on the ddrum4 SE.

To select one of the sounds in the Kick palette, send one of the MIDI Program Change numbers 100 to 104, for the Snare palette, use one of the MIDI Program Change numbers 106 to 110. The other two Palette groups use the MIDI Program Change numbers 112 to 116 and 118 to 122 respectively.

To deselect a Palette in, e.g. the Kick group, send the MIDI Program Change number 105 (to revert to the kit selection for that particular Palette group). Use the MIDI Program Change numbers 111, 117and 123 for the other Palette groups.

This means that in order to set the ddrum4 to a certain sound combination by sending MIDI Program Change numbers to it, you may have to use a combination of several MIDI Program Change messages. You may select a kit by one MIDI Program Change message (0 -98), change the kick in that particular kit by sending another MIDI Program Change number, etc.

As well as receiving MIDI Program Change numbers, the ddrum4 SE transmits them whenever you select a kit or palette on the ddrum4 SE itself.

MIDI IMPLEMENTATION CHART


Model: Clavla ddrum4 SE Date: November 2001
Version: 1.5x

FUNCTION
TRANSMITTED
RECOGNIZED
REMARKS
Basic Channel Default Changed 1
1-16 1
1-16
Memorized


Mode Default Messages Mode 3
X Mode 3
X
Note Number 0-127 0-127
Veloclty Note ON Note OFF O v=0-127
X O v=1-127
X
After Touch Key Channel 0 0-127
X 00-127
X
Pltch Bender X X
  0,32 X X Bank select
  1 X X Modulation
  4 0 0 Foot controller
  6,38 X X Data entry
  7 0 0 Volume
Control 10 X X Panpot
  11 X X Expression
Change 64 X X Hold 1
  65 X X Portamento
  66 X X Sostenuto
  67 X X Soft
  84 X X Portamento control
  91 X X Effect 1 depth
  93 X X Effect 3 depth
  96,97 X X Data incr, decr
  98,99 X X NRPN LSB, MSB
  100,101 X X RPN LSB, MSB
  120 X X All sound off
Prog Change 0 0-127 0 0-127
System Excluslve
0 *1,3
0 *1, 2, 3
System : Song Pos
: Song Sei
Common : Tune X X X X X X
System : Clock
Real Time : Commands X X X X
Aux Local ON/OFF X X
All Notes OFF X X
Messages Active Sense X X
Reset X X

Notes

*1 System setup
*2 Sample Dump Standard
*3 ddrum4 sounds

Mode 1: OMNI ON, POLY Mode 3: OMNI OFF, POLY

Mode 2: OMNI ON, MONO Mode 4: OMNI OFF, MONO

O: YES X: NO

8. APPENDIX

DDRUM4 SE  SOUNDLIBRARY

The ddrum4 SE sound library holds several mulri-sampled sounds made by the great drummers Simon Phillips, Dennis Chambers, Kenny Aronoff and Mel Gaynor. It's their drums, their choice of heads, their custom tunings etc., exclusively recorded by these drummers for the ddrum4 SE sound library! If you like you can download more of their sounds at www.clavia.se and from the enclosed CD-ROM!

The two letters to the right of the sound number in the KICK, SNARE, TOM, CYMBAL and HI-HAT groups below indicate which drummer the sounds originate from: The 'SP' sounds were produced by Si­ mon Phillips, 'DC' by Dennis Chamhers, 'KA' by Kenny Aronoff and 'MG' by Mel Gaynor.

Sound No. & Name Samples Variations Description
KICK_702 KAkickl DRY 7 1 Tama Starclassic 24" hass (dry)
KICK_703 DCkickl DRY 7 1 Pearl Masters Custom 22" hass (dry)
KICK_704 DCkick2 AMB 7 1 Pearl Masters Custom 22" hass (amh)
KICK_707 SPkick2 DRY 7 1 Tama Starclassic 24" hass (dry)
KICK_709 SPkick3 DRY 7 1 Tama Starclassic 18" hass (dry)
     
SNRE_73 "73-an" 1 2
SNRE_700 MGsnarel AMB 7 1 Tama Starclassic 14" snare (amh)
SNRE_701 MGsnare2 AMB 7 1 Tama Starclassic 14" snare side shot (amh)
SNRE_712 KAsnarel DRY 7 1 5 x 14" KA145 Trackmaster snare (dry)
SNRE_713 KAsnare2 DRY 7 1 5 x 14" KA145 Trackmaster snare off (dry)
SNRE_717 DCsnarel AMB 7 1 DC5314D snare (amh)
SNRE_720 SPsnarel DRY 7 1 12" Pageant Signature snare (dry)
     
RIM_709 KAsnare2asrtrim DRY 7 1 5 x 14" KA145 Trackmaster snare rim (dry)
RIM_715 DCsnarelsidest AMB 4 1 DC5314D snare rim (amh)
RIM_716 DCsnarelshot AMB 7 1 DC5314D snare side shot (amh)
RIM_719 SPsnarel sidest DRY 4 1 12" Pageant Signature snare side stick (dry)
RIM_720 SPsnarelshot DRY 5 1 12" Pageant Signature snare side shot (dry)
     
TOM_723 DCtoml AMB 7 1 Pearl Masters Custom 10" tom (amh)
TOM_725 DCtom3 AMB 7 1 Pearl Masters Custom 13" tom (amh)
TOM_727 DCtom5 AMB 7 1 Pearl Masters Custom 16" tom (amb)
TOM_728 DCtom6 AMB 7 1 Pearl Masters Custom 18" tom (amh)
TOM_729 SPtoml DRY 7 1 Tama Starclassic 10" tom (dry)
TOM_732 SPtom4 DRY 7 1 Tama Starclassic 14" tom (dry)
TOM_734 SPtom6 DRY 7 1 Tama Starclassic 16" tom (dry)
TOM_735 SPgongtom l DRY 7 1 20" Gong tom (dry)
TOM_737 SPoctohan2 DRY 7 1 Low Pitch Octohan
     
PERC_OO 1 Afro guiro 1 4

Sound No. & Name Samples Variations Description
PERC_002 Bamboostix 1 4
PERC_003 Bell mute 1 4
PERC_004 Bellbright 1 3
PERC_005 Cabasa 1 4
PERC_006 Cascara 1 4
PERC_007 Castanjet 1 4
PERC_008 Claves 1 4
PERC_009 CrackBell 1 4
PERC_O lO DDRtriangl 1 5
PERC_O 11 Duckshells 1 4
PERC_Ol2 Earthdruml 1 3
PERC_O l3 Earthdrum2 1 3
PERC_Ol4 GBcha-cha l 1 3
PERC_O l5 GBcha-cha2 1 3
PERC_O l6 GBconga 1 3
PERC_O l7 GBquinto 1 3
PERC_O l8 GBtumba 1 3
PERC_O l9 Handbell 3 1 3
PERC_020 Indie drum 1 3
PERC_021 Kandgila 1 3
PERC_022 LPtimbale 1 3
PERC_023 M bira 1 3
PERC_024 Mambo bell 1 4
PERC_025 MPbongo 1 3
PERC_026 MPbongo2 1 3
PERC_027 Tabla bass 1 3
PERC_028 Tabla mid 1 3
PERC_029 Tabla high 1 3
PERC_030 Table drum 1 3
PERC_031 Tamborin3 1 4
PERC_032 Tamborin4 1 5
PERC_033 Timbalehi 1 4
PERC_035 Woodblock 1 4
PERC_036 Bongo small-large 1 6
PERC_037 Hicongal-2 2 4
PERC_038 Earthdrum 1 3
PERC_039 Tamborim 2 3
PERC_040 Tamburinl 2 4
PERC_041 Cascara 1 2
PERC_042 Cowbell 1 3
PERC_043 Handbell 1&2 2 1
PERC_044 Lowconga 1 3
PERC_045 Tamburin 1 4
PERC_046 Tamburin2 1 4

Sound No. & Name Samples Variations Description
PERC_047 Tempelbl 1 4
PERC_048 Timbalelrg 1 3
PERC_049 Timbalesma 1 4
PERC_050 Triangle 1 4
PERC_05 l UFsmbell 1 5
PERC_052 Woodblock 1 4
PERC_053 Guiro. l 1 5
PERC_054 Guiro.3 1 4
PERC_056 Bongos 2 samp 2 2
PERC_060 Timpany Fl 2samp 2 4
     
CYMB_713 KAcrashl DRY 3 1
CYMB_716 KAridel DRY 3 1
CYMB_717 KAsplashl DRY 4 1
CYMB_744 KAhatFX2 DRY 3 1
CYMB_745 KAchina DRY 3 1
     
HHAT_702 KA hihat2 DRY 7 1
HHAT_706 SPhihatl DRY 7 1
     
EFCT_002 Iron dem 1 4
EFCT_003 Lrge Hit 1 4
EFCT_005 Fingersnaps4 1 4
EFCT_006 Goomcheaks 1 1 4
EFCT_009 Alarmdock 1 1 4
EFCT_Oll Bycyclebell l 1 4
EFCT_O l3 Chaindump 2 1 4
EFCT_Ol9 Belldump 1 2
EFCT_020 Belltree 2 1 4
EFCT_023 Laser 1 1
     
ASRT_OOl SOSclap 1 3
ASRT_002 SOSclave 1 3
ASRT_003 SOSconga 1 3
ASRT_004 SOScowbell 1 5
ASRT_005 SOSkick 1 3
ASRT_006 SOSrim 1 3
ASRT_007 808snare2 1 3
ASRT_008 SOStom 1 3
ASRT_009 909rimshot 1 3
ASRT_OIO 909snare2 1 4
ASRT_O l l analogbell 1 4
ASRT_012 clapl 1 4
ASRT_O l3 Housekick 1 4
ASRT_O l7 Bombo sftl&hrd2 2 1

DDRUM4 CAST PRECISION PADS

The feel of these pads is as important to the overall function of the ddrum4 SE sound engine as the sounds themselves.


CAST PRECISION PADS

The Cast Precision Pads feature a real drumhead. They are assembled in conjunction with a cast alumi­ num shell. The Cast Precision Pads detect pressure on the head and the position where you strike. The position feature is great to use together with multisampled sounds! These pads are also dampened for a quiet performance.

AssEMBLY OF THE PADS

Locate the Kick pad. lt is one of the two 12 inch pads in the pad package, the one with only one XLR connector on the back side. The Snare pad comes in the same size as the Kick pad but with two XLR connectors; one for the drumhead and one for the rim.


                                                                     connector side

                               kick                                   snare         

You need to assemble the L-shaped pedal attachment and the two chrome legs to the kick pad. The nec­ essary nuts, bolts and washers are located within the package that contains the legs. The only tool needed is your drum key. The pedal attachment has three holes for the bolts and one square cut-out, for the con­ nector output. The shorter part of the L should point in the direction towards your playing position.

Place the pad with the drum head facing downwards on, e.g. a table. Locate the square connector housing towards the edge of the table. Place the L-shaped attachment on top of the connector housing, short part facing downwards. Insert a nut from underneath and a bolt through one of the holes from the top. Tight­ en the bolt with your fingers. You should use all three bolts to secure the pedal attachment to the kick pad.

Locate the points of attachment for the two legs on the cast aluminum rim of the pad. Take the eye-bolt and insert the leg through it. Place the legs in the attachment, pushing the bolt through the hole in the

rim. Place two washers on each bolt and then take the wingnut and tighten the legs firmly to the pad. The legs should point downwards, at an angle away from your playing position.


                                                                                                         head side

MAINTENANCE

Always make sure that the pads regain normal room temperature if they have been kept at a low temper­ ature. Wipe the surface of the pads and the cymbals with a soft cloth, every now and then. Do not use any solvent. The heads should be replaced when worn out. You can use any head you like with the ddrum pads.

TOM PADS

When you replace the head on a Cast Precision Tom, check that the foam layer beneath the head has not turned porous. The foam layer is a spare part and can be obtained at your ddrum supplier.

SNARE AND KICK PADS

The two foam layers in these two Precision pad types are separated from the sensor plate. Ifthe foam gets porous or the sensor plate is damaged on a snare or kick pad, you must replace both the foam layer(s) and the sensor plate. Make sure you place the hardest foam layer on top (in front) of the sensor plate!

DDRUM4 CAST PRECISION MESH HEAD PADS

The feel of these pads is as important to the overall function of the ddrum4 SE sound engine as the sounds themselves. The mesh heads make these pads extremely low on acoustic noise.

CAST PRECISION MESH HEAD PADS

The Cast Precision Mesh Head Pads feature "silent" web drumheads for minimum acoustic noise. To minimize the acoustic noise even more, the rim hoops of the pads are rubber coated. They are assembled in conjunction with a cast aluminum shell.

ASSEMBLY OF THE PADS

Locate the Kick pad. lt is one of the two 12 inch pads in the pad package, the one with only one XLR connector on the back side and with a solid aluminum back side. The Snare pad comes in the same size as the Kick pad but with two XLR connectors; one for the drumhead and one for the rim, and without the aluminum back.


                                                                        connector side

                                      kick                                  snare

You need to assemble the L-shaped pedal attachment and the two chrome legs to the kick pad. The nec­ essary nuts, bolts and washers are located within the package that contains the legs. The only tool needed is your drum key. The pedal attachment has three holes for the bolts and one square cut-out, for the con­ nector output. The shorter part of the L should point in the direction towards your playing position.

Place the pad with the drum head facing downwards on, e.g. a table. Locate the square connector housing towards the edge of the table. Place the L-shaped attachment on top of the connector housing, short part facing downwards. Insert a nut from underneath and a bolt through one of the holes from the top. Tight­ en the bolt with your fingers. You should use all three bolts to secure the pedal attachment to the kick pad.

Locate the points of attachment for the two legs on the cast aluminum rim of the pad. Take the eye-bolt and insert the leg through it. Place the legs in the attachment, pushing the bolt through the hole in the rim. Place two washers on each bolt and then take the wingnut and tighten the legs firmly to the pad. The legs should point downwards, at an angle away from your playing position.

                                                                                                                   head side

MAINTENANCE

Always make sure that the pads regain normal room temperature if they have been kept at a low temper­ ature. Wipe the surface of the pads and the cymbals with a soft cloth, every now and then. Do not use any solvent. The mesh heads should be replaced when worn out. You can use any head you like with the ddrum Mesh Head Pads, but for "silent" playing, use mesh heads.


SNARE AND TOM PADS

When you replace the head on the Cast Precision Mesh Head pad, first remove the small red protection plate that sits above the transducer. Then, remove the rest of the tension rods. Note: don't forget to mount the red protection plate back on after you've replaced the drum head. The protection plate pre­ vents the piezo transducer from direct hits, which might destroy it.


KICK PAD

The two foam layers in the Kick pad are separated from the sensor plate. Ifthe foam gets porous or the sensor plate is damaged on the Kick pad, you must replace both the foam layer(s) and the sensor plate. Mak:e sure you place the hardest foam layer on top (in front) of the sensor plate!

DDRUM4 CAST CYMBAL


UNPACKING THE CAST CYMBAL
The Cast Cymbal comes with an L-rod receiver, a supporting spring and a mono XLR-jack cable. The Cast Cymbal is designed to be mounted on an L-rod stand using the supporting spring (se pictures be­ low). Connect the cymbal to Channel 8 or 9 on the ddrum4 SE module.

HOW TO CHOKE THE CAST CYMBAL

The Cast Cymbal pad is chokeable in a different way than you are used to. You press with your hand or with the drumstick in the center of the pad to mute the sound. Most of the ride cymbals in the ddrum soundlibrary offers ride and bell sound. The bell sound in these cases will be naturally positioned in the center of the Cast Cymbal pad.

MAINTENANCE

Wipe the surface of the Cast Cymbal with a soft cloth, every now and then. Do not use any solvent. The playing surface is rubbercoated metal for the right feel. Ifthe rubber becomes damaged or worn out, you can order a replacement rubber part from your ddrum supplier.

DDRUM4 CAST HI-HAT


UNPACKING THE CAST HI-HAT

The Cast Hi-Hat comes in two parts. The upper part is called the Hi-Hat dutch, to be mounted on your Hi-Hat rod. The larger part is called the Hi-Hat Controller, that mounts onto the Hi-Hat stand similar to a traditional bottom Hi-Hat cymbal. The Cast Hi-Hat is designed to fit conventional Hi-Hat stands. There is also a stereo XLR-jack cable included.

HOW TO MOUNT THE CAST HI-HAT

Start with the Hi-Hat Controller. The first thing to do is to totally open up the mounting bracket on the lower part of the Hi-Hat Controller. Take the package and let the Hi-Hat rod slide through the centre hole. Place the Controller on the felt washer. (Make sure you have one!) lt is important to make sure that the plastic center part of your Hi-Hat stand doesn't protrude above the surface where the Hi-Hat clutch have its target area. Ifit does; adjust the Hi-Hat Controller upwards or get a felt washer. Now attach the clamp around the Hi-Hat stand and tighten it firmly.

Connect the Hi-Hat Controller to channel 10 on the ddrum 4 with the attached stereo cable.
Please note: To gain all the features of the Hi-Hat functions you need to use a stereo XLR-jack cable! Finally, mount the Cast Hi-Hat clutch onto the Hi-Hat rod. Do not tighten it until you have done the calibration described below.


How TO CALIBRATE THE CAST HI-HAT

1. Let the Hi-Hat clutch fall down on the Hi-Hat Controller by its own weight.
2. Press the SYSTEM button until you get to the Trig Input mode for channel 10. Select 'HHt' with the ROTARY DIAL.
3. Without touching the Hi-Hat stand, hold SHIFT and press ExIT. The DISPLAY will briefly show 'CAL' and the calibration is completed.
4. Secure the Hi-Hat dutch at a comfortable height for playing.
5. Your new Cast Hi-Hat is ready for action.

MAINTENANCE

Wipe the surface of the Hi-Hat Controller with a soft cloth, every now and then. Do not use any solvent. The playing surface is rubbercoated metal for the right feel. Ifthe rubber becomes damaged or worn out, you can order a replacement rubber part from your ddrum supplier.

WHICH HI-HAT SAMPLES SHOULD I USE IN THE DDRUM4 ?

In Sound Library versions starting from 3.1, all hi-hat samples are compatible with the Cast Hi-Hat. In Soundlibrary 3.0: The samples 001, 005 and 008 are compatible with the new Hi-Hat functions. The Hi-hat samples 202 and 203 are velociry Hi-Hats and should only be played on a Cast Precision Pad. They do not work as expected with the Cast Hi-Hat Controller.

DDRUM ACCOUSTIC TRIGGERS

The ddrum Acoustic Triggers should be mounted on acoustic drums. They can be used with ordinary drum heads as well as with mesh heads. When used together with the ddrum4 SE module you'll get the same great dynamic response as with ddrum4 Pads. The ddrum Acoustic Triggers come in three different models: the Tom Trigger, the Kick Trigger and the Snare Trigger.

TOM TRIGGER

This one should be fastened to your tom tom hoops. Ifyou have drums with rims mounted you will find the area to mount the Trigger to be more restricted, but there is still plenty of space for it. Ifyou find that the Triggers are in your way, try to change the angle of your tom tom holder. Ifyou are using a rack sys­ tem type of stand you will find you get a lot of different options on the placement of your toms and trig­ gers. The Triggers use an industry standard XLR output connector. Use a ddrum pad cable or similar to connect it to the ddrum4 SE module. The pin configuration is as follows: pin 2 is hot (signal), ground on pin 1. All tom tom sounds can be found on Channels 4, 5 and 6 in the factory kits. We recommend you to use these inputs for your Tom Tom Triggers. The highest pitched tom is usually located on Chan­ nel 4 in a ddrum4 SE module.

KICK TRIGGER

Fits all rypes of standard hass drums hoops. The Kick Trigger comes with an extra rubber part. Mount the rubber if you have a hass drum hoop that is made out of metal. Most of the metal hoops have a pit on the drumhead side. Put the rubber part in this pit. This will prevent the lower part of the Kick Trigger to slip. Make sure that the transducer isn't pressing on the shell edge.

SNARE TRIGGER

The ddrum Snare Trigger is a special double microphone Trigger. Use an XLR cable split into two mono jack connectors to connect to your ddrum4 SE module. Pin 2 on the XLR 1s the signal from the drum­ head microphone, pin 3 is the signal from the rim microphone and pin 1 is ground. On the ddrum4 SE module the snare sounds can be found on channel 2 and the rim sounds on channel 3.

SETTING UP WITH DDRUM TRIGGERS

Mount the triggers on you drums. Press softly downwards towards the drumhead and tighten the screws that locks the Tom and Snare Triggers to the hoops. Make sure the screws are firmly tightened but not too hard. Don't worry, they will not come off. When mounting the Kick Trigger, press softly towards rhe drumhead. Make sure rhat the transducer isn't pressing on the shell edge. Tighten the screw firmly.

SOME TRIGGERING TIPS ON THE ROAD

When you set up your toms we suggest that you match the tuning of your acoustic drums and the sounds produced by the ddrum4 SE module. Otherwise you might experience the total drum sound as less nat­ ural. Matching the tuning will make rhe composite sound (digital and acoustic) much more natural and you will feel more comfortable when playing the system. The higher in pitch you tune your drum, rhe weaker the trig signal will get. This may not be a problem, but if you find that you need more gain from your Triggers, lower the tuning of the drum. Ifthe Snare double triggers while you hit other drums, or itself, it can depend on the snare bed. Try to tighten the snare bed properly. Ifthat isn't the problem try to raise the trig threshold or increase the crosstalk value a little.

MAINTENANCE

The triggers are roadworthy and they shouldn't require any real maintenance. Do not use any solvents when you clean them. The transducer itself can be bought as a spare part. A good idea is to have one as a spare in case of malfunction. lt's very easy to change it. The only thing you need is a good soldering unit. The transducer is fastened onto the metal casting with adhesive. And it's soldered to the XLR con­ nector. Check the configuration on the cables before you remove rhe old transducer from the metal and solder it away from the connector. (It's Blue lead on pin 1 and shield. Red on pin 2 (red is hot). Rim sensor is hot on pin 3). Take away the old adhesive from the metal. Use your nail or a alcohol based sol­ vent. Take the new transducer and peel off the protecting paper from the foam. Fasten it at the same place. Put the cables through the clips and tighten the cable to the connector. Solder them onto appro­ priate pins on the XLR connector.

The ddrum Acoustic Triggers are patented by Clavia DMI AB.
US Patent # 5,345,037, EU patent # 0542706, other countries patent pending.

DDRUM RED SHOT TRIGGERS

The ddrum Red Shot Triggers should be mounted on acoustic drums. They can be used with ordinary drum heads as well as with mesh heads. When used together with the ddrum4 SE module you'll get the same great dynamic response as with ddrum4 Pads. The ddrum Red Shot Triggers come in two different models: the Tom (and snare) Trigger, and the Kick Trigger.

TOM TRIGGER

This one should be fastened to one of your tom or snare tension rods. The Triggers use an ordinary mono-jack output connector. Use standard mono-jack cable to connect it to the ddrum4 SE module. The pin configuration is as follows: tip is hot (signal), and sleeve is ground. All snare sounds can be found on Channel 2 and all tom tom sounds can be found on Channels 4, 5 and 6 in the factory kits. We recom­ mend you to use these inputs for your Red Shot Tom Triggers. The highest pitched tom is usually located on Channel 4 in a ddrum4 SE module.

KICK TRIGGER

This one should be fastened to one of your kick tension rods. The Triggers use an ordinary mono-jack output connector. Use standard mono-jack cable to connect it to the ddrum4 SE module. The pin con- 6.guration is as follows: tip is hot (signal), and sleeve is ground. All kick sounds can be found on Channel 1 in the factory kits. We recommend you to use these inputs for your Red Shot Kick Trigger.

SETTING UP WITH DDRUM TRIGGERS

Mount the triggers on you drums. Press softly downwards towards the drumhead and tighten the tension screw that locks the Tom Triggers to the rims. Make sure the screws are firmly tightened but not too hard. Don't worry, they will not come off. When mounting the Kick Trigger, remove one tension screw. Put the tension screw through the hole of the Red Shot Kick Trigger and back on the drum again. Ifneces­ sary, also apply the supplied distance washer to make the entire trigger sensor surface touch the drum head (see picture below). You may have to bend the trigger plate slightly to fine-adjust the position.

SOME TRIGGERING TIPS ON THE ROAD

When you set up your toms we suggest that you match the tuning of your acoustic drums and the sounds produced by the ddrum4 SE module. Otherwise you might experience the total drum sound as less nat­ ural. Matching the tuning will make the composite sound (digital and acoustic) much more natural and you will feel more comfortable when playing the system. The higher in pitch you tune your drum, the weaker the trig signal will get. This may not be a problem, but if you find that you need more gain from your Triggers, lower the tuning of the drum. Ifthe Snare double triggers while you hit other drums, or itself, it can depend on the snare bed. Try to tighten the snare bed properly. Ifthat isn't the problem try to raise the trig threshold or increase the crosstalk value a little.

MAINTENANCE

The triggers are quite roadworthy and they shouldn't require any real maintenance. Do not use any sol­ vents when you clean them. The transducer itself can be bought as a spare part. A good idea is to have one as a spare in case of malfunction. It's very easy to change it. The only thing you need is a good sol­ dering unit. The transducer is fastened onto the metal plate with adhesive. And it's soldered to the jack connector. Check the configuration on the cables before you remove the old transducer from the metal and solder it away from the connector. (It's Blue lead on shield and Red lead on the tip (red is hot). Take away the old adhesive from the metal. Use your nail or a alcohol based solvent. Take the new transducer and peel off the protecting paper from the foam. Fasten it at the same place. Put the cables through the holes and tighten the cable to the connector. Solder them onto the appropriate pins on the jack connec­ tor.

The ddrum Red Shot Triggers are patented by Clavia DMI AB.
US Patent # 5,345,037, EU patent # 0542706, other countries patent pending.

DDRUM4 RACK STAND ASSEMBLY

WHAT THE BOX CONTAINS:

MOUNTING THE MAIN STAND


THIS IS WHAT YOU NEED:
The Curved tube The two Base legs
The two Cymbal/base tubes Two Cross joint clamps

Begin with mounting the two Cymbal/base tubes on one Base leg each. Tighten the two bolts on each Base leg. Then mount one Cross joint clamp on each Cymbal/base tube. To make it easier to fit the Curved tube in the Cross joint clamps, make sure you have the tightening bolts facing upwards (see picture to the right). Fit the Curved tube in the two Cross joint clamps of either Cymbal/base tube and tighten the bolts.

When the parts are assembled, adjust the Base legs so they are fairly parallel to each other. Then tighten all the bolts.

MOUNTING THE ALUMINUM TUBE FOR THE SOUND MODULE AND FLOOR TOM:


THIS IS WHAT YOU NEED:
The Aluminum tube One Cross joint clamp The Allen key
The two sound module arms

Begin with mounting the Cross joint clamp on the right Cymbal/base tube (if you're left-handed, you might pre­ fer to have it on the left Cymbal/base tube instead). To make it easier to fit the Aluminum tube in the Cross joint clamp, make sure you have the tight­ ening bolts facing upwards (see pic­ ture to the right).

Fit the Aluminum tube in the Cross joint clamp of the Cymbal/base tube and tighten the bolt.

Adjust the position of the Sound module arm holders by loosening the screws with the Allen key and slide the arm holders on the Aluminum tube to a suitable position.

Mount the two Sound module arms on the arm holders. You can choose two positions of the arms to your lik­ mg.

When all parts are assembled, the Rack Stand should look like this.

MOUNTING THE SNARE BASKET AND SNARE SUPPORT ARM:


THIS IS WHAT YOU NEED:
The Snare basket with support stand The Snare support arm
The Snare support arm cross joint clamp (same type as Tom
Tom clamp)
The Snare basket cross joint clamp

Begin with mounting the Cross joint damp on the left Cymbal/base tube (if you're left-handed, you might prefer to have it on the right Cymbal/ base tube instead). To make it easier to fit the Snare support arm in the Cross joint clamp, make sure you have the tightening bolt facing up­ wards.

Fit the Snare support arm in the Cross joint clamp of the Cymbal/ base tube and tighten the bolts. Ad­ just both bolts of the Snare support arm cross joint clamp to get an even pressure on the Snare support arm.

Mount the Snare basket cross joint clamp on the other end of the Snare support arm. Adjust both bolts of the Snare basket cross joint clamp to get an even pressure on the Snare sup­ port arm.

Fit the Snare basket with support stand in the Snare basket cross joint clamp. Adjust both bolts of the Snare basket cross joint clamp to get an even pressure on the Snare basket support stand. Make sure you fit the Snare basket cross joint clamp on the lower part of the Snare basket sup­ port stand to be able to easily adjust the height of the Snare basket after­ wards. The Snare basket support stand should rest on the floor.

When all parts are assembled, the Rack Stand should look like this.

MOUNTING THE TOM TOM HOLDERS:


THIS IS WHAT YOU NEED:
One Floor Tom/Cymbal holder The two L-rods
The three Tom Tom damps

Begin with mounting two Tom Tom damps on the Curved tube. Then mount an L-rod in one Tom Tom damp each. Adjust both bolts of the Tom Tom damps to get an even pressure on the L-rods.

Mount the third Tom Tom damp on the Aluminum tube. Then mount the Floor Tom/Cymbal holder in the Tom Tom damp. Adjust both bolts of the Tom Tom damp to get an even pressure on the Floor Tom/ Cymbal holder.

When all parts are assembled, the Rack Stand should look like this.

MOUNTING THE CYMBAL HOLDERS:

THIS IS WHAT YOU NEED:  Two Floor Tom/Cymbal holders

Place the Floor Tom/Cymbal holders in the Cymbal/base tubes. Tighten the Floor Tom/Cymbal holders with the bolts on the Cymbal/base tubes.

When all parts are assembled, the Rack Stand should look like this.

MOUNTING THE DDRUM4 PAD SET:

Now, the Rack Stand assembly is complete and you can mount the ddrum4 Pad Set. After you have mounted the Pads, make adjustments to have the pads at a comfortable playing position.
Note! Before attaching the Cymbals, don't forget to fit the supporting spring to the L-rods.

Good luck an enjoy playing your new ddrum4 kit!


S T O R E

1 – 20 von 157 Produkten werden angezeigt

  1. 1
  2. 2
  3. 3
  4. ...
  5. 8